Mountingthetransommountbracket
Thetransducermustbemountedonthetransomusingthemountingbracketprovided.Thesteps
belowdescribetheinitialmountingstepsrequiredinordertotestyourtransducersperformance.
Aftertestingthetransduceryoumustfinishthemountingfollowingtheinstructionsinthe
Finishing
the transducer mounting
section.
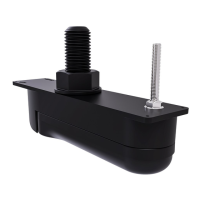
1.Fixthetransducermountingtemplatetotheselectedlocation,usingmaskingorself-adhesive
tape.
1Transducermountingtemplate
2
Waterline
3Mountingawayfrompropeller
2.Ensurethetemplateisparalleltothewaterline.
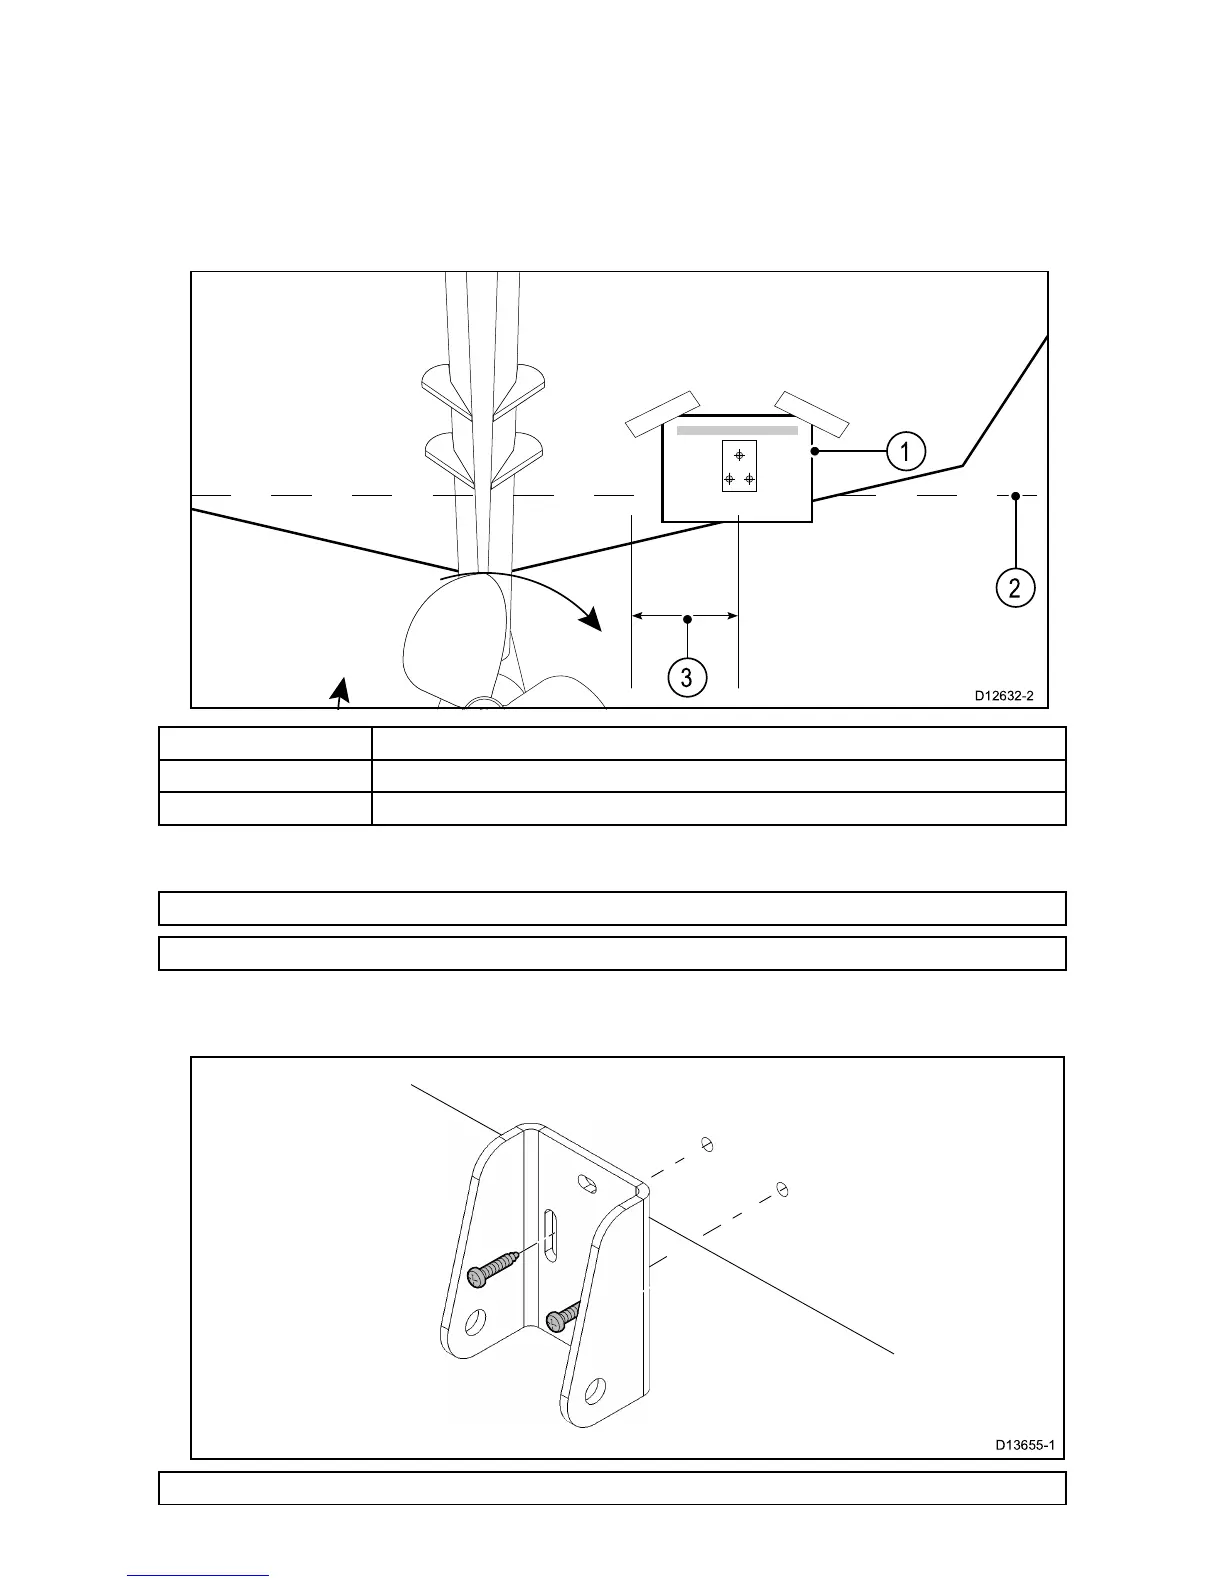
3.Drill2xholesfortheadjustmentslotscrewsasindicatedonthetemplate.
Note:T ohelppreventchippingofthemountingsurface,usepainter’stapetomaskthedrillarea.
Note:DoNOTdrillthethirdmountingholeatthisstage.
4.Fillthe2holeswithmarinegradesealant.
5.Usingapozi-drivescrewdriverandthescrewsprovided,securethetransommountbracket
usingthe2adjustmentslots.
Note:Thethirdlockingscrewisnotuseduntilthetransducerhasbeensuccessfullytested.
9

 Loading...