Chapter 3: Commissioning & setup 37
If the deviation figure exceeds 15° or the display shows no deviation value, the
compass is being affected by ferrous objects on your boat. You should move the
compass to a better location. Higher deviation figures are acceptable on steel boats.
Aligning the compass heading
Once the deviation is displayed, press
disp
to move to the Heading Alignment
(
ALIGN HDG
) page, then:
1. Manually steer the boat on a steady course at a speed sufficient to hold the
course.
2. If you have a GPS connected to your SPX-5 Wheel system:
i. Increase the boat speed to more than 3 knots.
ii. Press
auto
. The SPX-5 Wheel system will then set the heading to agree with
the COG (course over ground) heading received from the GPS.
As many factors can cause a difference between heading and COG you must fine-
tune the heading alignment so it matches the boat’s steering compass (or a known
transit bearing). To do this:
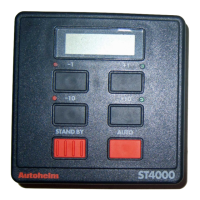
1. Use -
1, +1, -10
and
+10
to adjust the displayed heading until it matches boat’s
steering compass (or a known transit bearing).
2. Hold down
standby
for 2 seconds to exit Seatrial calibration and save the new
compass settings.
D10542-1
Turn boat in slow circles so:
• boat's speed stays below 2 knots
• each circle takes at least 2 minutes
Minimum of
2 circles
Keep turning the boat until
you see the DEVIATION screen
Start
turning boat
Autopilot heading
87074_2.book Page 37 Wednesday, November 21, 2007 3:55 PM

 Loading...


