15
Fig.4.8
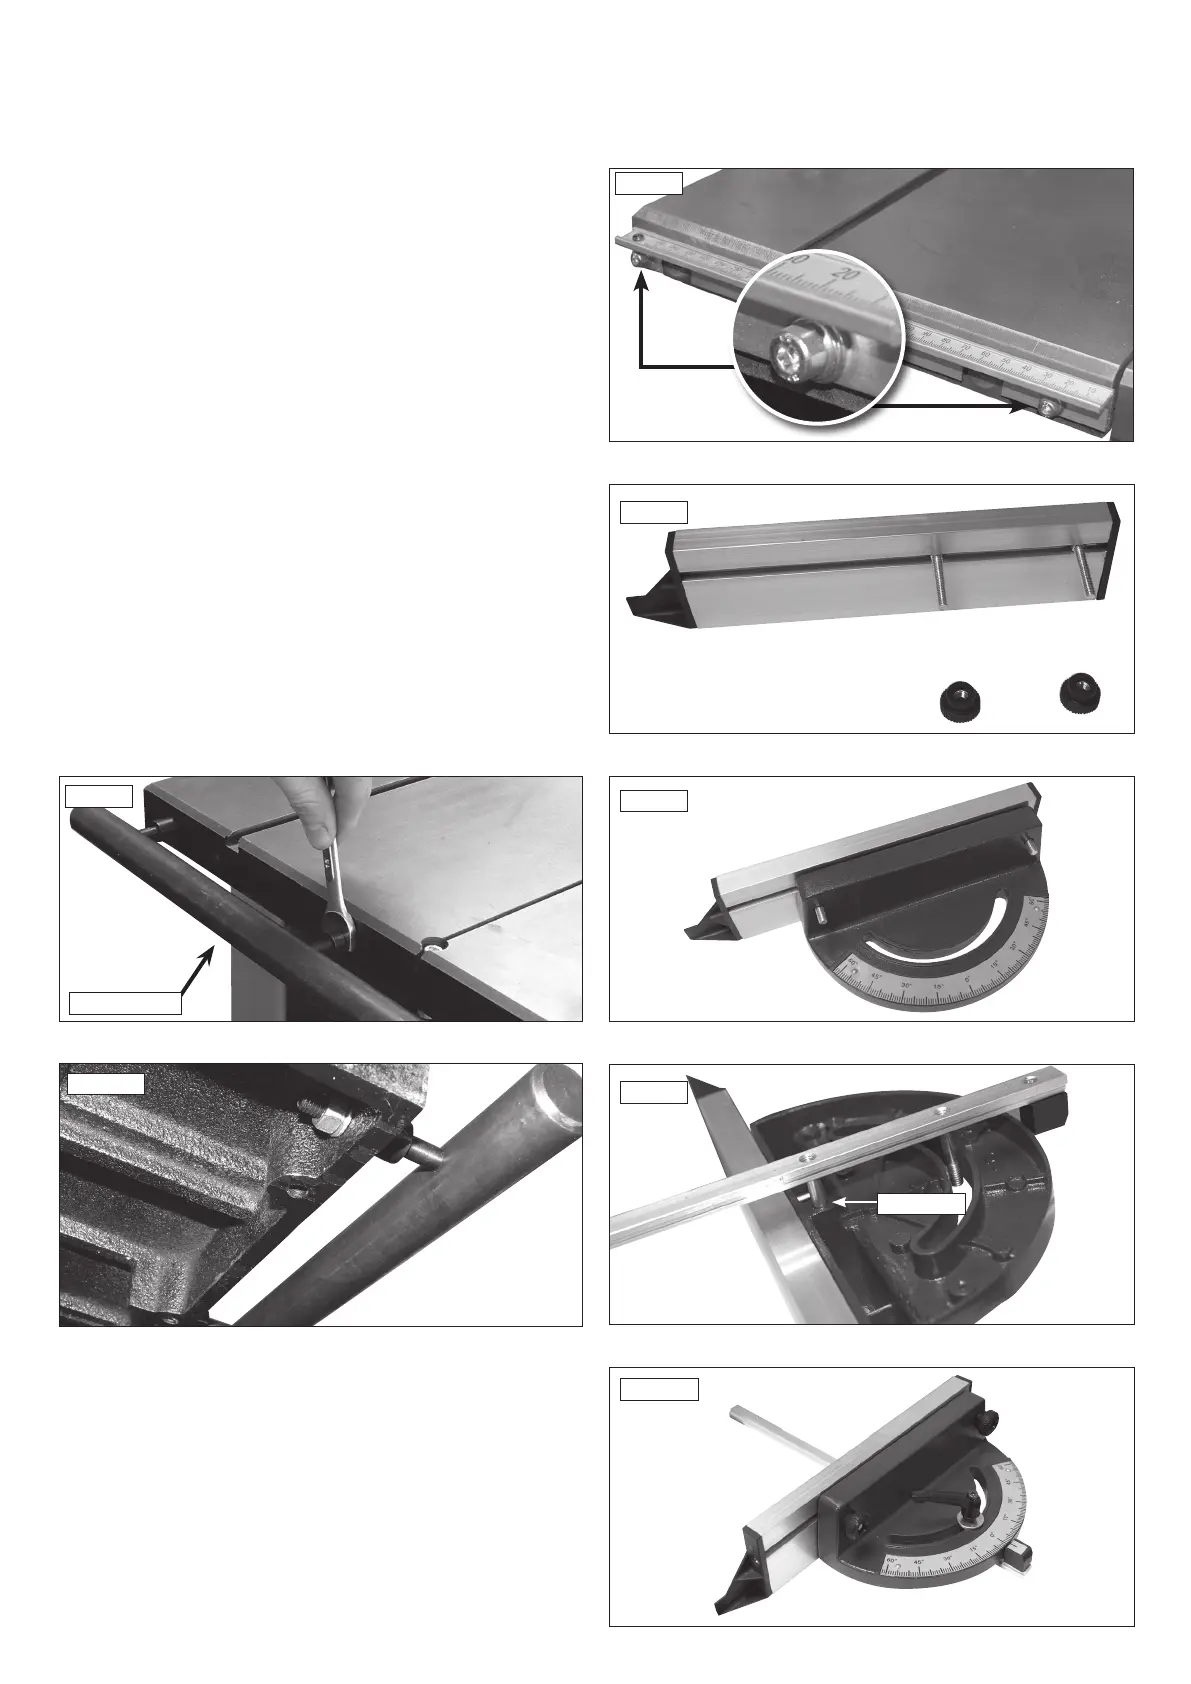
FENCE BAR
4.6 Fitting the Fence Bar
Attach the fence bar to the table as shown in Fig. 4.8, ensuring the
washers are placed next to the fixing nuts. Use the remaining 2 nuts and
washers to secure the fence bar from the underside of the table, Fig. 4.9.
Do not fully tighten yet as adjustment may be necessary.
4.7 Fitting the Scale Bracket
Using a 4 mm hex wrench, attach the scale bracket to the front left-hand
side of the table using the supplied hex head socket screws and washers as
shown in Fig 4.10.
4.8 Assembling the Mitre Fence
1. Unscrew the locking nuts from the mitre fence, Fig. 4.11.
2. Pass the fence bolts through the holes in the gauge as shown
in Fig. 4.12 and re-attach the locking nuts to secure the fence in place.
3. Remove the ratchet handle and washer from the slide and pass the
threaded pin through the gauge and the unthreaded pin into the pivot hole
as shown in Fig 4.13.
4. Re-attach the washer and ratchet handle to the threaded bar of the slide
as shown in Fig. 4.14.
4. Machine Assembly
Fig.4.11
Fig.4.12
Fig.4.14
Fig.4.9
Fig.4.10
Fig.4.13
Pivot hole