Page 34 13900-103 Rev. A
Repair 1
Nosepiece Cover Replacement
The steps below provide the information for changing the
Nosepiece Cover.
1. Disengage the connection to the Touch Plate and then
remove the Touch Plate from the unit.
Note: Do not loose the insulation bushings which are
installed between the Touch Plate and the Spring
Tubes
2. Press the top and bottom of the Nosepiece Cover
together until the locking tabs release from the Rear
Mask. Refer to Figure R1-1 for an illustration of the
location of the Rear Mask.
3. Install the new Nosepiece Cover onto the Rear Mask
from which the old one was removed.
Note: Make sure that the Nosepiece Cover is installed
flat against the Rear Mask or it may apply
pressure to the tip of the airtube and cause
misalignment of the air delivery system causing
asterisk readings or no applination to be dis-
played on the LCD.
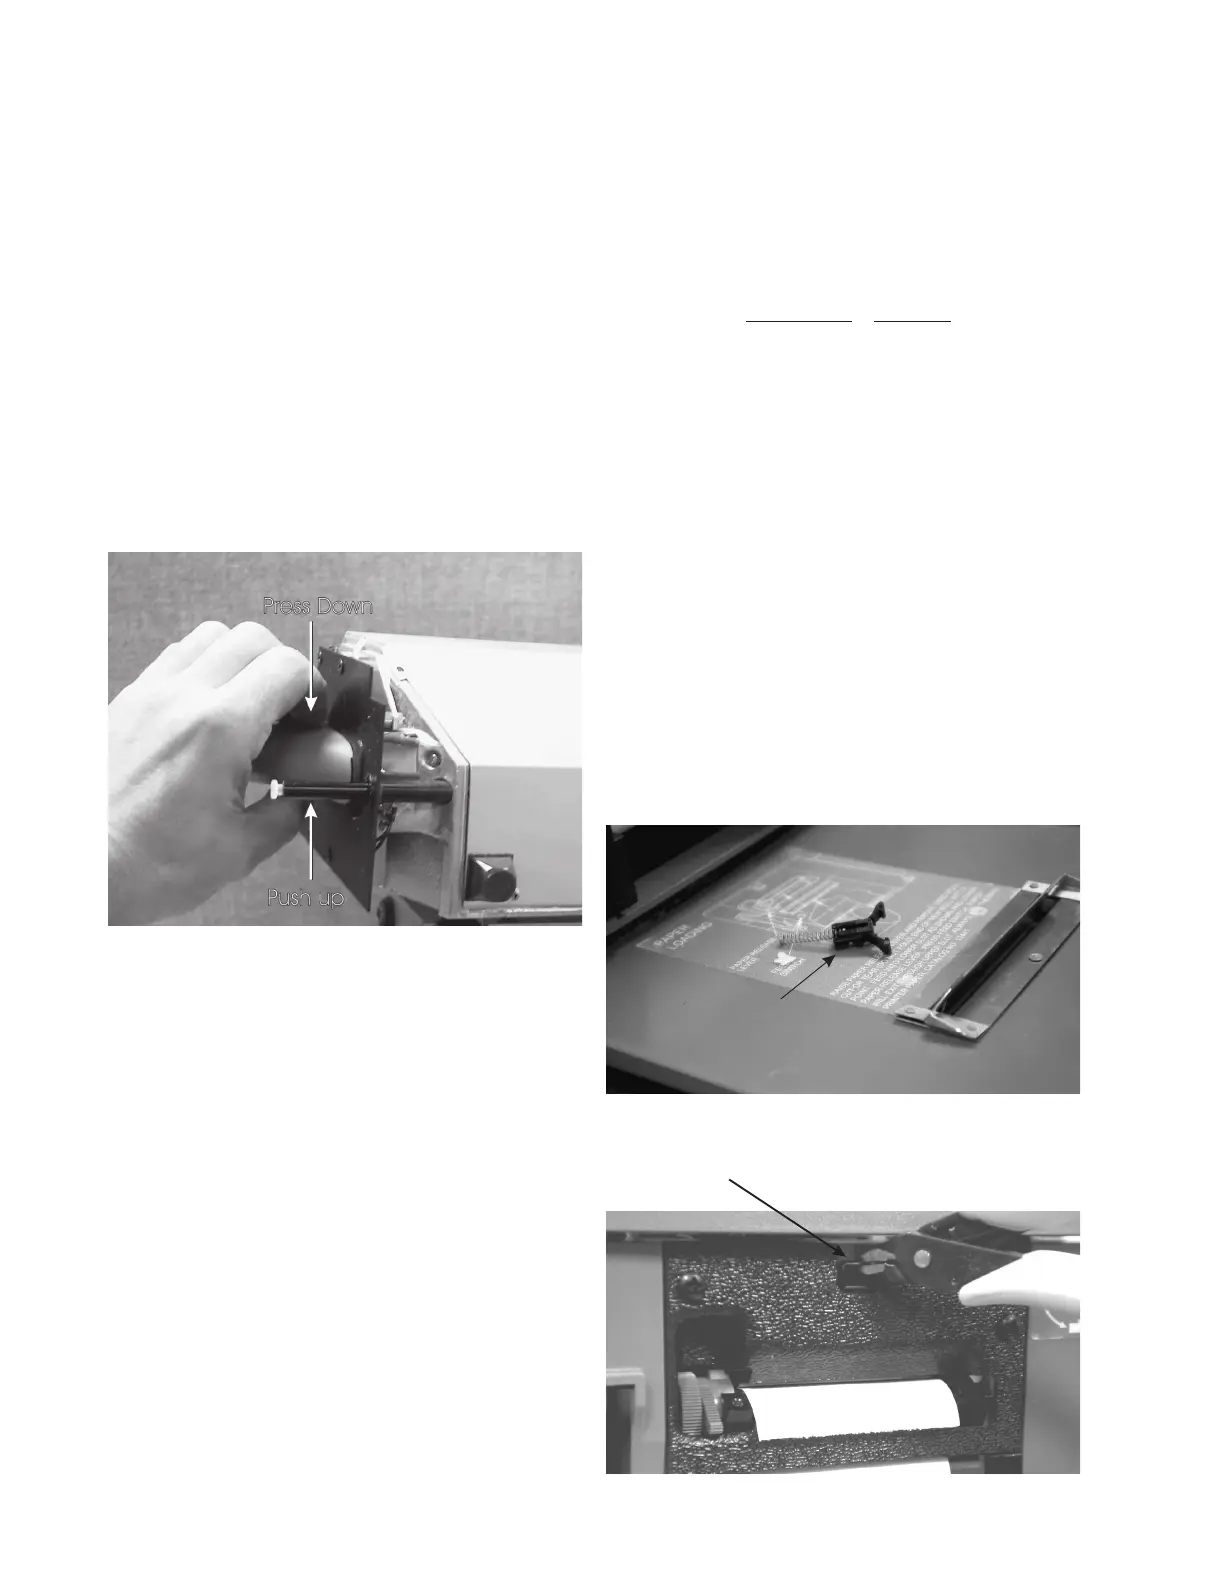
Repair 2
Printer Door Latch Replacement
This section details the steps necessary to replace a
broken printer door latch.
Note: For this repair it is not necessary to perform the
steps in Disassembly or Assembly.
1. Open the printer door and pull the latch finger
assembly completely out of the Latch (Fig.3,11) using a
pair of pliers. Refer to Figure R3-1.
2. Put a cut in the middle of the top and bottom sides of
the exposed part of the empty latch. Refer to Figure
R3-2.
3. Using a needle nose plier, hold one side of the
exposed part of the latch and push it toward the
center and at the same time pull it out so that it
releases on one side.
4. Repeat the above step for the other side of the empty
latch. When the side releases, the latch should pull
completely out of the unit.
5. Install a new Latch by carefully pushing it into the
hole.
6. Take a small file and remove the sharp edge on the
inside corner of the latch head (between the door and
the end of the latch head) that mates with the new
latch just installed.
Figure R2-1, Latch Fingers
Latch Finger
Assembly
Cut Sides
Figure R2-2, Latch Removal
Figure R1-1. Nosepiece Cover Removal
 Loading...