13900-103 Rev. A Page 35
Repair 3
Printer Replacement
This section details the steps necessary to replace a
defective printer. It is not necessary to perform the steps
in the
Dissassembly section of this manual to perform this
repair sequence.
CAUTION: THE INTERNAL CIRCUITS OF THIS INSTRUMENT
HAVE ELECTROSTATIC DISCHARGE SENSITIVE
DEVICES (ESDS) AND ARE SENSITIVE TO STATIC
HIGH VOLTAGES STORED IN AND TRANSFERRED
BY THE HUMAN BODY. OBSERVE CORRECT ESDS
PRECAUTIONS OR PREMATURE MALFUNCTION
OF THIS INSTRUMENT WILL OCCUR.
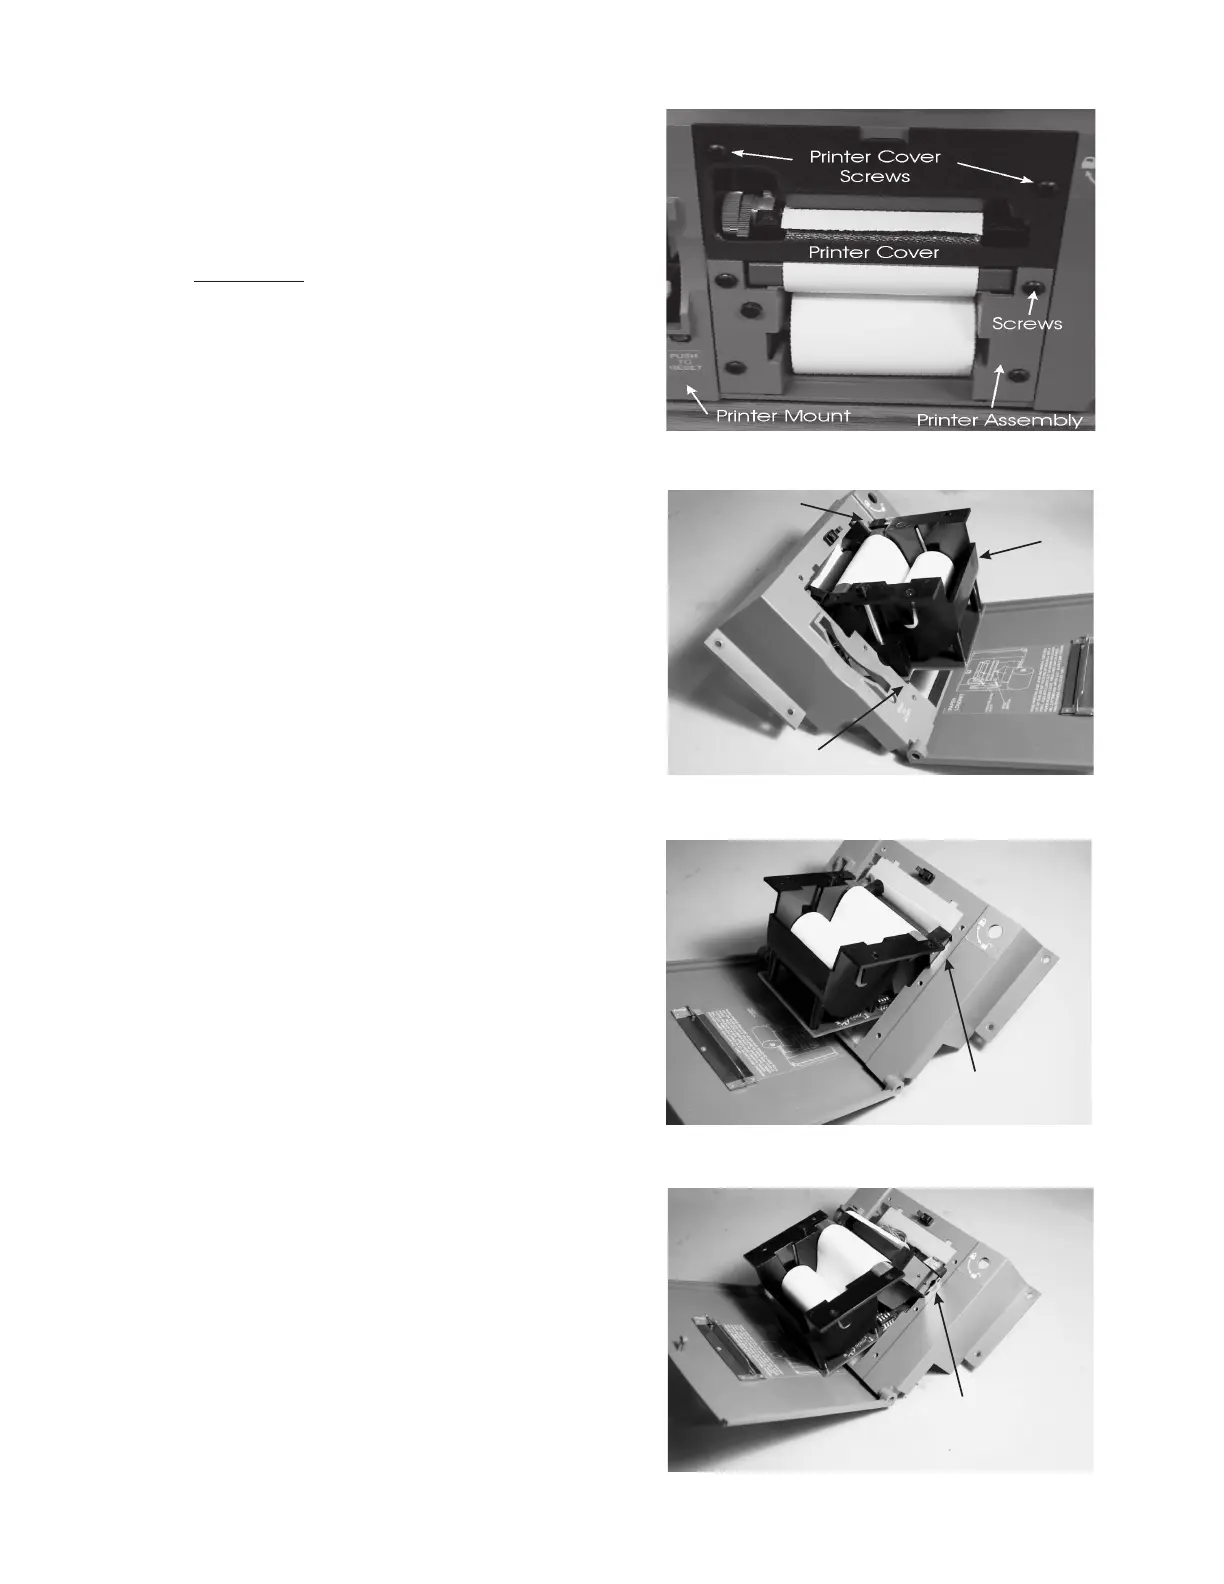
1. Open the printer door and remove the Printer Cover
Screws which secure the Printer Cover to the Printer
Assembly.
2. Remove the four screws which secure the Printer
Assembly to the Printer Mount.
3. Remove the four screws which secure the Printer
Mount to the Bracket Assembly.
4. Detach the two harnesses from the Printer Assembly.
5. Remove the Printer Assembly from the Printer Mount.
Note: It is difficult to remove the Printer Assembly from
the Printer Mount. Refer to Figures R3-2 through
R3-4 for illustrations of the Printer Assembly
removal.
6. Install the new printer into the Printer Mount in the
reverse order that it was removed.
7. Attach the two printer harnesses to the printer.
CAUTION: DO NOT OVER TIGHTEN THE SCREWS TO THE
PRINTER MOUNT AS VERY LITTLE TORQUE IS
REQUIRED (4.0 - 6.0 IN·LBS).
8. Secure the Printer Assembly to the Printer Mount
using the four screws.
9. Set the Printer Mount against the Bracket Assembly
and align the PC Card Slot into the groove at the rear
of the Printer Mount. Secure the Printer Mount to the
Bracket Assembly using the four screws.
CAUTION: DO NOT OVER TIGHTEN THE SCREWS WHICH
SECURE THE PRINTER COVER TO THE PRINTER
MOUNT AS VERY LITTLE TORQUE IS REQUIRED
(4.0 - 6.0 IN·LBS).
10. Secure the Printer Cover to the Printer Mount using
the two screws.
11. Align the paper through the paper slot and close the
printer door.
Lower Edge
Above Notch
Upper Edge
Over Hole
Printer
Mount
Printer
Assembly
Figure R3-1, Printer Parts ID
Slide Through
Indent
Slide Through
Indent
Figure R3-2, Printer Removal Step 1
Figure R3-3, Printer Removal Step 2
Figure R3-4, Printer Removal Step 3
 Loading...