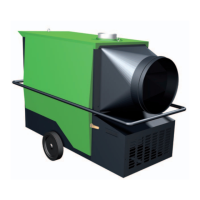
27
The initial commissioning may only be carried out
by a contract installation company or the factory
customer service department.
Carry out the following steps prior to the initial
commissioning:
1. Inspect all connections and screw connections
of the unit and the gas connections for leakage
integrity.
2. Check all electrical screw and plug connections
within reach.
3. Check the electrical connection for polarity and
the power supply (230V/50Hz).
4. Check whether the unit is properly connected
to aneffective grounding system that corresponds
to the applicable safety standards.
Only then is the electrical safety and function
of the unit guaranteed.
The units are delivered pre-set in the factory
according to the desired type of gas.
It must be ensured that a gas supply pressure
that conforms to standards is continuously present
in accordance with the locally available gas type.
The gas of the network must be consistent with
the gas category to which the unit is adjusted.
For commissioning of the burner, proceed as follows:
Commissioning
1. Loosen the lock screw in the pressure tap of
the burner.
Do not unscrew completely!
2. Connect a suitable pressure measurement device,
e.g. U-pipe pressure gauge, min. resolution 0.1
mbar.
3. Open the gas shut-off devices.
4. Switch on the main/emergency switch.
5. Set the mode selector switch on the front side
of unit to the “winter” setting.
6. Switch on the room thermostat or press the remote
control switch.
7. Set the heat requirement temperature higher than
the temperature measured by the room thermostat
or the temperature controller (omitted with KF-30).
If the conditions are fulfilled and the unit is not
blocked, pre-ventilation of the combustion chamber
starts, followed by ignition of the burner. The cooling
fan subsequently starts.
It is possible that the ignition burner does not ignite
with the initial commissioning, because there is still air
in the gas line, whereby the unit triggers a malfunction.
The unit must be unlocked and the starting procedure
repeated.
Combustion analysis
Start the unit and make sure that the pressure
at the valve intake corresponds with the prescribed
value. Otherwise adjust.
After approx. two minutes connect a flue gas
analytical device to the flue gas pipe and read
the CO
2
value.
Compare this value to the information in the table
"Gas settings" for the type of gas in use.
s
s
s
CAUTION
Adjustment and maintenance work on the
unit and gas burner may only be carried out
by authorised and qualified technicians!
CAUTION
Gas lines must never be used for the grounding
of electrical equipment!
CAUTION
A functional inspection of the entire unit
including leak testing of all gas-conveying
connections must be conducted.
 Loading...