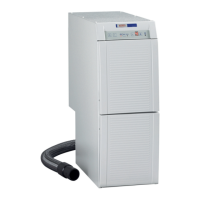
- 11 -
6.2 Changing the dust bag
Thedustextractormayonlybeoperatedwithacompleteltrationsystem.Thedustbagmustbeimmedi-
atelyreplacedwithanewoneassoonasthe“ChangeFilter”indicatorgoeson.
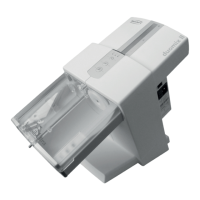
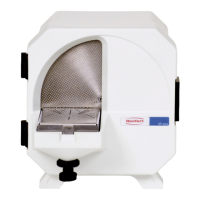
• Pull the front panel forward and off (Fig� 8)�
• Pull the dust drawer out towards the front (Fig� 9)�
• Leave the dust bag in the dust drawer and take it to the disposal location�
• Remove the dust bag from the drawer�
• Pullofftheprotectivelm,sealthelteropeningdust-tight(Fig.10).
• Dispose the dust bag accordingly�
Always comply with all local ordinances governing proper disposal and accident prevention!
Dependingontheltercontents,protectiveclothingmayberequired.
• Insert the new dust bag into the dust drawer, being careful to ensure that the dust bag is properly alig-
ned in the guide grooves and the glue lap faces up (Fig� 11)�
• Inspect the dust drawer seal for damage and replace it, as required (Fig� 12a, b)�
• Insert the dust drawer, making sure it is straight, and push it fully against its stops� Make sure the dust
drawer is seated correctly on the guide (Fig� 13)�
• Installthefrontpanelonthebottomhooksrst(Fig.14),thenpushitintotheupperlockbolts,pressing
rmlyuntilitlocksinplace(Fig.15).
6.3 Filters
NEVERoperatethedustextractorwithoutthecompleteltrationsystem.
6.3.1 Replacingthenelter
Examinetheneparticlelterregularly,butatleastannually,andreplaceit.Itmustalwaysbereplacedif
the“ChangeFilter”indicator(K)continuestogoon,despitethedustbaghavingbeenreplaced.
Thereisariskofincreasedexposuretodustwhenreplacingthenelter.
That's why the following measures must be taken:
• Keeptheplasticbagreadythatcontainsthenewlter.
• Keep an additional dust extraction device or suction tube from another workbench extraction unit ready�
• Wear at least an FFP2 mask for respiratory protection�
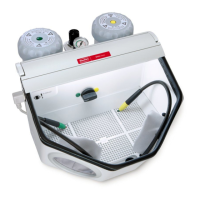
• Pull the front panel forward and off (Fig� 16)�
• Turntheneparticlelteranticlockwisetoreleaseit(Fig.17).
• Pulltheneparticlelterstraightforwardsandoutoftheunit(Fig.18).
• Placetheneltersimmediatelyintheplasticbagandsealthebagtightlytopreventdustescaping.
• Ensure proper disposal�
Always comply with all local ordinances governing proper disposal and accident prevention!
Dependingontheltercontents,protectiveclothingmayberequired.
• Insertthenewnelterandpushitinfullyviatheretainingbracket(Fig.19).
• Turntheneparticlelterclockwiseandhand-tightenitinplace(Fig.17).
• Inspect the seal on the front panel for damage and replace it, as required (Fig� 20)�
• Snap the front panel in place (Fig� 21, 22)�
• Use the additional dust extraction device to suction up dust that has been released�
6.3.2 Replacing the Exhaust Filter
Theexhaustlterprimarilytrapsparticlesrubbedoffthesuctionturbinegraphitebrushes.Thelter
should be replaced annually:
• Pressonthefourlocktabsontheltercassetteandpullthecassettedownandofftheunit(Fig.23).
• Properlydisposeofthelterandtheltercassette.
Always comply with all local ordinances governing proper disposal and accident prevention!
Dependingontheltercontents,protectiveclothingmayberequired.
• Insertanewltermatintheltercassettesothatthesmooth,compressedsideoftheltermatfaces
downoroutwardswhenthelterisinstalled.
• Installthenewltercassetteontheexhaustairvent.
• Makesuretheltercassetteisproperlyseatedandlockedinplaceonallfourtabs.
en
 Loading...