- 12 -
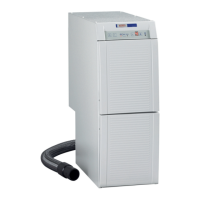
6.3.3 Replacing the Electronics Filter
Coolingairfortheunit’selectronicspassesthroughtheelectronicslter.Thetypeofmaterialtrappedby
thelterandthedegreeofcontaminationdependontheambientlaboratoryconditions.
Theltershouldbeexaminedannuallyandreplaced,asnecessary:
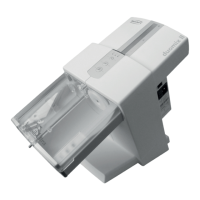
• Pressonthetwolocktabsontheltercassetteandpullthecassetteofftowardstherearoftheunit
(Fig� 24)�
• Properlydisposeofthelterandtheltercassette.
Always comply with all local ordinances governing proper disposal and accident prevention!
Dependingontheltercontents,protectiveclothingmayberequired.
• Installanewltercassetteandlterontheopening.
• Makesuretheltercassetteisproperlyseatedandlockedinplaceonbothtabs.
6.4 Fuses
Instead, two device overload switches, (L, Fig� 4) are provided to protect these units�
Press the button to reset a switch which has tripped�
6.5 Self-diagnosis
The dust extractor is equipped with a self-diagnosis, which checks various functions and displays errors
on the display (G)�
Beforethediagnosistakesplace,insertanewdustbagandensurethatthenelteriscleanand
the suction pipe is not blocked.
Activate the self-diagnosis:
• Switch Silent TS off;
• Press and hold the operating mode selector switch (D) and switch Silent TS on (Fig� 7a)�
• For approx� 3 sec�:
- all LED displays are illuminated,
- An„8“isindicatedinthedisplay
- The signalling device gives an acoustic signal�
• A“d”appearsonthedisplayduringtheunit’sself-test(Fig.7b).Duringthistime,theunit’selectronics
checkvariousinternalelementsandfunctions.ThesuctionturbineswillbrieyrunatLevel1duringthis
test phase�
• If no errors are detected, the Silent TS automatically goes into the previously selected operating mode
at the end of the self-test (after approx� 10 sec�)�
• Ifanerrorisdetectedduringtheself-test,aashing“E”willappearonthedisplay,togetherwithanum-
ber (1 to 3)�
• These indicate:
- E1:Airowsensorfault;havetheunitrepaired.
- E2: Plug on grey motor wire out of its socket (Fig� 26) or suction turbine fault� Replace suction turbine if
necessary (refer to the spare parts list)�
- E3: Error in the electronics; have the unit repaired�
• In this case, the Silent TS remains in the self-diagnosis mode until it is switched off at the OFF
switch (A)�
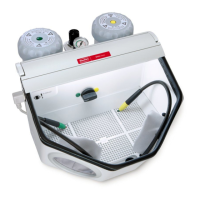
6.6 Replace the suction turbine
The suction turbine is encased in an encapsulating housing to form a single unit, thus allowing it to be
easily replaced without the need for any tools�
Before opening the unit, disconnect it from the mains power supply by unplugging the power cord
from the wall outlet.
The motor may be hot. Allow the motor to cool off before proceeding.
The suction turbine may only be operated when it is installed in the unit. Only an authorized elec-
trician may perform a functional inspection of or repair the unit.
Please observe the documents included with the spare part!
• Turn the lock knob 90° anticlockwise (Fig� 25)�
• Remove the motor compartment cover�
• Openthexingclipandremovethemotorplug(Fig.26).
• Loosen the two internal, grey knurled nuts (Fig� 27) and unscrew them approx� 1 cm� These knurled
nuts do not need to be completely removed�
• Release the suction turbine by turning it anticlockwise, then pull it straight out towards the back (Fig� 28)�
en
 Loading...