XCell® ATF 2 and 4 Stainless Steel Housings
SG-SSATF24 rev 1
6.4.2 Tubing set kit for XCell® ATF 2 Stainless Steel Housing connected to glass bioreactor
Assembly of the housing, tubing set, and accessories is completed prior to autoclaving.
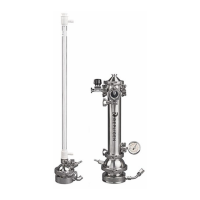
Figure 5. XCell® ATF 2 Stainless Steel Housing connection to glass bioreactor (tri-clamp)
A. TC-DIP-LAB-.25/.5-250 or
TC-DIP-.25/.5-250 (Dip tube)
B. ATF2-A2B-TC (A2B)
C. SSATF2-TSK
C1. Top permeate
C2. Bottom permeate
C3. Drain
Connection instructions (Figure 5):
1. Ensure dip tube (A) is attached to head plate of bioreactor.
2. Attach A2B tubing (B) to XCell® ATF 2 and bioreactor head plate.
3. Attach top permeate (C1) to hose barb.
4. Attach bottom permeate (C2) to hose barb.
5. Attach drain (C3) to hose barb. Autoclave.
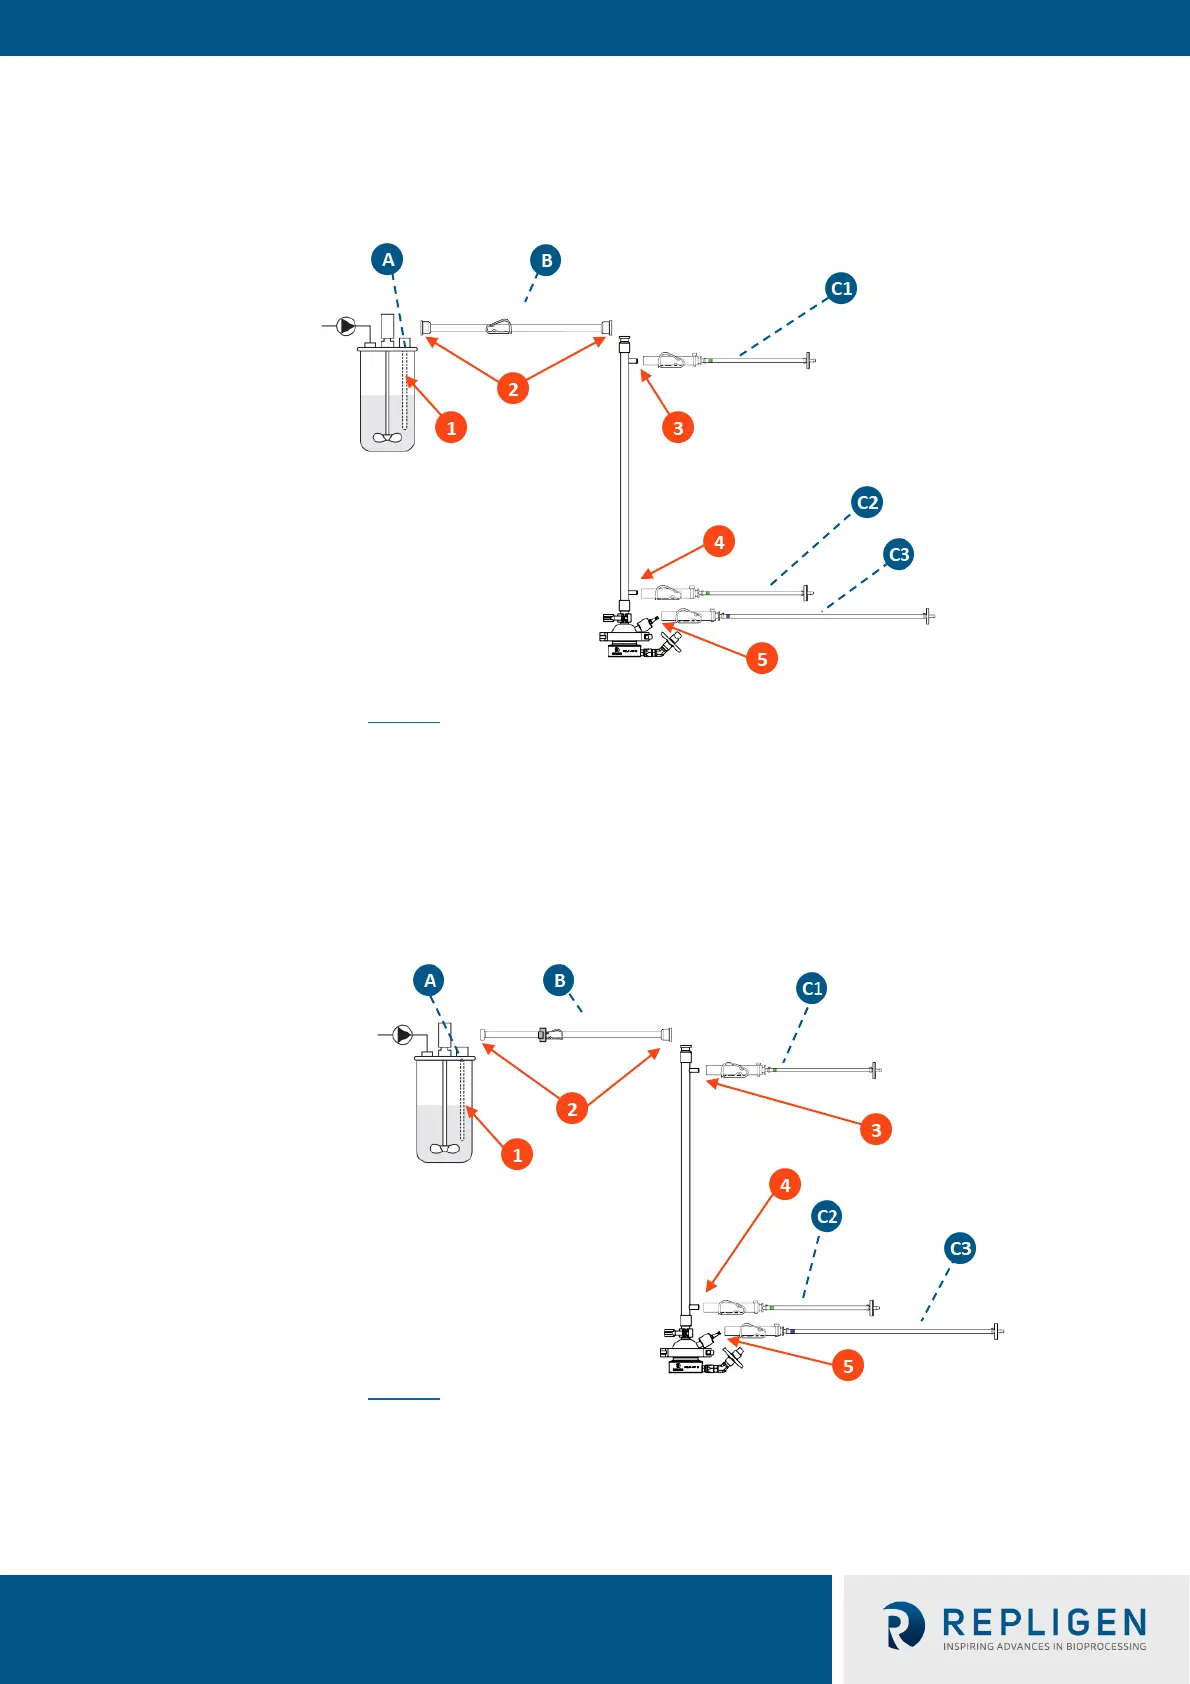
Figure 6. XCell® ATF 2 Stainless Steel Housing connection to glass bioreactor
(AseptiQuik®/ReadyMate™)
A. TC-DIP-LAB-.25/.5-250 or
TC-DIP-.25/.5-250 (Dip tube)
B. ATF2-A2B-RMTC or
ATF2-A2B-TCAQ or
ATF2-A2B-AQ
(A2B)
C. SSATF2-TSK
C1. Top permeate
C2. Bottom permeate
C3. Drain
Connection instructions (Figure 6):
1. Ensure dip tube (A) is attached to head plate of bioreactor.
2. Attach A2B tubing (B) to XCell® ATF 2 and bioreactor head plate.
Note: Bioreactor adapter tubing not provided.
3. Attach top permeate (C1) to hose barb.