17
4. Once the desired miter angle is
achieved, press down on the quick-
cam locking lever (1) to secure the
table into position.
5. If the desired miter angle is NOT
one of the nine positive stops noted
above, simply lock the table at the
desired angle by pressing down on
the quick-cam locking lever (1).
6. Turn the laser guide on and position
the workpiece on the table for pre-
alignment of your cut.
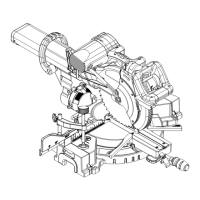
BEVEL CUT (FIG. 30)
1. When a bevel cut is required,
loosen the bevel lock knob (1) by
turning it clockwise.
2. Tilt the cutting head to the desired
angle, as shown on the bevel
scale (2).
3. The blade can be positioned at
any angle, from a 90° straight cut
(0° on the scale) to a 45°. Tighten
the bevel lock knob (1) to lock the
cutting head in position. Positive
stops are provided at 0° and 45°.
4. Turn the laser guide on and position
the workpiece on the table for pre-
alignment of your cut.
WARNING! The sliding fence must
be extended when making any bevel
cut. Failure to extend the sliding
fence will not allow enough space
for the blade to pass through which
could result in serious injury. At
extreme miter or bevel angles the
saw blade may also contact the
fence.
COMPOUND CUT (FIG. 30, 31)
A compound cut is the combination of
a miter and a bevel cut simultaneously.
1. Extending the fence by sliding it out
to the required location or remove
the left sliding fence if necessary.
See “SLIDING FENCE.”
2. Set the desired bevel angle using
the bevel lock knob (1). (Fig. 30)
3. Set the desired miter angle and lock
into position. See “MITER CUT.”
BASE MOLDING CUT (FIG. 32)
Base moldings and many other
moldings can be cut on a compound
miter saw. The setup of the saw
depends on molding characteristics
and application, as shown. Perform
practice cuts on scrap material to
achieve best results:
1. Always make sure moldings rest
rmly against fence and table. Use
hold-down clamp, crown molding
vise or C-clamps, whenever
possible, and place tape on the
area being clamped to avoid marks.
2. Reduce splintering by taping the cut
area prior to making the cut. Mark
the cut line directly on the tape.
3. Splintering typically happens due to
an incorrect blade application and
thinness of the material.
NOTE: Always perform a dry
run cut so you can determine if
the operation being attempted is
possible before power is applied to
the saw.
 Loading...