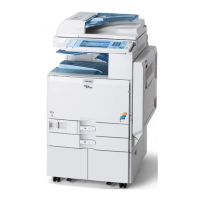
Do you have a question about the Ricoh MP 4002 and is the answer not in the manual?
Guides on inserting originals into the document feeder for copying.
Navigating to the copier function on the device's home screen.
Steps to adjust paper guides and select additional copy settings for the job.
Instructions for preparing and inserting originals for batch copying jobs.
Steps to select batch mode, enter settings, and start the copying process.
Navigating the interface to select finishing options and desired sort methods.
Explains the different output modes for collating copies.
How to choose the desired staple position for copied sets.
Steps to find and select from various staple positions via the finishing menu.
Choosing the desired hole punch position from the available options.
How to view all hole punch positions if not initially displayed.
Choosing duplex mode and original/output sidedness.
How to select the correct paper orientation for duplex copying.
Setting to combine multiple pages onto a single output page.
Using the Series function for specific document output formats.
Utilizing the Book function for magazine-style output, including stapling.
Setting original and output sidedness and number of pages per sheet.
Finalizing settings and placing originals for the combine pages function.
Placing open books or magazines face down on the platen glass.
Copying book/magazine pages using the Series function for output.
Choosing from standard percentage options for resizing documents.
Entering custom percentages for resizing documents from 25% to 400%.
Adjusting horizontal and vertical percentages independently for non-proportional scaling.
Calculating percentage based on input original and copy sizes for proportional scaling.
Entering inch measurements for horizontal/vertical scaling for non-proportional results.
Reducing image to 93% and centering it to create copy edges.
Optionally adjusting the reproduction ratio if needed for the margin.
Navigating to image editing functions like erasing margins.
Options to erase the center, edges, or both of an image.
Accessing the stamping options and selecting page numbering.
Setting the numbering format, position, and range for page numbers.
Navigating to image editing functions to apply double copies.
Selecting the double copies option and output paper size.
Navigating to image editing functions.
Centering a smaller image on the output page and selecting paper size.
Setting up paper type and thickness for cover stock in User Tools.
Choosing cover sheets during the copy process.
Accessing options to designate specific pages or sheets.
Defining whether designated sheets are copied or left blank.
Setting up copy job and selecting Sample Copy before full output.
Options to continue, suspend, or cancel after a sample copy is produced.
Setting the paper size for the bypass tray.
Specifying the paper type loaded in the bypass tray.
Setting up a subsequent job while a current one is still running.
Placing originals and starting the pre-configured next job.
Selecting the Simple Screen button to display basic functions.
Overview of different display layouts available on the screen.
| Resolution | 600 x 600 dpi |
|---|---|
| Duplex Printing | Yes |
| First Print Speed | 4.1 seconds |
| Multiple Copies | Up to 999 copies |
| Max Paper Size | A3 |
| Fax Resolution | 200 x 200 dpi |
| Print Speed | 40 ppm |
| Connectivity | USB 2.0, Ethernet |
| Functions | Print, Copy, Scan |
| Original Size | A3 |
| Zoom | 25% to 400% |
| Scanning Speed | 50 images per minute |
| Scan Resolution | Up to 600 dpi |
| Copy Speed | 40 cpm |
| Operating System Compatibility | Windows, Mac, Linux |
| Power Consumption | 1.5 kW |