"
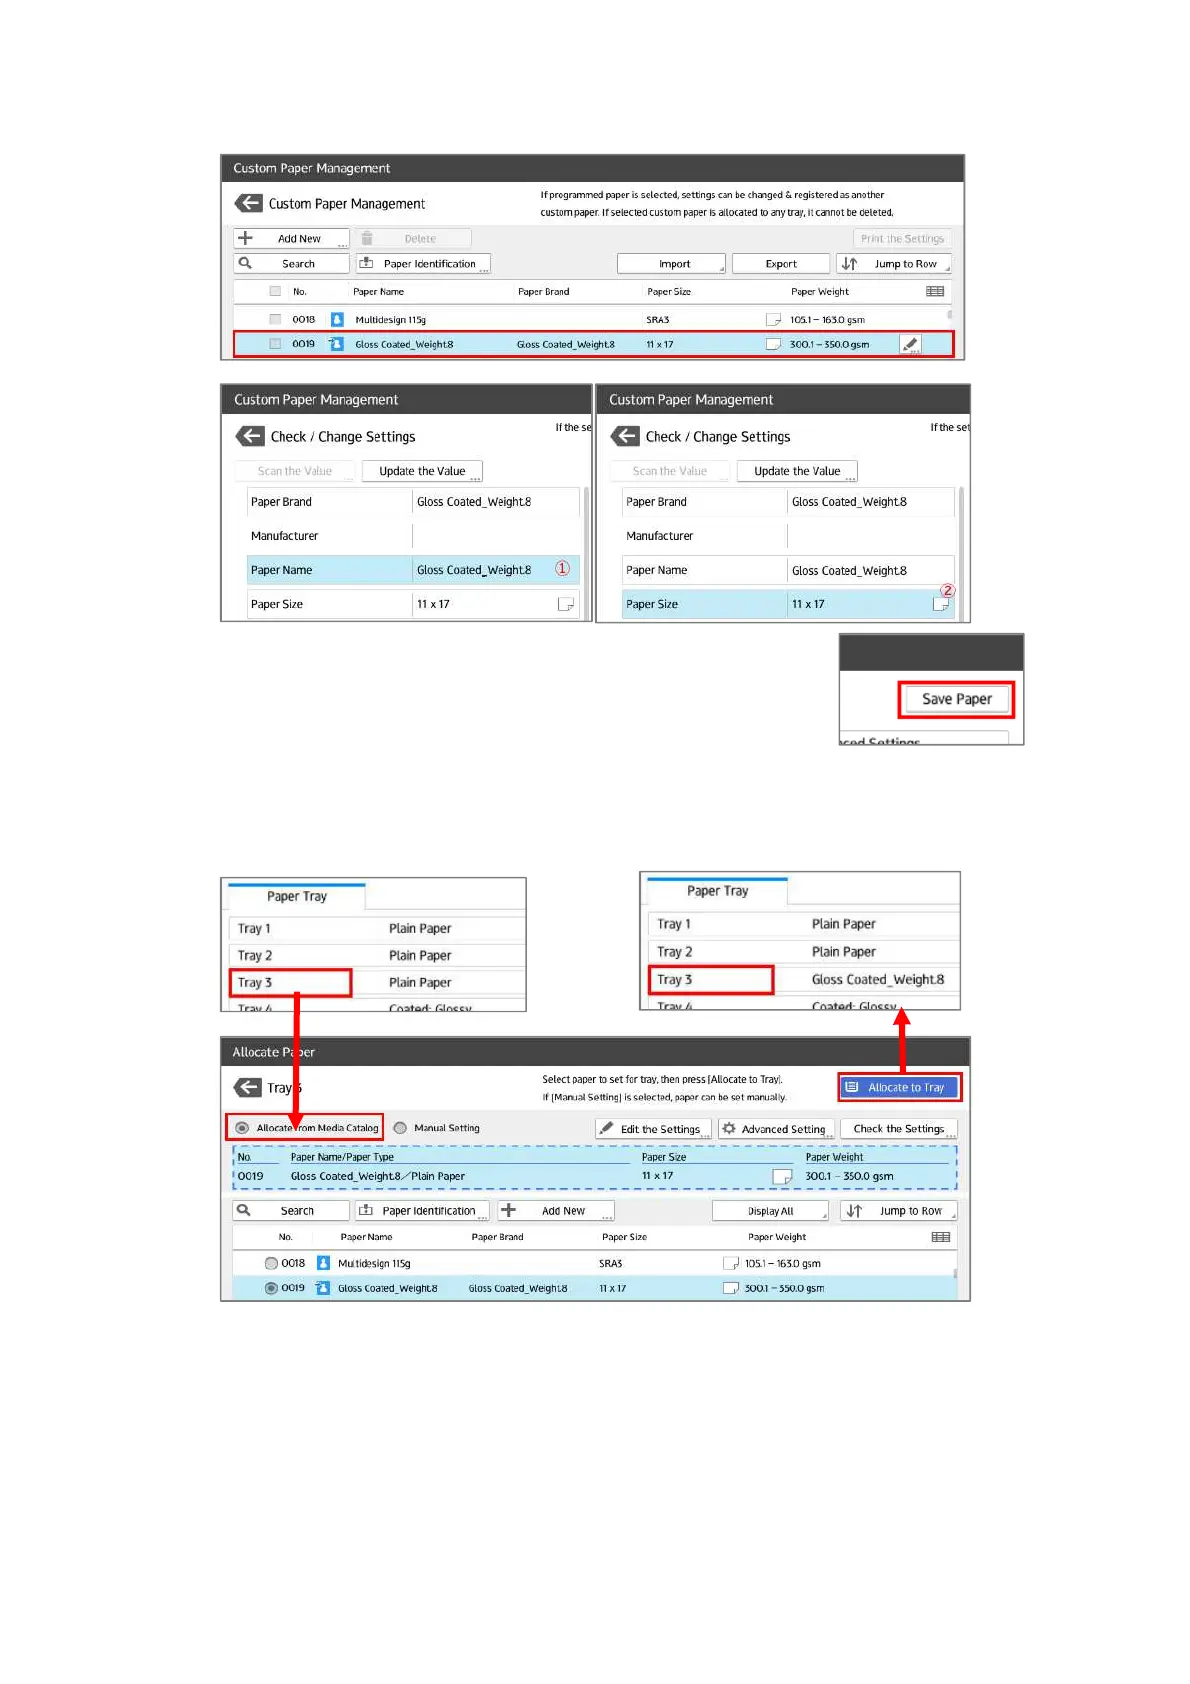
Size] as needed.
(4) After changing the settings, press [Save Paper] and press
[Overwrite] button on the screen to confirm it.
(5) Go back to the [Tray Paper Settings] screen, select the tray where paper is fed. On the
[Allocate Paper] screen, select [Allocate from Media Catalog] and select the custom paper
created before and press [Allocate to Tray] button.
Caution: When printing on both sides of a paper with different front and back characteristics, cancel the
auto duplex function and print each side of paper. Before printing, specify print conditions accord-
ing to the condition of each side. There might be the case that print quality may not be satisfactory
when print conditions are not specified properly or when printing on the non-print side of the paper.
This also may cause dirt inside of the machine and other troubles.

 Loading...