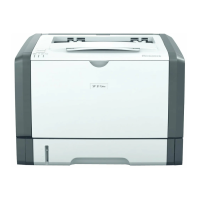
RICOH SP 311DNw B&W Network Laser Printer
Getting Started Guide
19
STEP 4
Print Test Page
This final step is to confirm that your computer and printer are communicating. Do so
by printing a test page through Windows and/or Smart Organizing Monitor.
Note:
• If a wired (Ethernet) or wireless connection was made, the test page will include the printer’s
IP address, e.g., 192.168.1.12.
b. Click [Devices and Printers].
c. Right-click [RICOH SP 311DNw PCL 6].
d. Select [Printer properties].
e. Click [Print Test Page].
f. Click [Close].
g. Click [X] to close open windows.
Note:
• If printer is on a wired or wireless network,
the Test Page will include the IP address
under [Port name(s)].
b. Select [Smart Organizing Monitor Status].
c. Click [User Tools] tab.
d. Select [Test Page] from [List/Test Print] menu.
e. Click [Print].
f. Click [Close].
Important:
• To print the Test Page from the printer control
panel, press and hold the [Job Reset] key, while
turning the printer On. Continue to hold [Job
Reset] for 6 seconds, and then release. Test
Page prints.
 Loading...