INSTALLATION
15
9
Use copper pipes for cooling systems.
9
Use connecting pipes and tools appropriate for the system's
refrigerant.
0
It is forbidden to use second-hand cooling lines since their
flare connection seal is not guaranteed.
0
It is forbidden to use pre-charged cooling lines.
0
It is forbidden to carry out welding operations with refrig-
erant inside the cooling circuit. If necessary, the refrigerant
must be recovered and the circuit must be cleaned with ni-
trogen without oxygen.
Connections
— position the connecting pipes
OK
OK
OK
9
Plug the pipe ends in order to prevent water or debris from
flowing in.
9
Before threading the lines through the hole in the wall,
close the lines ends.
— cut the pipe end square using a pipe cutter
— remove burrs keeping the cut edge facing down
— remove the flare nut on the unit connection
— insert it into the connection pipe
— flare the tube
A
Pipe Ø A
mm inches mm
6,35 1/4 9,1
9,52 3/8 13,2
12,70 1/2 16,6
15,88 5/8 19,7
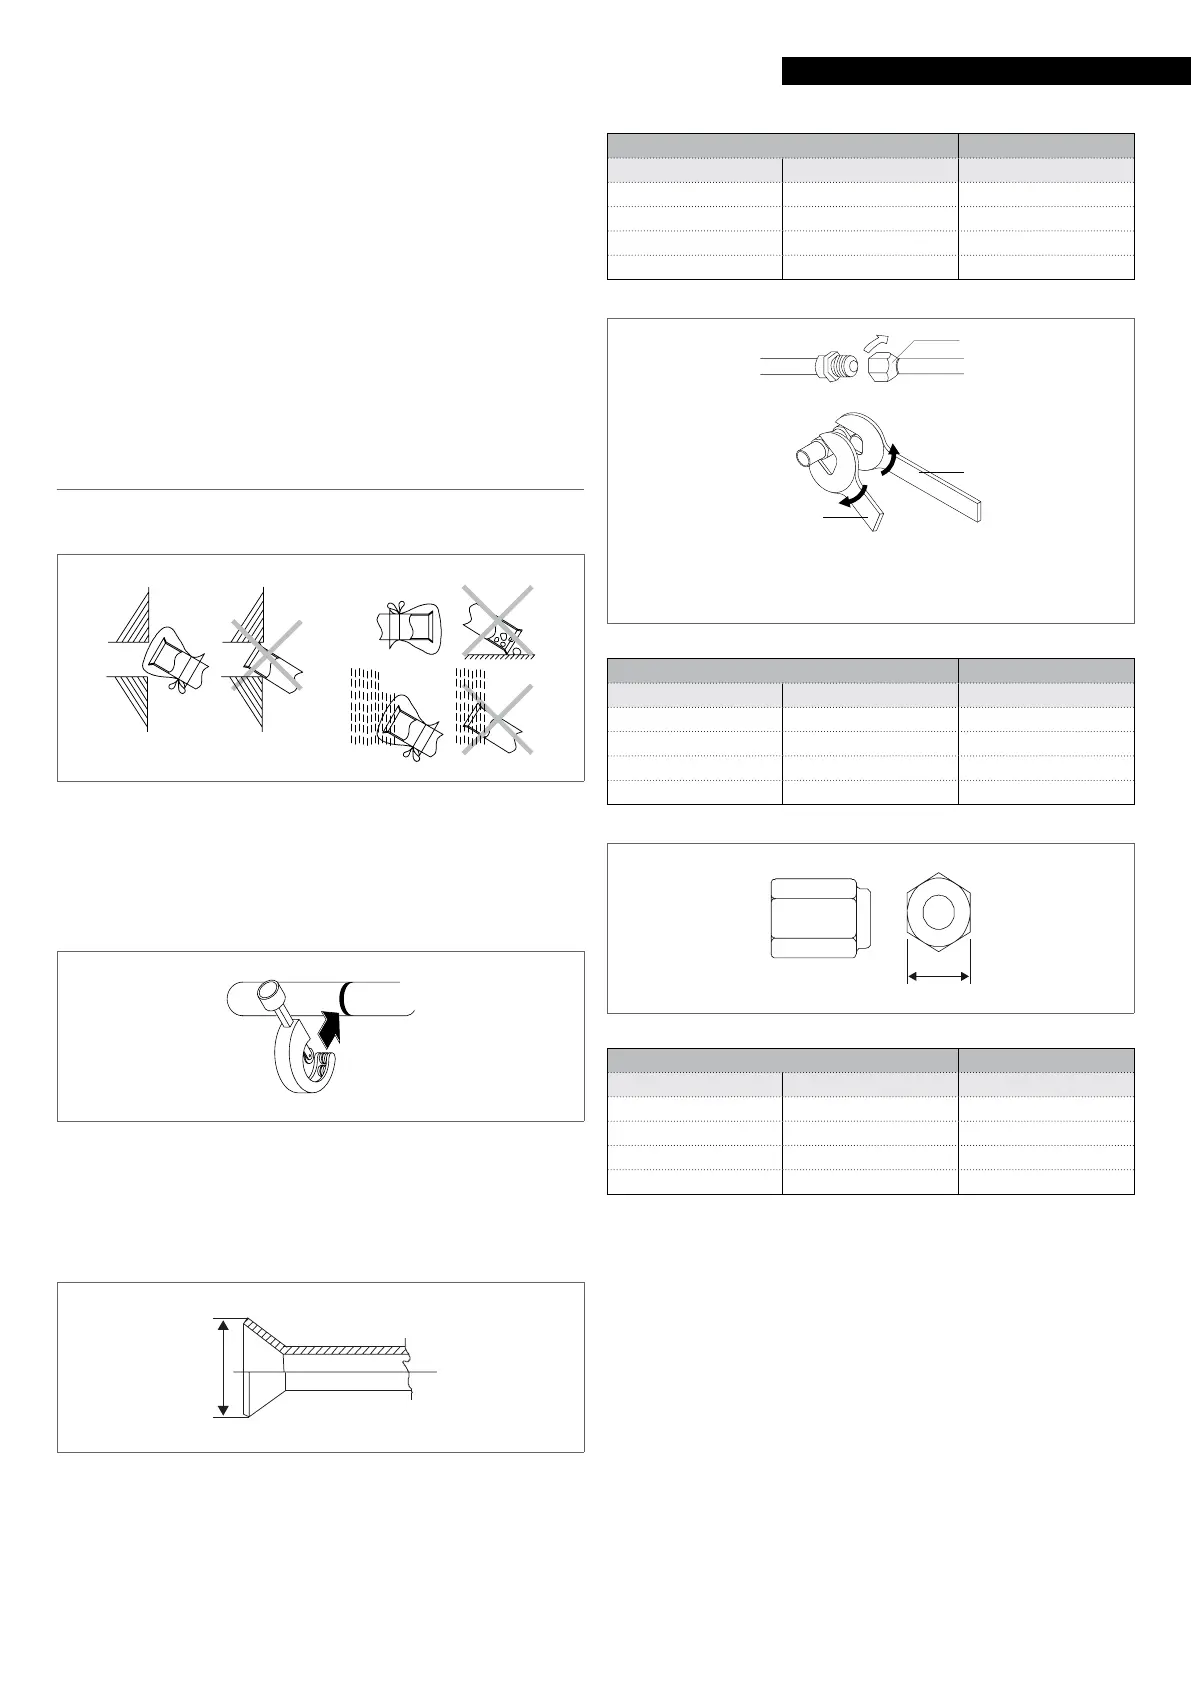
1 Key
2 Torque wrench
3 Flare nut
2
3
1
Pipe Ø Tightening torque
mm inches Nm
6,35 1/4 18
9,52 3/8 42
12,70 1/2 55
15,88 5/8 60
A
Pipe Ø A
mm inches mm
6,35 1/4 17
9,52 3/8 22
12,70 1/2 26
15,88 5/8 29
— bring line ends with flare connection close to their cou-
pling on the unit
— manually rotate the flare nuts by 3 - 4 turns
— tighten the connections using a spanner and a counter
spanner
9
Use a torque wrench to tighten so as to prevent damage to
flare nuts and gas leaks.
9
During the connection, keep the leak finder on and close to
the unit so that it signals any refrigerant leak.
9
Avoid using the refrigerant oil on the external part of the
flaring.
After connecting the cooling pipes:
— create a vacuum inside the pipes
— check for refrigerant leaks
— apply thermal insulating material on the joints