101
ENGLISH
After the installation of the unit, check the following before switching on the circuit breaker:
)LHOGZLULQJ 0DNHVXUHWKDW WKH¿HOGZLULQJEHWZHHQWKHORFDOVXSSO\SDQHODQGXQLW DQGYDOYHVZKHQ DSSOLFDEOHXQLWDQG URRP
thermostat (when applicable), unit and domestic hot water tank, and unit and backup heater kit have been connected according to the
instructions described in the chapter 9.7 "Field wiring", according to the wiring diagrams and to local laws and regulations.
Fuses, circuit breakers, or protection devices Check that the fuses or the locally installed protection devices are of the size and type
VSHFL¿HGLQ7HFKQLFDOVSHFL¿FDWLRQV0DNHVXUHWKDWQRIXVHVRUSURWHFWLRQGHYLFHVKDYHEHHQE\SDVVHG
Backup heater circuit breaker: Do not forget to turn on the backup heater circuit breaker in the switchbox (it depends on the backup
heater type). Refer to the wiring diagram.
Booster heater circuit breaker: Do not forget to turn on the booster heater circuit breaker (applies only to units with optional domestic
hot water tank installed).
Ground wiring: Make sure that the ground wires have been connected properly and that the ground terminals are tightened.
Internal wiring:Visually check the switch box for loose connections or damaged electrical components.
Mounting: Check that the unit is properly mounted, to avoid abnormal noises and vibrations when starting up the unit.
Damaged equipment: Check the inside of the unit for damaged components or squeezed pipes.
Refrigerant leak: Check the inside of the unit for refrigerant leakage. If there is a refrigerant leak, call your local dealer.
Power supply voltage: Check the power supply voltage on the local supply panel. The voltage must correspond to the voltage on the
LGHQWL¿FDWLRQODEHORIWKHXQLW
Air purge valve: Make sure the air purge valve is open (at least 2 turns).
6KXWRႇYDOYHV0DNHVXUHWKDWWKHVKXWRႇYDOYHVDUHIXOO\RSHQ
7KHSUHVHQFHDQGFOHDQLQJRIWKH<¿OWHURQWKHXQLWVZDWHULQOHW
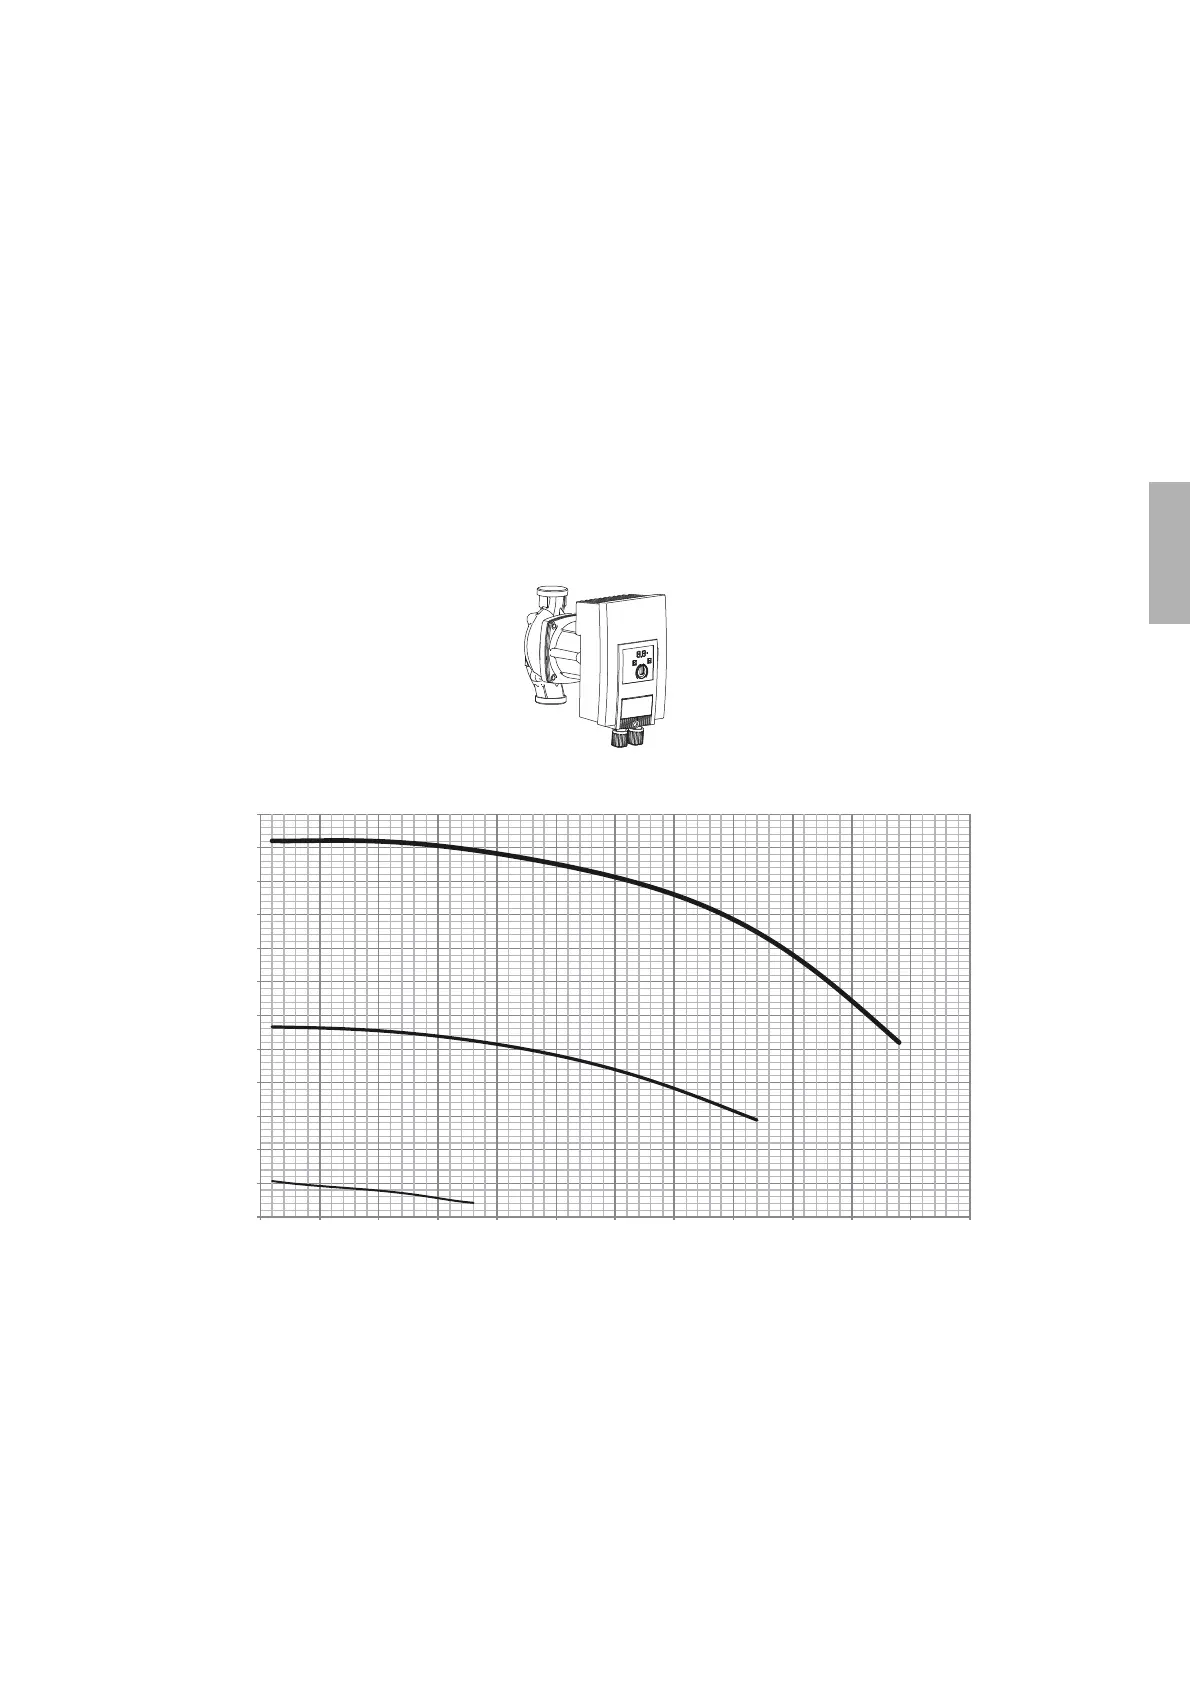
10.4 Setting the pump speed
The pump speed can be selected by adjusting the red knob on the pump. The notch point indicates pump speed. The default setting is the
KLJKHVWVSHHG,,,,IWKHZDWHUÀRZLQWKHV\VWHPLVWRRKLJKWKHVSHHGFDQEHVHWWRORZ,7KHDYDLODEOHH[WHUQDOVWDWLFSUHVVXUHIXQFWLRQIRU
ZDWHUÀRZLVVKRZQLQWKHJUDSKEHORZ
0
10
20
30
40
50
60
70
80
90
100
110
120
0.0 0.5 1.0 1.5 2.0 2.5 3.0 3.5 4.0 4.5 5.0 5.5 6.0
ESP (kPa)
Flow rate
(m
3
/h)
)
)
)
Available external static presurre VS Flow rate
b
DANGER
Operating the system with closed valves will damage the circulation pump!
If it's necessary to check the running status of the pump when unit power on. please do not touch the internal electronic control box
components to avoid electric shock.