22 di 42
8 MACHINE USE
8 USO DELLA
MACCHINA
8 MASCHINEN-
BEDIENUNG
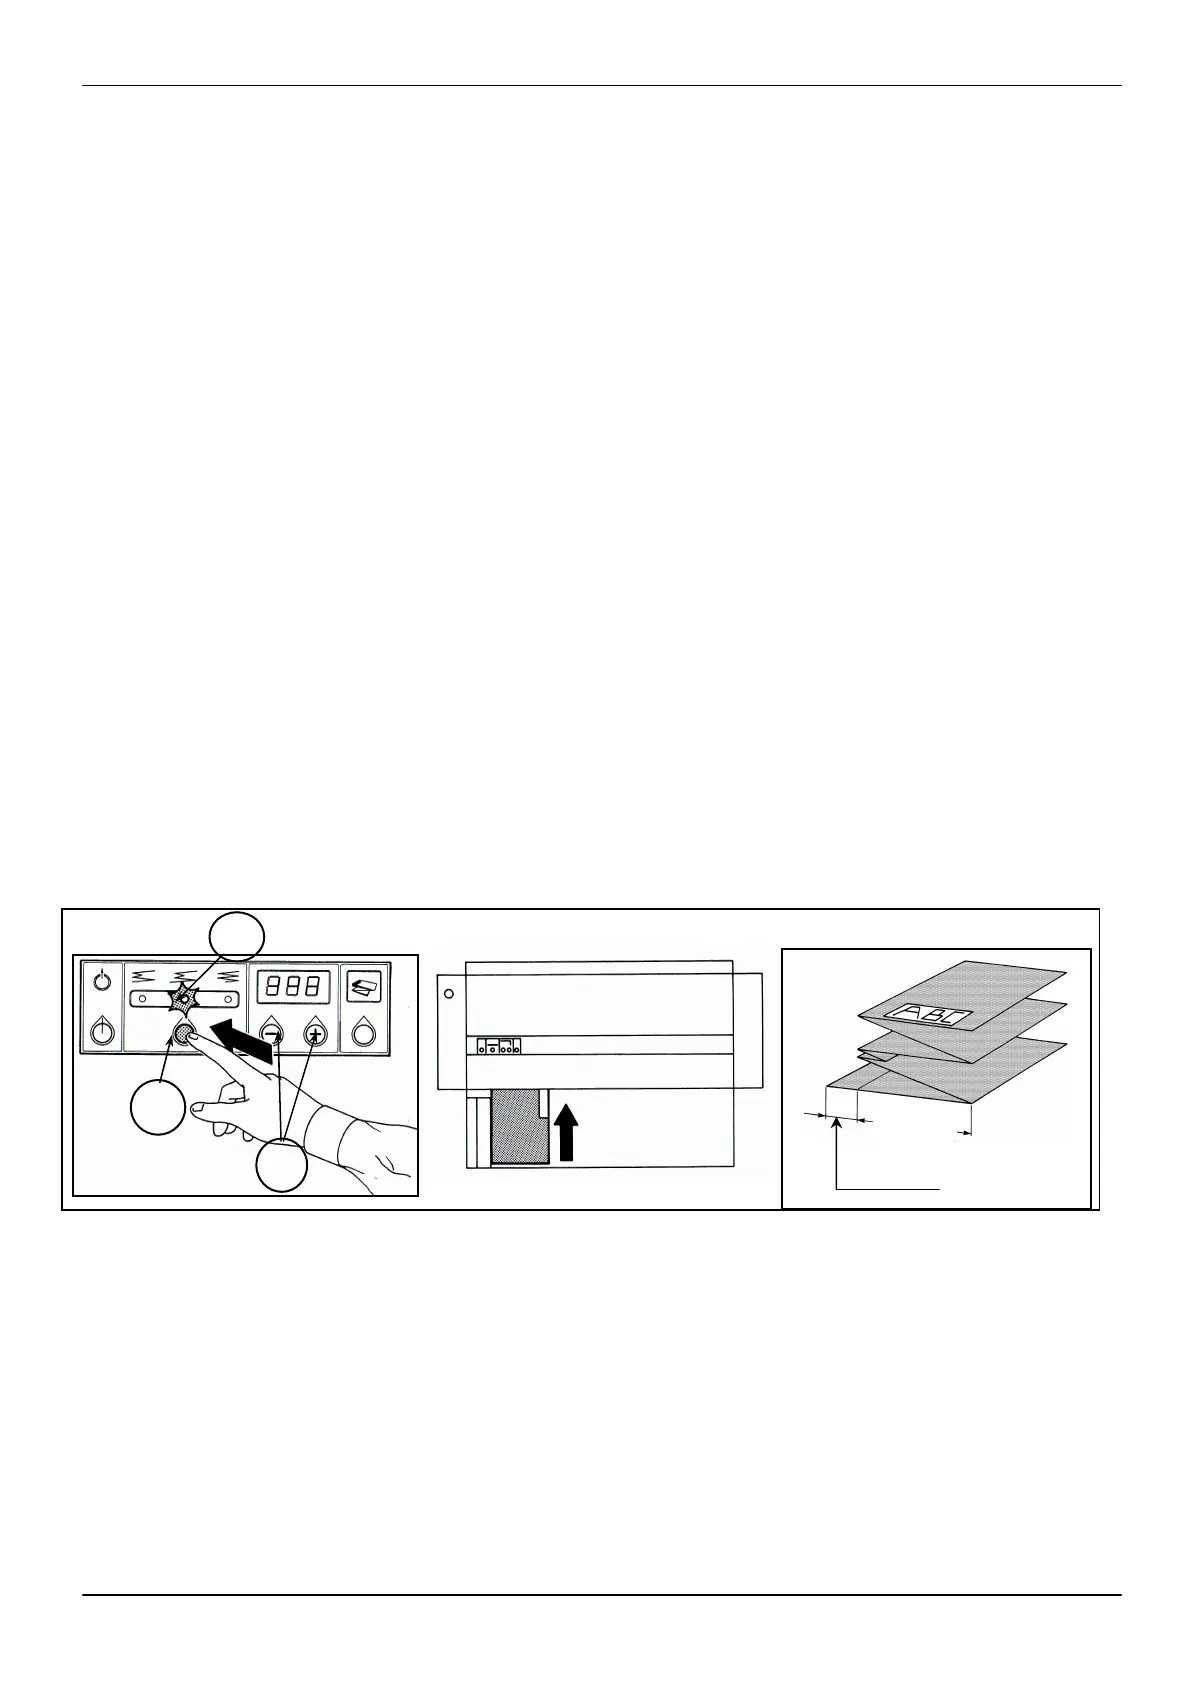
8.2.2
programme with
filing border
•
Press the programme button
functi
filing border on the left side
of the drawing (fig. 11).
•
Antil at the program 11 (see
on dysplay at
machine)
only by a skilled technician
• Since the program 12 for
modify the
push the button “I” for 5
sec. and
adjustment buttons (H)
•
The set folding measurement is
190 mm and can be changed by
using the adjustment buttons (H).
See paragraph 8.1.4.
• Insert the sheet, positioni
it with the front title block
as shown (fig. 8).
•
The sheet will be folded as
indicated in (fig. 11).
8.2.2
archiviazione
•
Premere il tasto programma
(F) (fig.10), fino a fare
ac
corrispon
inserire la funzione che crea
un bordi
sul
disegno(fig.11).
• Fino al programma 11
standard del bor
mm.e può esse
solo da un
qualificato.
• Dal progr. 12
tasto “I” per oltre 5 sec
può modificare la lunghezza
del bordino agendo sui tasti
“+” e “-“ H
•
preimpo
può es
regolazione (H); ve
paragrafo 8.1.4.
•
orientandolo con la tabe
in avanti (fig.12).
•
Si ottiene il risultato di
piega indicato in (fig.11).
8.2.2 Programm mit
berechnetem Endbogen
und Heftstreifen zur
Archivierung
•
(Abb.10) drücken, bis die
leuchtet, um die Funktion
Heftstreifen auf der linken
Seite des Plans zu betät
(Abb.11).
•
Antil at the program 11 (see
on dysplay at turn on the
machine)
des Hefstreifens ist 20 mm
Fachpersonal
werden.
•
modify the leng of border,
push the button “I” for 5
sec. and
adjustment buttons (H)
•
Einstelltasten (H) geändert
8.1.4.
•
Den Plan mit Tabelle nach
vorne (Abb.12) einführen.
•
Faltergebnis w
(Abb.11) geschildert.
12
F
10
H
E
11
190mm