5 Installation
EN
24 Rittal roof-mounted Blue e+ cooling unit/VX25 Blue e+ integration solution
Accessories for roof plate reinforcement with
VX25 system
– Punched section with mounting flange, 18 x 64 mm,
for VX
5.3.4 Connect the condensate water discharge
For the integration solution, a condensate water evapo-
rator is mounted at the bottom of the cooling module.
With an enclosure connected, this condensate water
evaporator may typically evaporate condensate water
volumes of up to 100 ml/h. For the roof-mounted cool-
ing unit, the condensate water evaporator can also be
installed subsequently as accessory (3355.720).
General notes for routing the condensate water
discharge hose
– The hose must be laid with an adequate and constant
gradient to prevent siphoning.
– The hose must be laid without any kinks.
– If extended, the cross-section of the hose must not be
reduced.
– The hose should be routed to a drain or external con-
densate water evaporator by the customer.
Roof-mounted cooling unit Blue e+
You can attach the supplied condensate water dis-
charge hose (L=3 m, Ø ½") to the roof-mounted cooling
unit. For this purpose, two connection points are provid-
ed on the cooling unit.
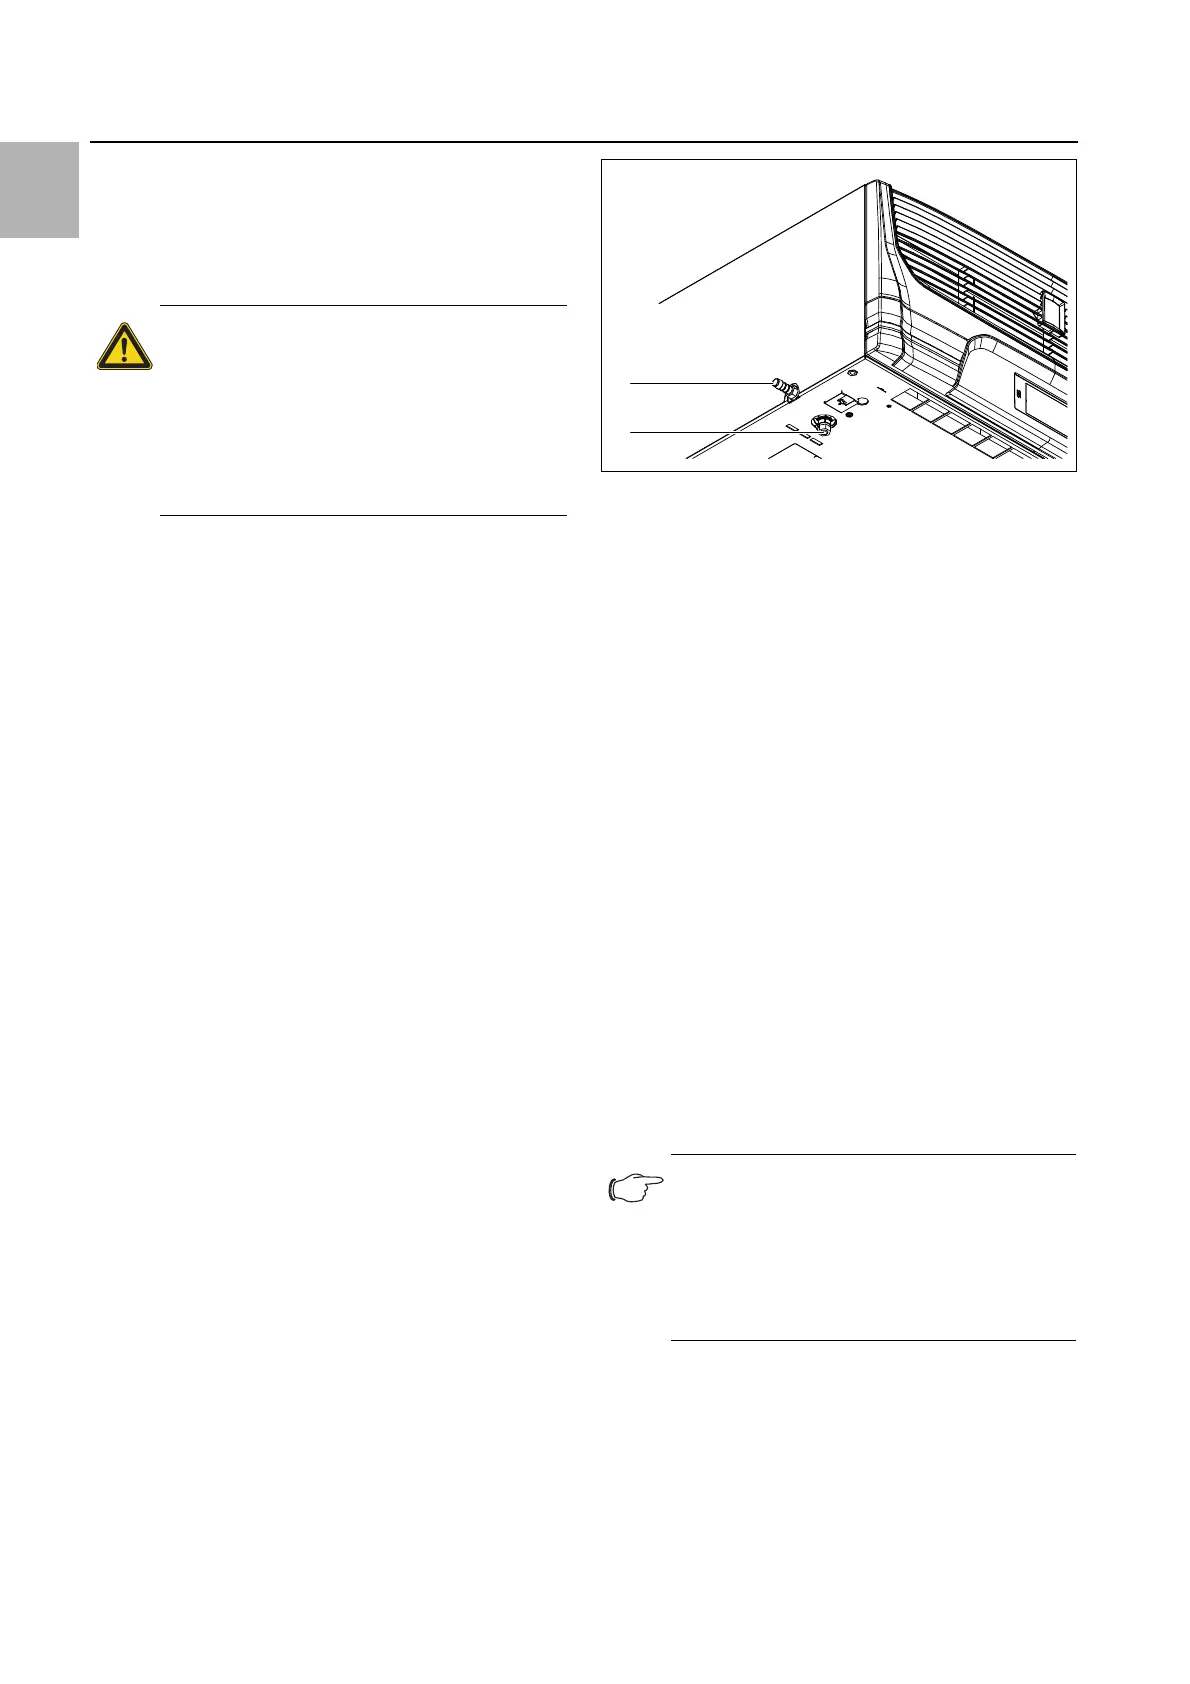
Fig. 10: Connection for the condensate water discharge hose
Key
1 Connection point on the side of the unit (here with screw-
in grommet)
2 Connection point at the bottom of the unit (closed with a
bung)
Proceed as follows when you want to use the side con-
nection point of the unit:
Screw the supplied screw-in grommet into the side
connection point.
Then place the supplied condensate hose onto the
screw-in grommet and secure it with the hose clip (al-
so supplied).
Lay the hose as per the instructions above.
Proceed as follows when you want to use the bottom
connection point on the unit:
Unscrew the bung from the bottom connection point.
Close with this bung the side connection point of the
unit so that condensate water cannot discharge there.
Screw the supplied screw-in grommet into the bottom
connection point.
Then place the supplied condensate hose onto the
screw-in grommet and secure it with the hose clip (al-
so supplied).
Lay the hose as per the instructions above.
VX25 Blue e+ Integration solution
A condensate evaporator is installed as standard for the
integration solution. A factory-mounted hose at the bot-
tom of the condensate evaporator discharges any re-
sulting condensate water without pressure from the
cooling module.
Caution!
Before commissioning, ensure that the
condensate management is installed, as
described in this section. The correct
functioning must be checked regularly
for maintenance of the final application
(see section8 "Inspection and mainte-
nance").
Note:
If you must use the bottom connection point
of the unit, connect the supplied condensate
hose there. Otherwise, condensate can es-
cape uncontrolled from the cooling unit and
cause an electrical short-circuit or fire in the
enclosure.