Rittal Liquid Cooling Package 25
5 Assembly and siting
EN
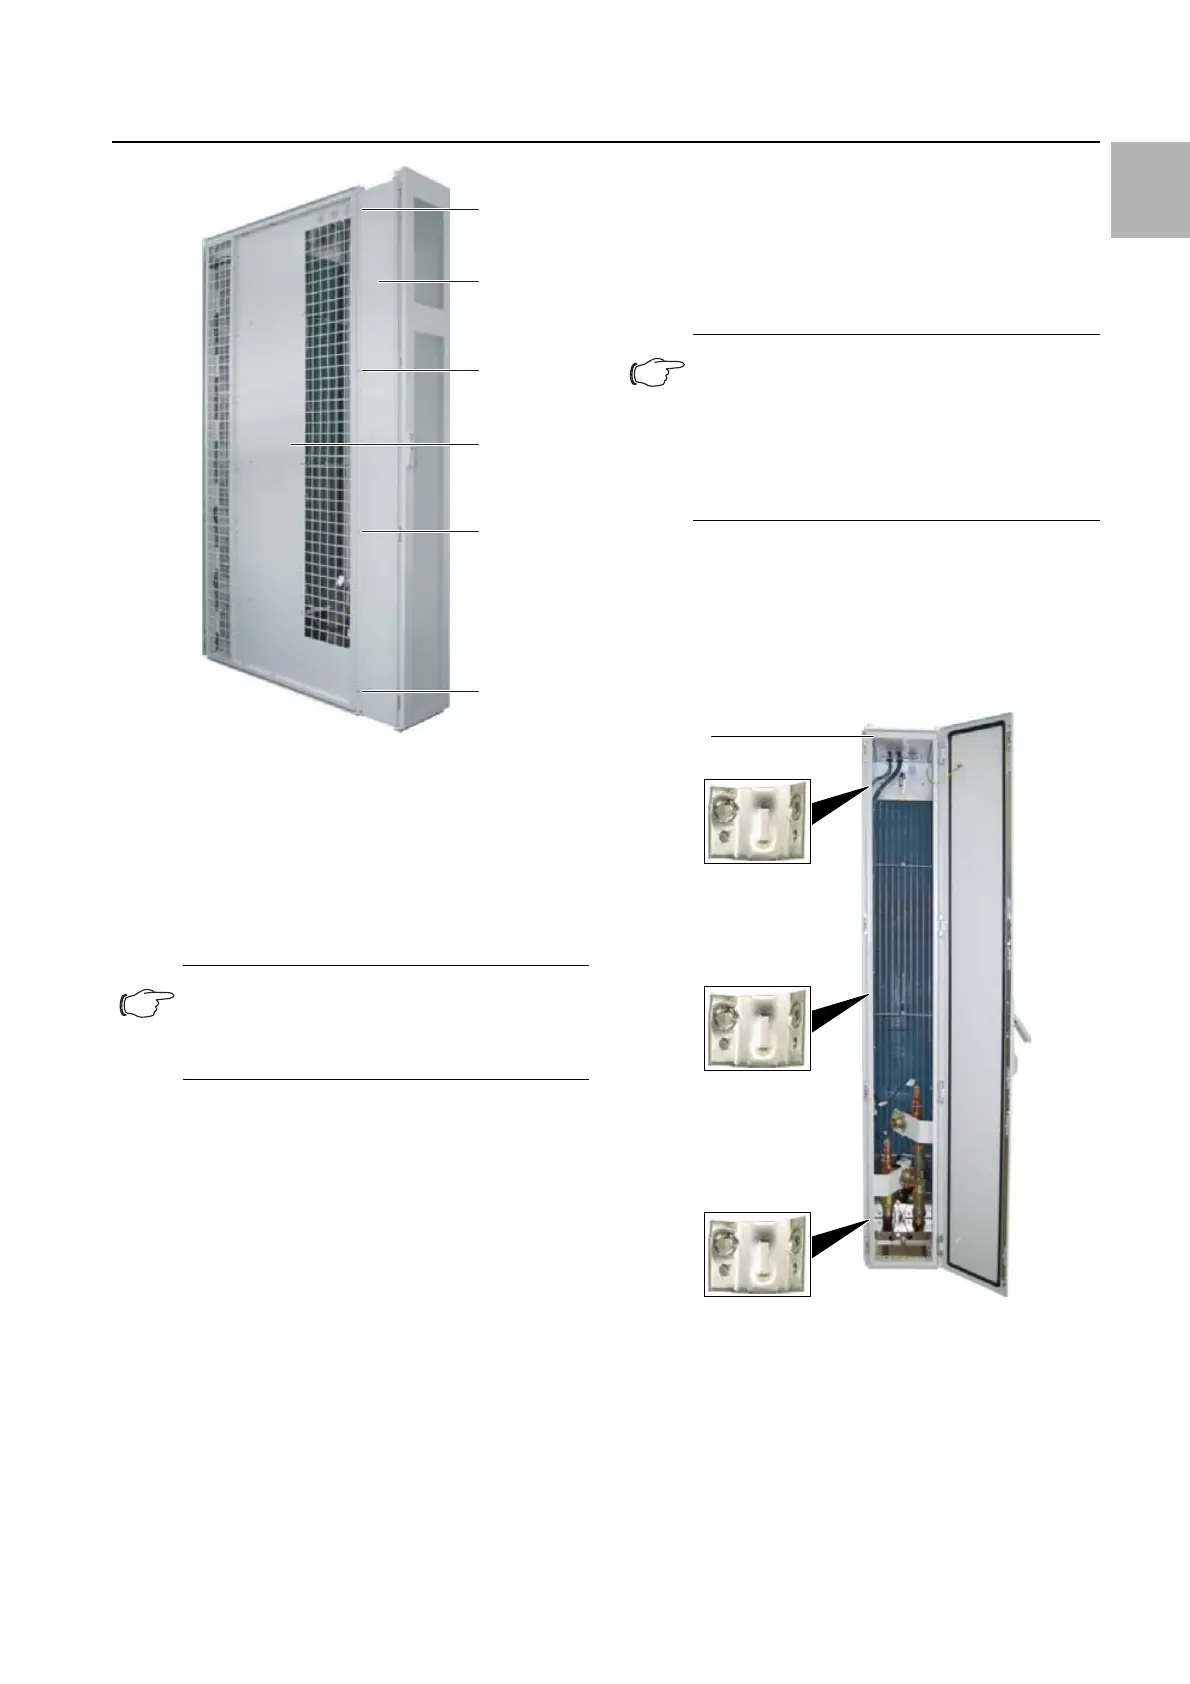
Fig. 25: Adaptor on the LCP Inline
Key
1 Assembly screws
2Adaptor
3 LCP Inline
Fit the door at the rear of the adaptor if you are se-
curing the LCP Inline to the server enclosure with the
aid of baying clamps.
5.2.6 Fit the trim panels if siting without a rear
adaptor
If no rear adaptor is installed at the rear of the LCP
Inline, with bayed server racks, a gap will appear
when the side panels are removed.
Fit a compensating panel (see section 15 "Accesso-
ries") to the server racks in the rear section in order
e.g. to prevent unauthorised access to the server
racks.
5.2.7 Installation and baying of the Liquid
Cooling Package
Position the Liquid Cooling Package on the side of
the server enclosure to which it is to be bayed.
Pull the LCP Inline forwards until the air outlet holes
on the side of the LCP Inline are completely in front
of the front edge of the server enclosure.
Align the Liquid Cooling Package with the server en-
closure. Ensure that the Liquid Cooling Package is
aligned levelly and that both enclosures are adjust-
ed to the same height and are vertically aligned to
each other.
Dismantle the door of the Liquid Cooling Package
whose hinges are on the side on which the server
enclosure is to be bayed. Proceed as described in
section 5.2.4 "Dismantle the server enclosure door".
Attaching the LCP Rack and LCP Inline
Using the corresponding assembly screws, fasten
three baying connectors each (fig. 26, item 2) onto
the attachment points provided in the mounting
strips on the front and rear of the LCP Rack or LCP
Inline flush (fig. 26, item 1).
Fig. 26: LCP Rack – rear
Key
1LCPRack
2 Baying connector
In the same way, fasten the baying connectors onto
the attachment points provided in the mounting
strips on the front and rear of the server enclosure.
If necessary, press the LCP Rack or LCP Inline flush
lightly against the server enclosure in order to bring
Note:
If you are securing the LCP Inline to the serv-
er enclosure with the aid of baying clamps,
do not fit the rear door yet.
1
1
1
1
2
3
Note:
If the Liquid Cooling Package is to be bayed
between two server enclosures, both doors
of the Liquid Cooling Package must be dis-
mantled before the baying connectors are
installed so that the attachment points for the
baying connectors are accessible.
1
2
2
2
 Loading...