4
Assembly of Roof, Sides and Ends
ASSEMBLY OF ROOF, SIDES & ENDS
NOTE: IDENTIFICATION OF ALL PARTS AND
SECTIONS CAN BE FOUND ON THE ID
CHARTS (PAGES 16 – 18).
THE ROOF
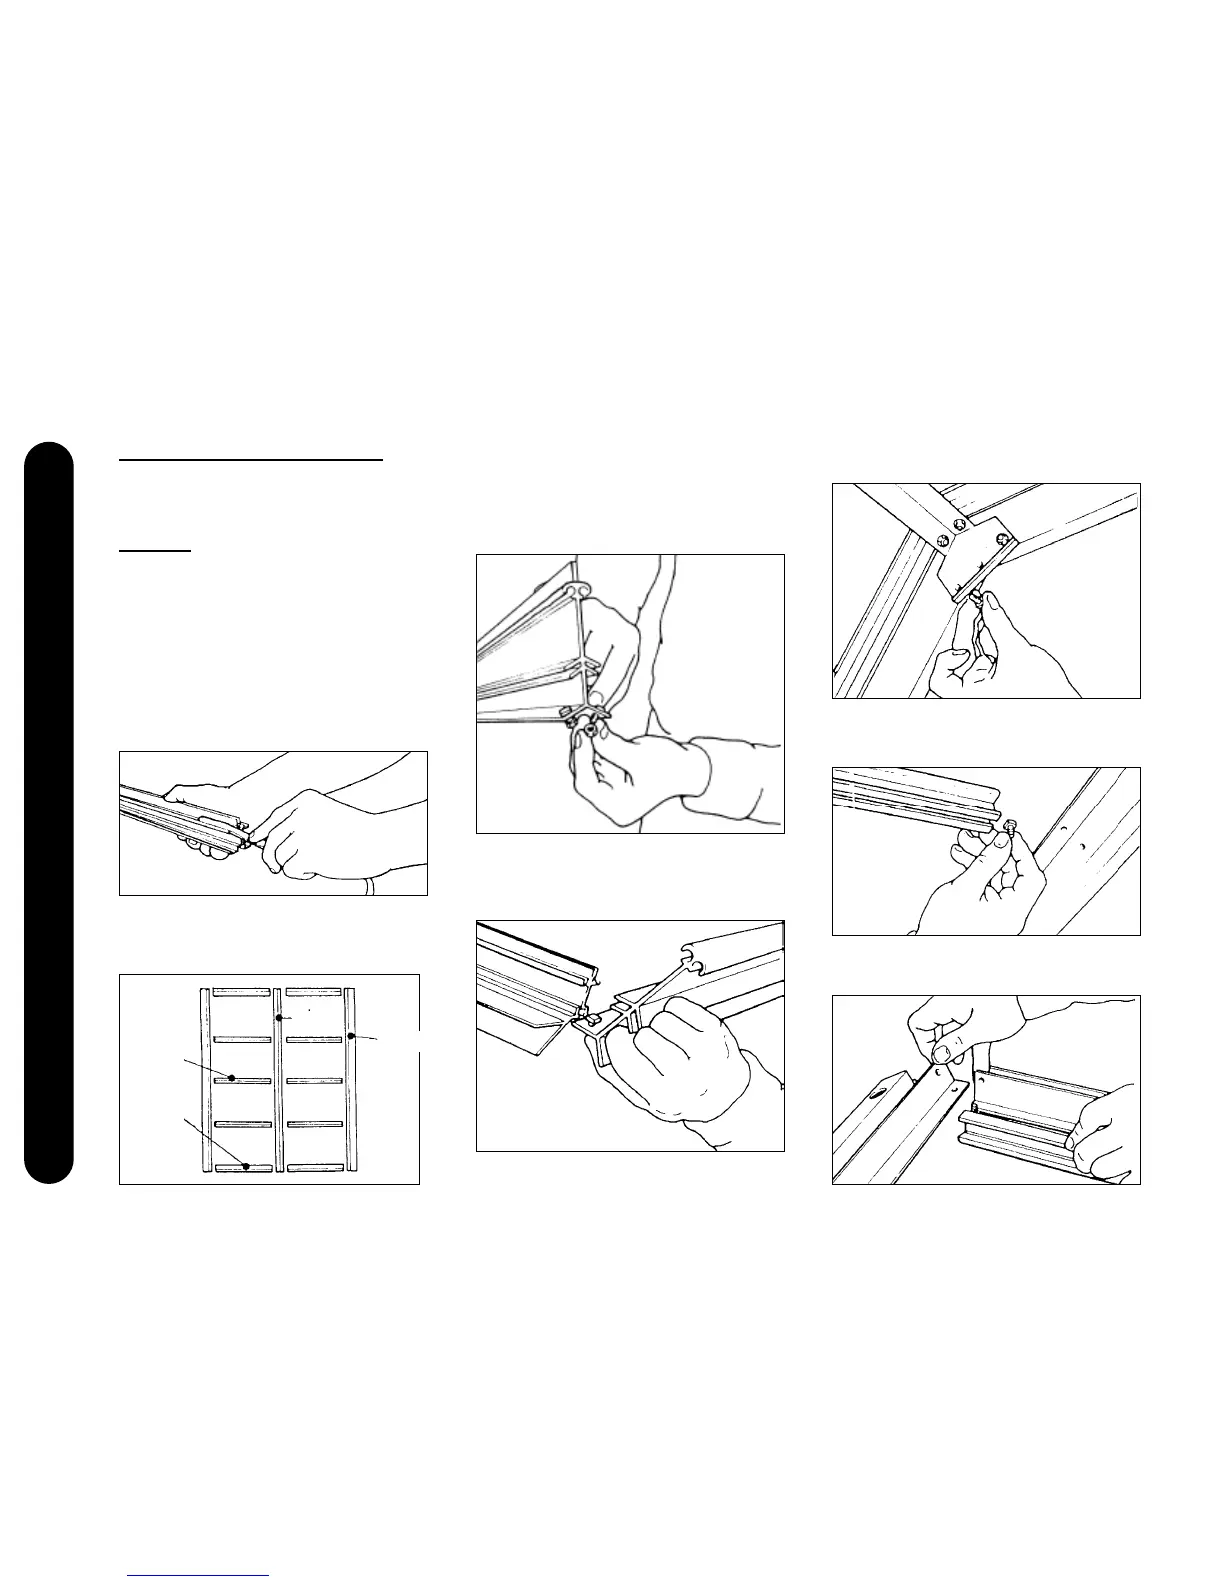
1Identify the ridge member (no.1 on ID chart), roof glazing
bars (No. 2 ID chart), roof end glazing bars (No. 3) and
the eaves gutter (No. 4). For help with identification, roof
glazing bars are the same length as roof end glazing bars.
2 Thread PVC glazing strip (No. 5 ID chart) into the grooves
provided on the roof glazing bars and the inside groove
of the roof end bars. Cut to full length taking care not to
stretch the PVC strip. Water or washing up liquid used as
a lubricant may help; especially in winter months.
3 The roof is assembled upside down initially. Lay out the
parts roughly in position with PVC strip facing downwards.
NOTE: If fitting a partition or extension
read in conjunction with Pages 13.
4. Insert short square headed bolts (No. 6 ID chart) into the
holes provided in the ridge member and loosely fit nuts.
5. Starting with one side only, slide glazing bars and roof
end glazing bars onto bolt heads and push home fully.
Tighten nuts securely taking care not to over tighten.
6. Repeat process for the other side.
7. Fit apex plate (No. 7, ID chart) to both ends as shown and
tighten securely.
8. Starting with one side only, slide one short bolt into the
ends of roof glazing bars and roof end glazing bars.
glazing
bar
roof end
glazing
bar
ridge
gutter