6
Assembling the Vent
Then slide a long bolt into the end glazing bars and
attach the long bolt to the base angle as shown. Secure
end glazing bars top and bottom.
26.Identify door end glazing bars (No. 2, ID Chart).
Proceed as for plain end glazing bars, remembering
to slide an additional short bolt up each glazing bar.
Do not at this stage fix the short centre glazing bar,
(on Royale & Rosette models).
27.Next fit the door guide (No.11, ID Chart) & threshold
(No. 51, ID Chart) onto the base rail, position the door
guide as below. Then push down firmly on the
threshold until it locks into position.
28.Fit braces to both gable ends as shown. Fit tubular
roof ties (Royale and Rosette only) fit tubular eaves
braces (Rosette only) equidistant along the length of
the house, to the roof glazing bars using cropped head
bolts and nuts (No.24, ID Chart).
29.Identify plain end purlin member (No.12, ID Chart)
(Not required on Regent Model) and using short bolts
previously fitted, offer up purlin to end and corner
glazing bars. Secure horizontal purlin approximately
250mm (10”) down from eaves. The corner braces
should pass behind the purlin.
On REGENT ONLY fit short purlin to left hand side of
door end and temporarily fix the strike plate at this
stage. (see 78. Square bolts and nuts in glazing bar).
NOTE: With the basic framework complete the
next stage is to check with a spirit level that the
structure is plumb, level and square in all planes
before glazing.
30.Fit eaves rail / gutter closure, (see No. 59, ID Chart).
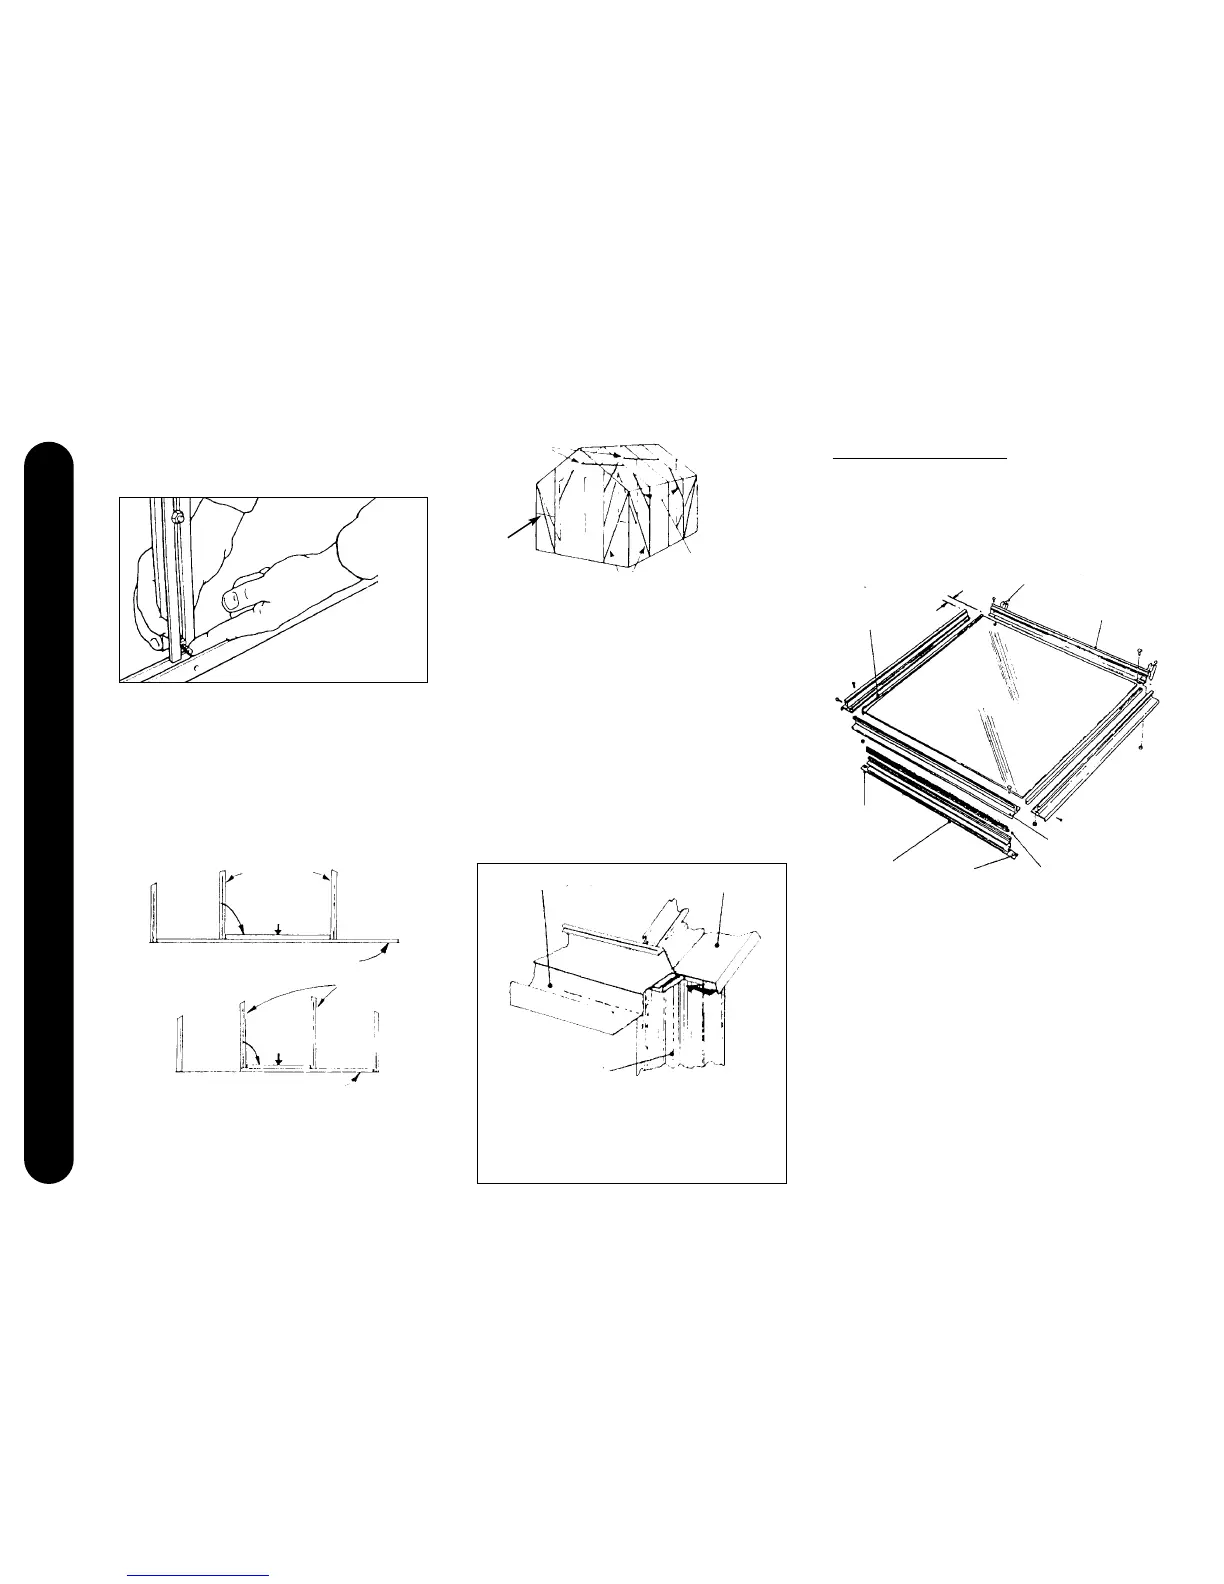
ASSEMBLING THE VENT
31.Identify vent kit(s) and assemble with a standard size
pane of glass (610 X 610). Do not at this stage attach
the slam rail assembly, this will be attached when the
roof glazing is complete. (Stage 40)
32.Fit both side vent members to vent hinge, using M6 x
10 bolts. Slide glass into side vents and into hinge
Then fit cill member in place and fix using M6 X 10
bolts. Finally, using No. 8 X 12 self tapping screws, fix
at each corner, ensuring the vent hinge closures are in
place.
On all models use silicone around the perimeter of the
glass to seal any gaps, checking first that the vent is
square.
threshold
threshold
push
door guide
door guide
door
bar caps
push
door
bar caps
8’/10’ Door end
6’ Door end
Insert closure as shown and push fully home (A small
amount of water or washing up liquid may help)
NOTE: These closures are supplied in pairs
and must be separated by cutting with
scissors or a knife before being inserted.
vent closure
(I.D. chart no.23)
vent hinge
(I.D. chart no.18)
vent side
(I.D. chart no.19)
slam rail cleat
(I.D. chart no.22)
slam rail
assembly
cropped head bolts
(I.D. chart no.24)
nylon brush strip
(I.D. chart no.47)
vent cill
(I.D. chart no.20)
Tubular
roof tie
Diagonal braces
Eaves rail gutter Roof end glazing bar
Corner glazing bar
Tubular
eaves braces
Short
Purlin bar
(Regent only)