14
Securing the Base
METHOD OF ERECTION: ROSETTE
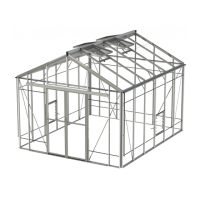
Rosette 10ft model - single door
94.Clad as for plain end. Because the door is plain (no
handle or lock fitted), it can be made to slide in either
direction. After deciding which way you prefer, glaze
the gable end, leaving the two top shapes. Fit single
header to track (inner and outer) and position on top
of door posts. Secure with attachment plates using a
special double one between the two. You can then
complete the glazing not forgetting the ‘Z’ trim. Make
up the door drilling two 6mm holes for the handles in
the side required.
NB. Door can be fitted in either middle bay.
METHOD OF ERECTION: ROSETTE & REGAL
Double door
NOTE: Doors must be slid into the top
track and erected as a complete unit.
95.Clad as for door end (see 10). Assemble inner and
outer shortened partition door tracks and header.
Identify special door track support angles (No. 68, ID
Chart) and fit to roof end bars, then fit door track to
these. Slide door on as you go. Glazing can then be
completed above the door (see 11). It would be
advisable to complete all this work before glazing the
main structure.
SECURING THE BASE WITH SOIL
BASE ANCHORS.
96.When the greenhouse is in its final position, identify
the soil base anchors (No. 16, ID Chart). Place one
anchor per glazing bar on the sides. (Only one anchor
required at each corner - not two).
Then dig out a hole below each chosen glazing bar 6”
X 6” X 12” and secure the soil anchors in position.
Concrete in each anchor as shown and allow to set.
SECURING THE BASE WITH CONCRETE
BASE BRACKETS.
97. When the greenhouse is in its final position, check that
it is square, diagonals are equal and the base rail
overhangs 7mm all around (as shown).
Position the base brackets at the base of each glazing
bar on the ends, and every other on the sides. (Only
one bracket required at each corner-not two).
Secure the base bracket to the glazing bar (as shown)
through slotted hole in bracket, push the bracket down
to touch the concrete and tighten nut.
Drill through hole in bracket with a 7mm masonry drill
to a depth of 50mm.
Insert a rawlplug and secure with a woodscrew
(as shown).
Glazing bar
Long bolt
Base anchor
Base bracket
Glazing Bar
Long bolt
Concrete base
No. 10x50
woodscrew
12”
6”
305
X
1374
305
X
1374
305
X
305
305
X
305
Shape
E
Shape
E
610
X
1374
610
X
1374
610
X
1374
Shape
F
Shape
F
610 X 305
610 X 305
610 X 305
Shape
H
Shape
G