85 of 136
= Reset device data to factory defaults
= Print
If you forget each button’s purpose, hold your cursor over them to display a tooltip with their function.
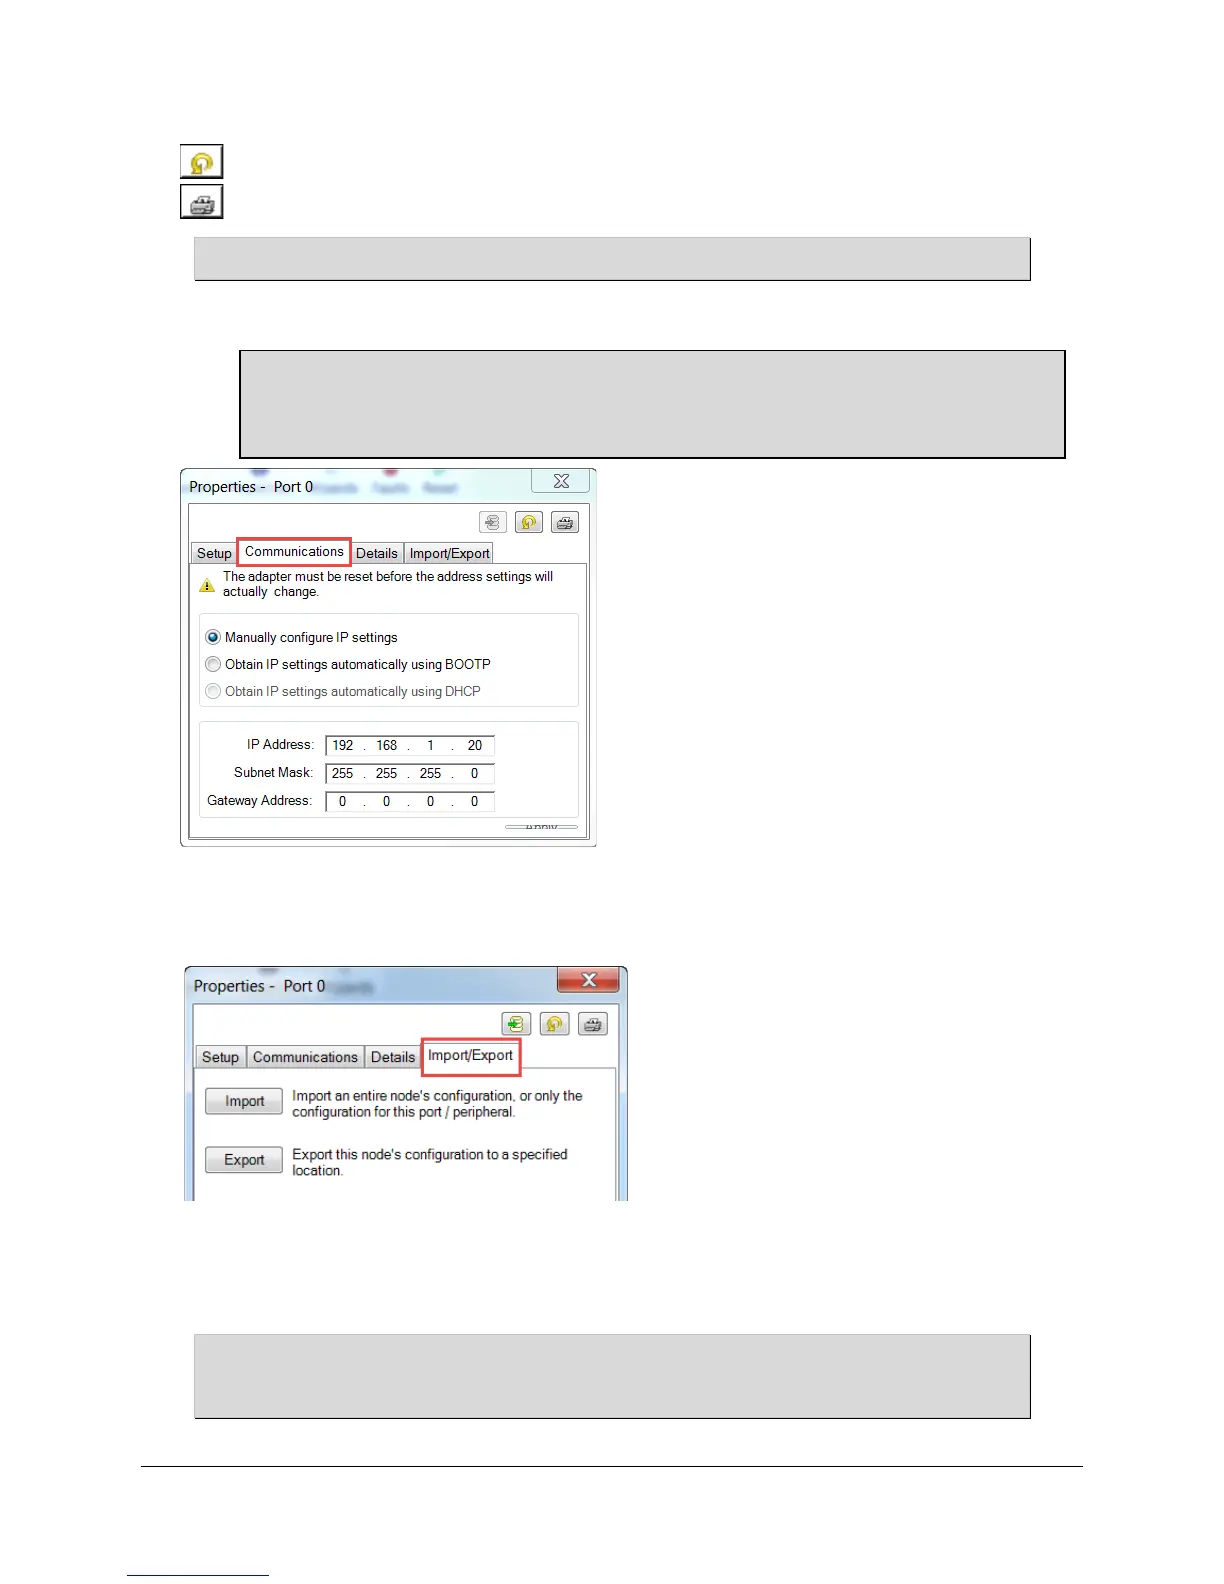
7. Click on the “Communications” tab.
On this tab, you can configure the Ethernet communication settings for the drive. This includes setting a static IP address or
configuring the drive for BOOTP or DHCP.
8. Click on the “Import/Export” tab.
From this tab, you can import or export the drive configuration file as either a *.PF5 (PowerFlex 520 Series USB) or *.IUUX
(CCW Device) file type. Using the USB port on the removable control module of the PowerFlex 525 drive lets you download
the configuration to a drive that does not have main power applied. This can save time and reduce the personal protective
equipment requirements for programming many similar drives.
The *.PF5 and *.IUUX file format is compatible with Connected Components Workbench, but the PowerFlex
525 is not compatible with *.DNO or *.CSF files.
The following screenshot is for the PowerFlex 525 Embedded Ethernet communication. For this lab we are
using the 25-COMM-E2P module in Port 2 for communication.
You can view a similar Properties dialog box for the 25-COMM-E2P by selecting the ’2 - 25-COMM-E2P’ tab,
then clicking ‘Properties’ and selecting the ‘Communications’ tab.
 Loading...