R&S NRP-Z91 PC control
1168.8579.12 1.7 E-6
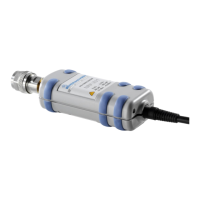
Unlatch the R&S Instrument connector on the rear panel by
pressing down the unlatching ring of the built-in plug and
pulling off the cable jack at the same time (Fig. 1-7).
Fig. 1-7 Unlatching the R&S Instrument connector
Test Setup
Fig. 1-8 shows a typical test setup:
External power supply unit (supplied)
BNC cable (optional, not supplied)
Trigger source (optional)
Triggered device (optional)
R&S NRP-Zxx power sensors (one to four sensors)
The sequence in which the cables are connected is not important.
As already mentioned in section Ports and LEDs, the R&S NRP-Z4 passive interface adapter can also
be used as an alternative to a standard USB cable for connecting to the PC. This adapter is connected
to the R&S Instrument port. Simultaneous operation at two USB hosts is not possible as the USB host
connected to the R&S Instrument port always has priority.
It is possible to cascade several R&S NRP-Z5 sensor hubs by connecting the R&S Instrument port of
an R&S NRP-Z5 to one of the sensor ports of another R&S NRP-Z5. However, external triggering and
the use of the Trigger Master function are then not possible. Instead, it is recommended to connect all
R&S NRP-Z5 hubs individually to the USB host or to an interposed USB hub, and to feed the external
trigger signal to all R&S NRP-Z5 hubs via their trigger inputs; or to forward the external trigger signal
from the trigger output of the R&S NRP-Z5 to which the Trigger Master is connected to the trigger
inputs of the other R&S NRP-Z5 hubs.
 Loading...