Caution
1. Do not pour hot water into the two-in-one water tank to avoid deformation of the water tank; do not flush or soak the two-in-one water tank;
2. Do not use detergents, disinfectants, solid detergents, and other cleaning products to prevent corrosion and blocking of the two-in-one water tank;
3. Due to production testing reasons, there may be a small amount of water residue in the two-in-one water tank, which is a normal phenomenon;
4. When mopping the floor, set up virtual walls or a no-go area in carpeted areas; do not use the mopping function on the carpet;
5. When the device is charging or not in use, remove the mopping module, pour out the excess water in the water tank, and clean the mop to avoid mildew or odours;
6. It is recommended to clean the mop aer each use to ensure the water output speed and cleaning effect. If necessary, the mop can be replaced with a new one;
7. When the main unit is charging on a wooden floor, timely remove the mopping module to prevent the mop from leaking and damaging the floor.
Installation of mopping module
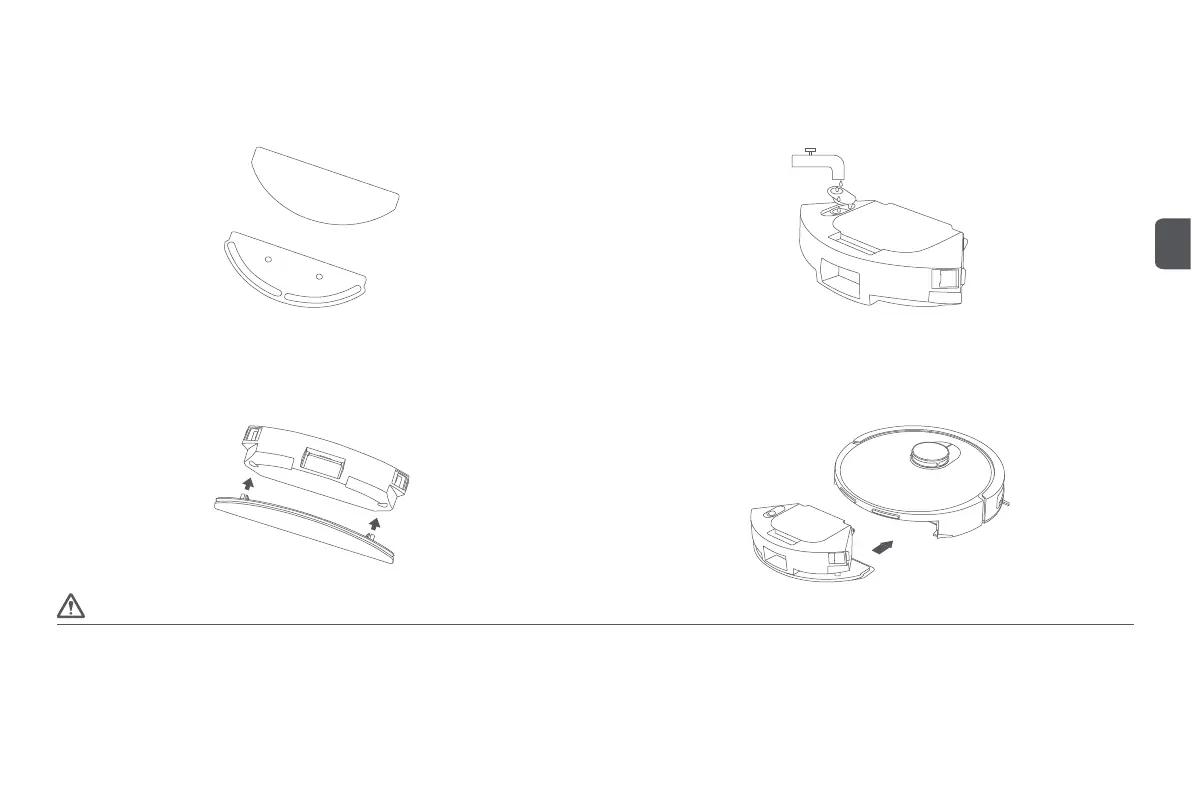
Step 1: Install the mop
Insert the wrung damp mop into the mop holder and paste it on the Velcro;
Step 2: Fill the two-in-one water tank with water
Open the rubber cap of the two-in-one water tank inlet, pour clean water into the tank, then
fasten the rubber cap;
Step 3: Install the mopping module
Install the mopping module into the boom of the two-in-one water tank according to the direction
shown in the diagram;
Step 4: Install the two-in-one water tank
Install the two-in-one water tank into the main unit according to the direction shown in the
diagram, until you hear a "click" sound.
7
EN
 Loading...