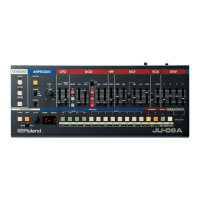
USING THE ARPEGGIATOR
The arpeggiator is a welcome addition to the JU-06A. It represents what people seemed to really adore
about the Juno-60 (in addition to how wonderful it sounded) but was excluded from the Juno-106.
Instead we got an optional MSQ-100 mini sequencer which magnetically mounted right on top, and
looked perfect there. It’s really a treat that the apreggiator is added to this little replicant. You can play it
and adjust it using the internal settings, or you may sync it from midi. Sadly, at this writing, the
developers at Roland have overlooked the ability to sync the arpeggiator from the external clock input.
This had to have been an error which no one has gotten around to correcting yet. In fact this user’s guide
took a long time to produce because externally clocking an arpeggiator is one of my personal favorite
things to do… advancing the arpeggiator one step per pulse from a pattern programmed on an external
machine (like a TR-08) and using live played chords to be played back almost like a sequencer is
endless fun and inspiration for me as a musician. And I wanted to write a few pages about this and share
the love. I waited a year for Roland to update the firmware, and it didn’t happen. No one from Roland
even replied. So I gave up the ghost and wrote this user’s guide for you anyway. We’ve waited long
enough. IF they ever do update the firmware to include clocking the arpeggiator from the external clock
input, I will include the pages I’ve written about this at that time. For now, it’s just a sad tale of error, and
if you even read this, may have even bummed you out. Sorry about that. %
Here’s how you use the arpreggiator:%
1. Press the ARPEGGIO [ON/OFF] button to make it light. !
2. Use the [MODE] switch to select the arpeggio mode. !
UP (upward), U&D (upward & downward), DOWN (downward) !
3. Use the [RANGE] switch to specify the range (1–3 octaves) in which the arpeggio plays !
4. Use the [RATE] knob to specify the length of the notes.%
5. Hold down multiple keys simultaneously. !
You can perform while using this function together with chord memory and the [HOLD] button. You can
also use the step buttons to play the keyboard. For details, refer to “Using the Buttons as a Keyboard
(NOTE)”. !
Why does it say “ARPEGGIO” and you keep calling it an arpeggiator?
This is a great question. It’s possible that it’s a translation issue. But an arpeggio is a flourish of notes.
An arpeggiator creates these flourishes of notes. So it’s common sense that the device which produces
arpeggios is not an arpeggio itself, but rather an argpeggiator which then produces arpeggios or
arpeggiation. Got it? Cool.!

 Loading...