108
Changing the Location of the Insert
Eects (LOCATION)
By default, the insert eects are connected (inserted) directly after
the input source. This means that you’ll be able to hear and record the
sound processed by the eect.
However, in some cases, you may wish to change this method of
connection. The JUNO-Gi lets you change the location where the insert
eects are connected, thus allowing you to use the eect in a variety
of ways.
1. In the recorder’s eects screen, press the [1] (INS FX) button.
The INSERT FX screen will appear.
2. Press the [4] (LOC) button.
The INSERT FX LOCATION screen will appear.
3. Use the VALUE dial or the [DEC] [INC] buttons to specify the
location where the insert eects are to be connected.
Value Explanation
INPUT
<NORMAL>
This lets you monitor and record the sound that is
processed through the insert eects. Normally, you
should use this setting.
TRACK 1
(REC)
INPUT
<REC DRY>
This lets you monitor the sound that is processed
through the insert eects, but record the sound before
it has passed through the insert eects (i.e., record the
“dry” sound). Use this setting if you want to try out
various eect settings after recording.
g.03
TRACK 1
(REC)
TRACK
1–8,
1/2–7/8
This lets you apply the insert eects to the track
playback audio. Use this setting if you want to try out
eects after recording the dry sound, or if you want to
apply the eect only to a specic track.
g.03
TRACK 1
(PLAY)
RHYTHM
This lets you apply the insert eects to the rhythm
sound.
g.03
RHYTHM
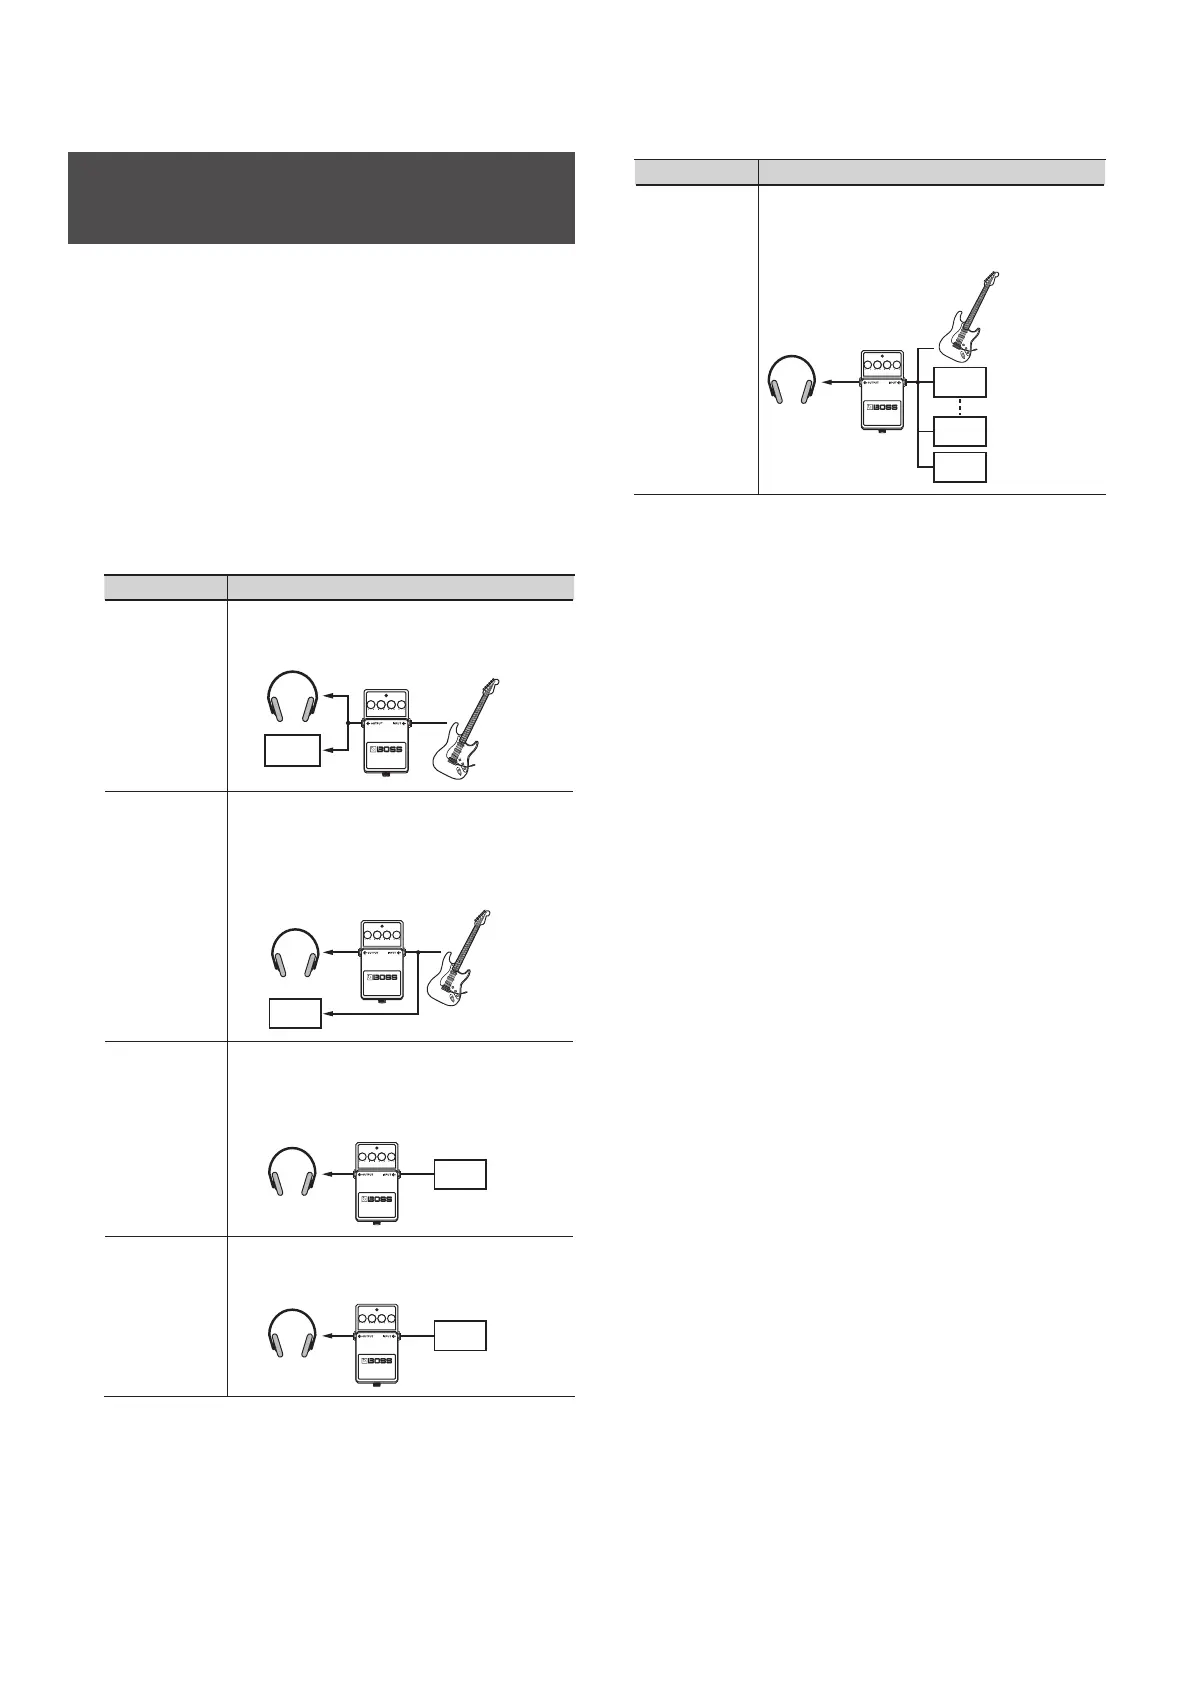
Value Explanation
MASTER
Use this setting if you want to apply the eect to the
overall sound, such as when using the eect to modify
the sound during bounce-recording, or using the eect
to achieve a special sound.
TRACK 1
(PLAY)
TRACK 8
(PLAY)
RHYTHM
4. When you’ve nished making settings, press the [EXIT]
button.