27
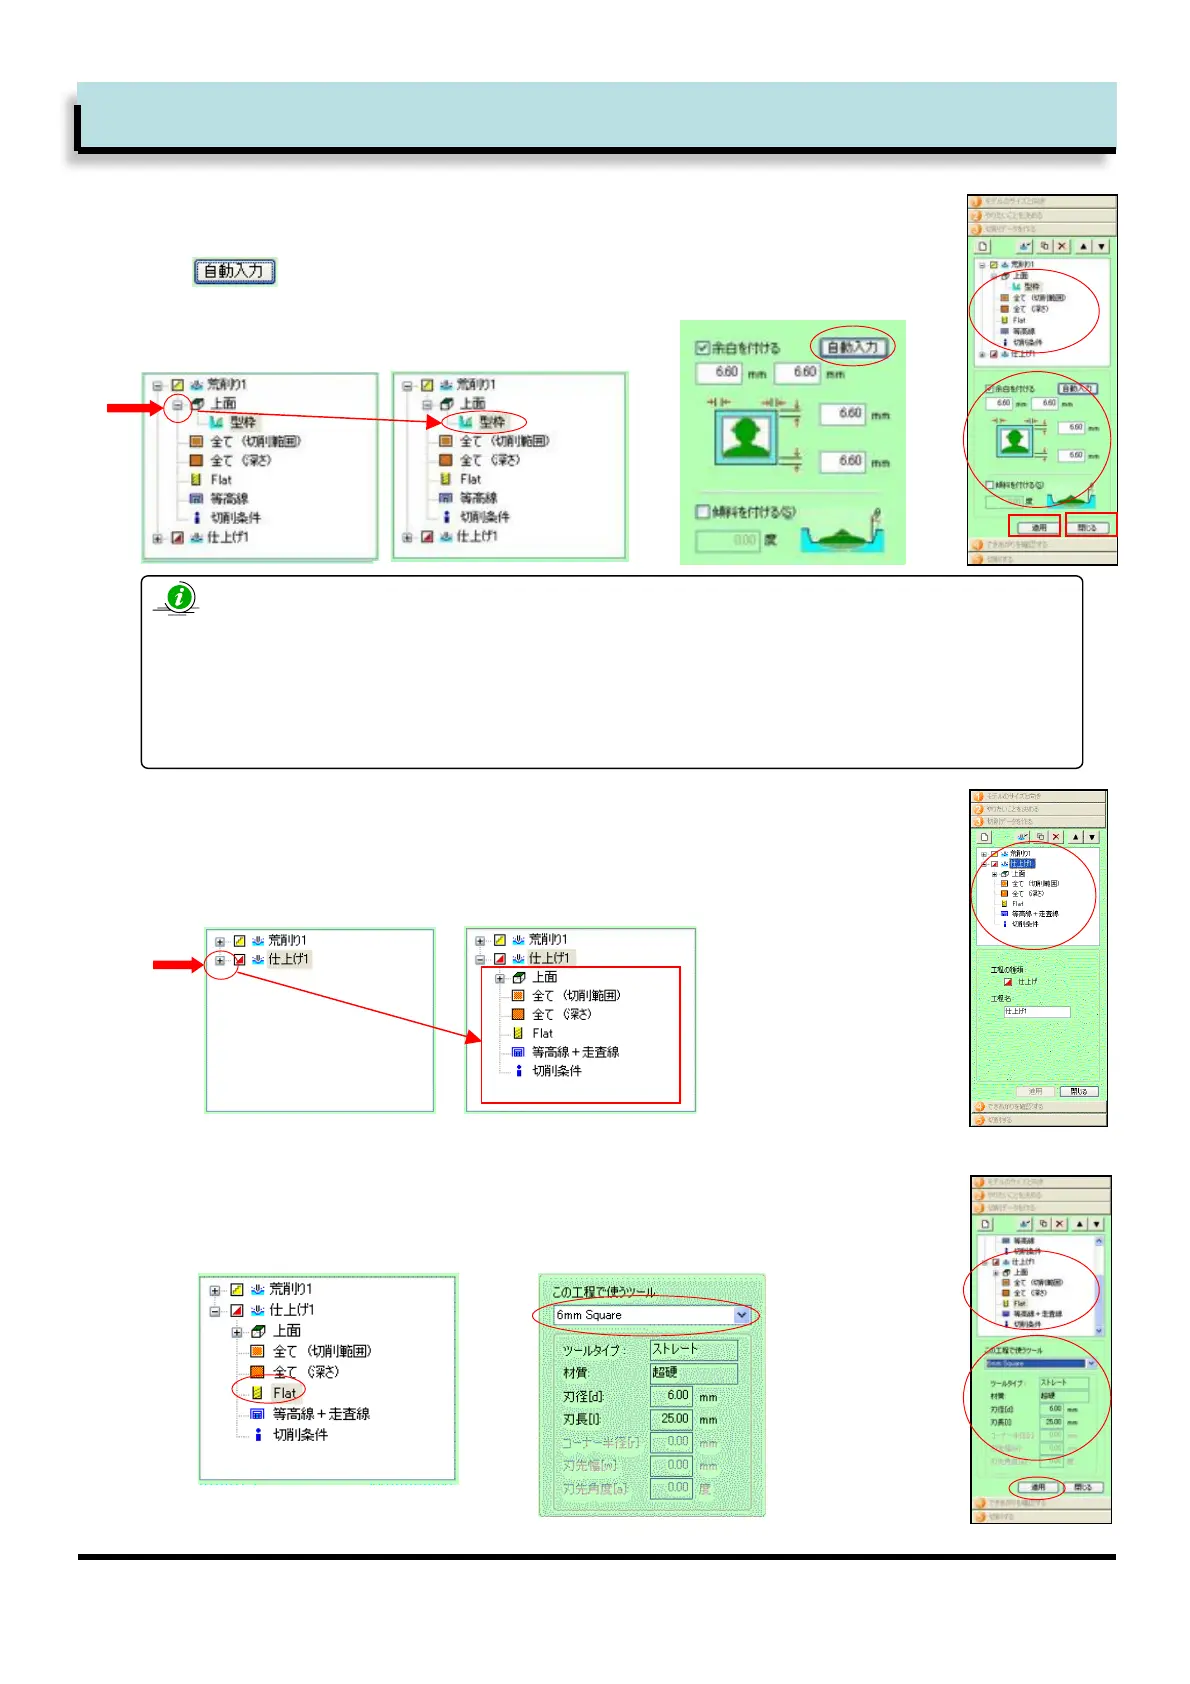
Set the margin
KClick the ‘-’ position as below to expand the frame pallet.
L+++++++Click [Automatic ], the automatic value is relative to the tool diameter.
M Click [Apply]
N Click [Close]
Step 4.+Create tool path
9
K
L
10
K
L
M
N
Set up finishing
Click the ‘+’ mark as below. The expanded pallet menu is shown.
11
K
L
M
K L
Select the tool
K1Select tool pallet.
L Select [6mm square]
M1Click [Apply]
The margin is an additional area around the model which is cut in order to allow the model
circumference to be completed.
If no margin is set, cutting is limited to the inner model area. If too large a margin is set,
cutting time will be excessive.
What is the margin?
 Loading...