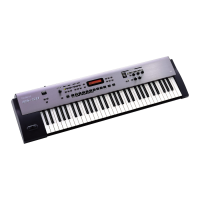
Adjusting the Volume Level for
Individual Layers
LAYER Switch
These buttons turn each layer on/o.
Lit is on, unlit is o.
LAYER LEVEL Slider
Adjusts the volume of an individual layer.
Operation Guide
Adjusting the Overall Volume
1.
Turn the [VOLUME] knob.
Min Max
Accessing the MENU Screen
1.
Press the [MENU] button.
Here you can make
system settings for the
RD-800, or manage les.
page 26
Accessing the MIDI Control Screen
1.
Press the [MIDI CONTROL] button.
Here you can control the
external layers.
page 26
Changing the Sound’s Pitch in Real
Time (Pitch bend)
While playing the keyboard, move the lever
to the left to lower the pitch, or to the right to
raise the pitch. This is known as Pitch Bend.
If you move the lever away from yourself
while also moving it to left or right, the pitch
bend and modulation
eects will be applied
simultaneously.
Transposing Your Performance
(Transpose)
You can adjust the transpose setting in semitone
steps over a range of -48–0–+48 relative to C4.
1. Hold down the [TRANSPOSE] button for
several seconds.
The current setting is shown.
2. Continuing to hold down the
[TRANSPOSE] button, press the [DEC]
[INC] buttons or a key.
When you release the [TRANSPOSE] button, the
previous screen reappears.
When the amount of transposition is set,
the Transpose function switches on, and the
[TRANSPOSE] button lights up.
MEMO
• If you press the C4 (middle C) key, the
transpose amount will be set to “0.” For
example, to have “E” sound when you play “C”
on the keyboard, hold down the [TRANSPOSE]
button and press the E4 key. The degree of
transposition then becomes “+4.”
• You can set the degree of transposition for
each of the Layer individually. For details, refer
to “TRA (Layer Transpose)” (p. 28).
NOTE
If the transpose amount is 0, the [TRANSPOSE]
button will not turn on even if you press it.
Adding Vibrato or Dynamics
(Modulation)
You can also apply vibrato by manipulating
the lever away from you. This is known as
Modulation.
If you move the lever away from yourself
while also moving it to left or right, the pitch
bend and modulation eects will be applied
simultaneously.
Disabling the Button (Panel Lock)
By engaging the Panel Lock function, you can
disable panel functions.
This prevents settings from being changed
inadvertently on stage or in other such
situations.
1. While holding down the [MENU] button,
press the [ENTER] button.
The panel lock popup screen appears for a time
and then disappear; then an icon indicating the
panel lock status appears in the upper right of
the Tone screen and the Live Set screen.
2. To disengage the Panel Lock function,
press the [EXIT/SHIFT] button twice in
succession.
Assigning Convenient Performance
Functions ([S1] [S2] Buttons)
You can assign various functions to these
buttons (p. 30).
While performing, you can press these buttons
to use the assigned functions.
12

 Loading...