20
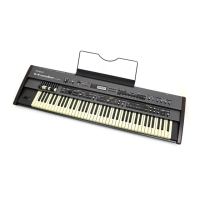
V-SYNTH
6. After copying the data, operate your computer as described in
“Disconnecting the USB connection” (p.92) of the owner’s “Closing the
USB storage screer” and manual, and then disconnect the USB cable from
the V-Synth.
7. Press the front panel PATCH PALETTE [NUMBER][8] button.
8. The display will indicate “Update Internal Disk,” and the update will be
executed.
9. When the update has been successfully completed, a beep will sound and
the display will indicate “Complete! Please Power Off.” Turn off the
power of the V-Synth.
* If the update was not successful, the display will indicate “ERROR!”
If the above steps did not result in a successful update, please check the
following two points.
• Are the V-Synth and computer correctly connected by a USB cable?
• Were the correct files copied to the drive that appeared on your
computer desktop?
Perform the update procedure from the beginning, paying careful attention to
the above points.
• Please exchange the main board Assy when you still can not update
correctly.
Test mode
Test items
0: Test Mode Top page (Identifying the version number)
1: Shock test
2: Beep Check
3: Memory Test
4: MIDI Test
5: Sound Test
6: LCD Test
7: Encoder Test
8: A/D Test1 (Bender & Modulation)
9: A/D Test2 (Volume)
10: A/D Test3 (After Touch)
11: A/D Test4 (HOLD, CTL1, CTL2)
12: Touch Panel Calibration
13: Touch panel A/D check
14: XY-PAD Calibration
15: XY-PAD A/D check
16: PC-CARD Test
17: D-Beam Adjustment
18: D-Beam Check
19: Switch & LED Test
20: Keyboard Test
21: Noise Check
22: USB Test
Required items
• PC-CARD (one pc.)
• Computer (OS must be Windows Me or Windows XP Windows 2000)
• Usb Id Set (an application for writing the USB serial number. Same as
used for the UM-880.)(#
17041153
)
• Expression pedals (three pcs.)
• Touch pen (#00900545 / included with PMA-5)
• Headphones
• Oscilloscope
• Noise meter
• MIDI cable (1 pc.)
• Audio cables (4 pcs.)
• Coaxial cables (2 pcs.)
• Optical cable (2 pcs.)
• Speakers
* Use speakers such as the MA-10D that has analog and digital inputs (optical/
coaxial 44.1KHz/48KHz/96KHz)
• A device with digital output (optical/coaxial 44.1KHz/48KHz/96KHz)
Preparations for testing
• If you will be writing the USB serial number in the [22: USB Test] item,
copy the entire “Usb Id Set” folder into the hard disk of your computer,
and start up the executable file (UsbIdSet.ext) found within this folder.
• Make speaker connections etc. as follows.
fig.connect
Button operations
Entering Test mode
• While holding down the three buttons [-OCT] + [+OCT] + [8], turn on
the power. Continue holding down the buttons until you hear the beep.
The top screen of test mode will then appear.
• In the top page, press [ ] to begin from test item 1: Shock test.
• For test items 8~5 and 7~9 the next test item will begin automatically
when each test completes successfully.
• The top page displays a list of the test items. You can use [ ] /[ ]
(or turn VALUE) to move the cursor, and then press [DEC] to directly
select a test item.
• By pressing [SHIFT] + [ ] / [ ] you can forcibly move to the next
or previous test item even if the current test has not yet been completed.
• From each test mode you can press [MODE] to return to the top page.
* For details on each screen, refer to the test item details below.
Existing test mode
Turn off the power.
CD/MD player etc.
MAIN OUT
INPUT
PHONES
DIR OUT INPUT
MA-10D etc.
OPTICAL
IN OUT
COAXIAL
IN OUT
COAXIAL
IN
COAXIAL
OUT
L R
L R
L R
L R
OPTICAL
IN
OPTICAL
OUT

 Loading...