11
Getting Acquainted with the XPS-10
How the XPS-10 Is Organized
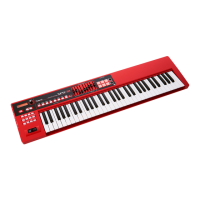
Broadly speaking, the XPS-10 consists of a controller section, a sound
generator section, and a AUDIO PAD section.
Controller Section
(controllers such as keyboard, pitch bend/modulation lever, etc.)
Playback
Performance
Sound
Generator
Section
AUDIO
PAD
Section
Controller Section
This section consists of a keyboard, pitch bend/modulation lever, the panel
buttons and sliders, and pedals connected to the side panel. The
performance information generated when you press/release a key or press
a hold pedal are transmitted as MIDI messages to the sound generator
section and/or a computer.
Sound Generator Section
This section produces the sound. It receives MIDI messages from the
controller section, AUDIO PAD section, or a computer, generates musical
sound according to the MIDI messages that were received, and outputs the
sound from the OUTPUT jacks and PHONES jack.
AUDIO PAD Section
This section is used to play back audio les saved in USB ash drive.
It can also play rhythm patterns in a variety of styles.
You can play along on the keyboard accompanied by the audio le or
rhythm pattern played by the AUDIO PAD Section.
Units of Sound
Patch
A “patch” is a unit of sound used when performing.
Drum kit
Drum kits are groups consisting of various percussion instrument sounds.
Since percussion instruments generally do not play melodies, there is no
need for a percussion instrument sound to be able to play a scale on the
keyboard. It is, however, more important that as many percussion
instruments as possible be available to you at the same time. Therefore,
each key (note number) of a drum kit will produce a dierent percussion
instrument.
Performance
A performance has a patch or drum kit assigned to each of the 16 parts,
and can simultaneously handle 16 sounds.
Part
A “part” is something to which you assign a patch or drum kit. Each
performance has sixteen parts, and you can assign a patch or drum kit to
each part.
About the Eects
The XPS-10 has built-in eect units, and you can independently edit each
unit’s settings.
Multi eects
The multi-eects are multi-purpose eects that completely change the
sound type by changing the sound itself. Contained are 78 dierent eects
types; select and use the type that suits your aims. In addition to single
eects such as distortion or anger, a broad range of other eect types are
provided. Some multi-eect types include chorus or reverb, but these are
independent of the chorus and reverb eects described below.
In Performance mode, you can use three dierent multi-eects
simultaneously. These are called MFX1, MFX2, and MFX3 respectively.
Chorus
Chorus adds depth and spaciousness to the sound. You can select whether
to use this as a chorus eect or a delay eect.
Reverb
Reverb adds the reverberation characteristics of halls or auditoriums. Five
dierent types are oered, so you can select and use the type that suits
your purpose.
About the Audio Files
Audio les saved on a USB ash drive can be assigned to each audio pad
and played by tapping the pads, or imported and played from the
keyboard.
AUDIO PAD
Use these pads to play audio les saved on a USB ash drive.
Assigning audio les to the keyboard
Audio les (WAV format only) can be imported into the XPS-10 itself and
assigned to the keyboard so that you can play them.
Basic Operation of the XPS-10
The [SHIFT] Button’s Function
By holding down the [SHIFT]
button and pressing another
button, you can access the screen
for making settings related to that
button.
For example, if you hold down the
[SHIFT] button and press the
[MENU] button, the WRITE screen
will appear.
For details, refer to “List of
Shortcut Keys” (p. 48).
Saving Your Settings
Hold down the [SHIFT] button and press the [MENU](WRITE) button; the
WRITE screen appears.
In the WRITE screen you can save the currently selected patch,
performance, and eect settings.

 Loading...