16
R62 / R62T / R65 / R65T - Rev. A
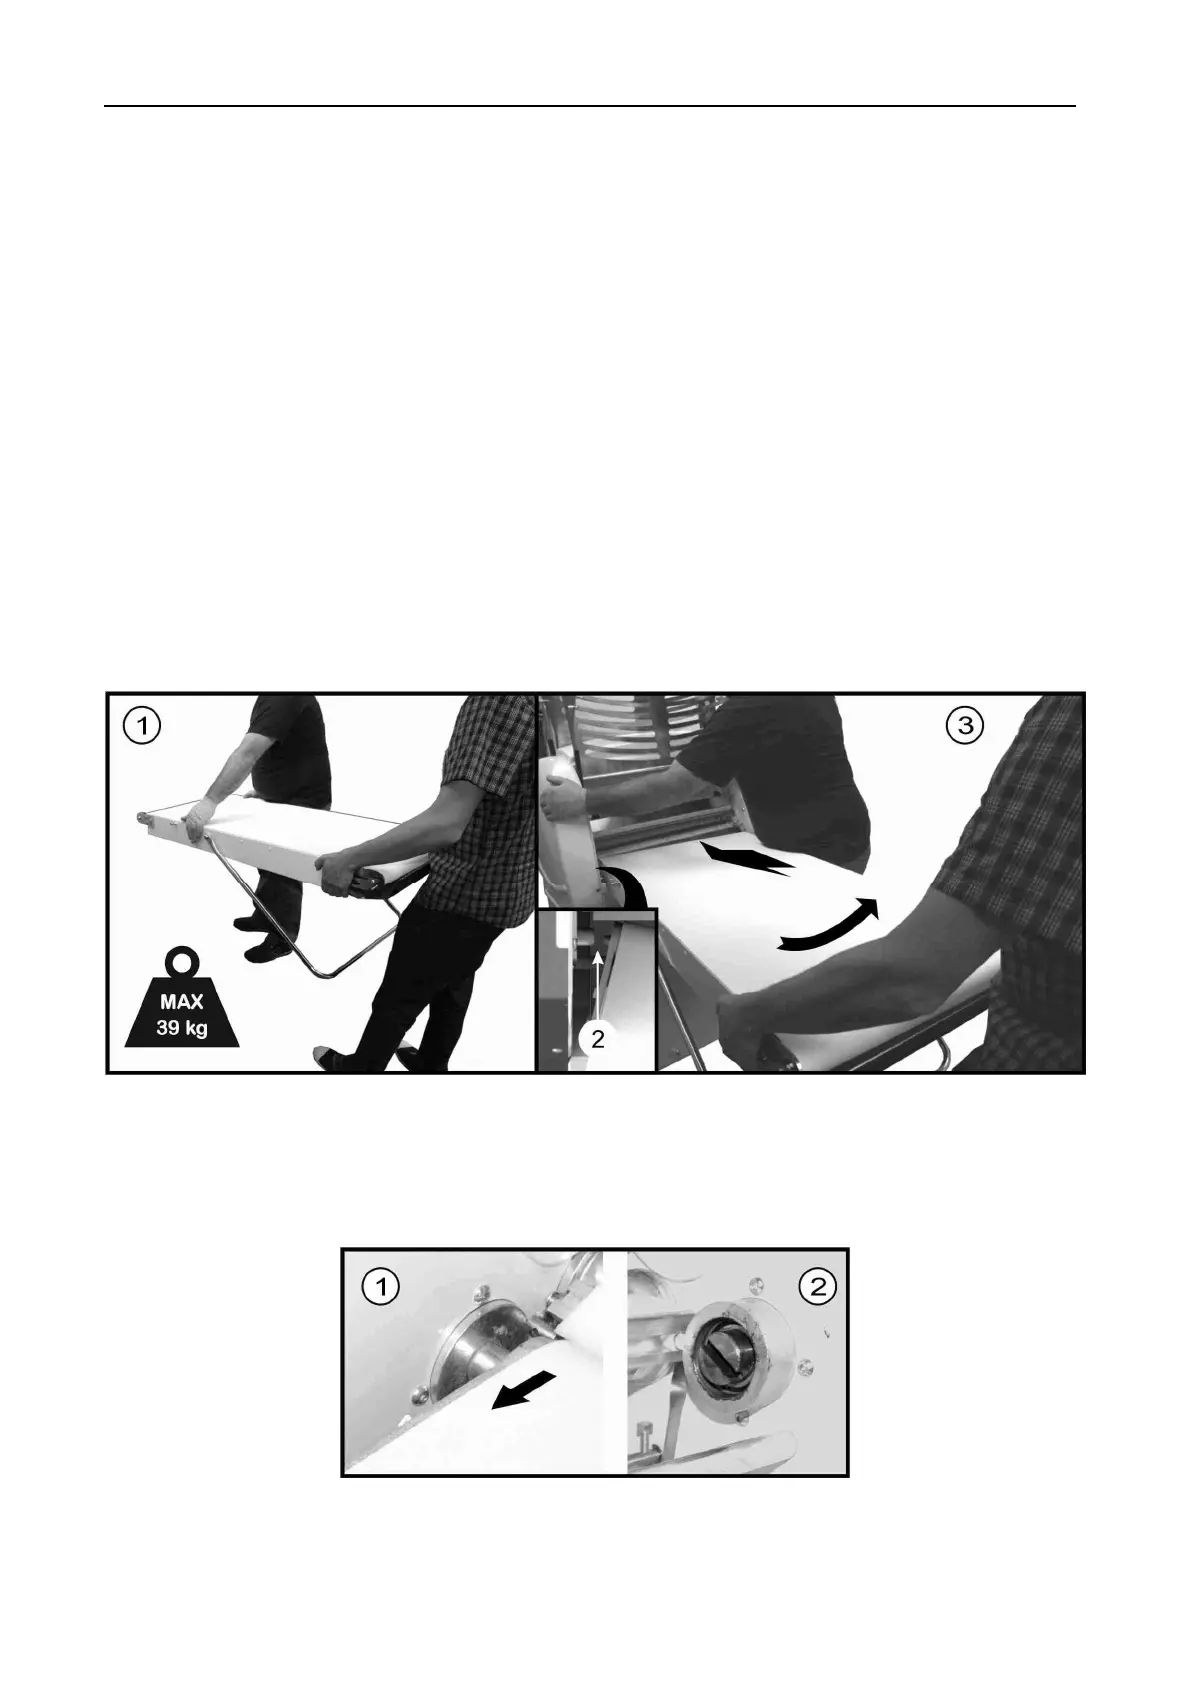
3.4.7 ASSEMBLING AND DISASSEMBLING THE WORK TABLES
Before assembling or disassembling the work tables, take the main switch to O (OFF) and unplug the
power plug, to prevent the machine from starting
To correctly assemble the tables, two people must operate as described hereafter and in accordance
with Figure 11 and Figure 12:
• Lift the table as illustrated in ref. 1 Figure 11. Pay attention to the grease on the two pins ref.
1 and 2 Figure 11
• Centre the back pin ref. 2 to Figure 11in the corresponding support located on the back
shoulder
• While the operator positioned outside holds the weight of the table, the second operator
grabs the machine's shoulders and uses his hip to push the table, as per ref. 3 in Figure 11, in
the direction indicated by the arrow (towards the back wall)
• At the same time, the other operator must slightly rotate the table, as indicated by the arrow,
to insert the pulling pin ref. 2 Figure 12
• After inserting the table, rest the work table support ref. 8 Figure 1on the corresponding
supports located on the base
• Gently move the belt in the direction indicated by the arrow ref. 1 Figure 12so as to correctly
insert it inside the slot, until you hear a clicking sound and the belt locks in position
Figure 11
Refer to table for the specific weight of the tables 2.2
TECHNICAL FEATURES
.
To disassemble the tables, follow the instructions given for assembly operations in the reverse order.
Once the table has been disassembled, rest it onto a stable horizontal surface.
Figure 12
 Loading...