Page 54 RS-500/600 Series Doors Part No 4801-5154 Rev 01-2017
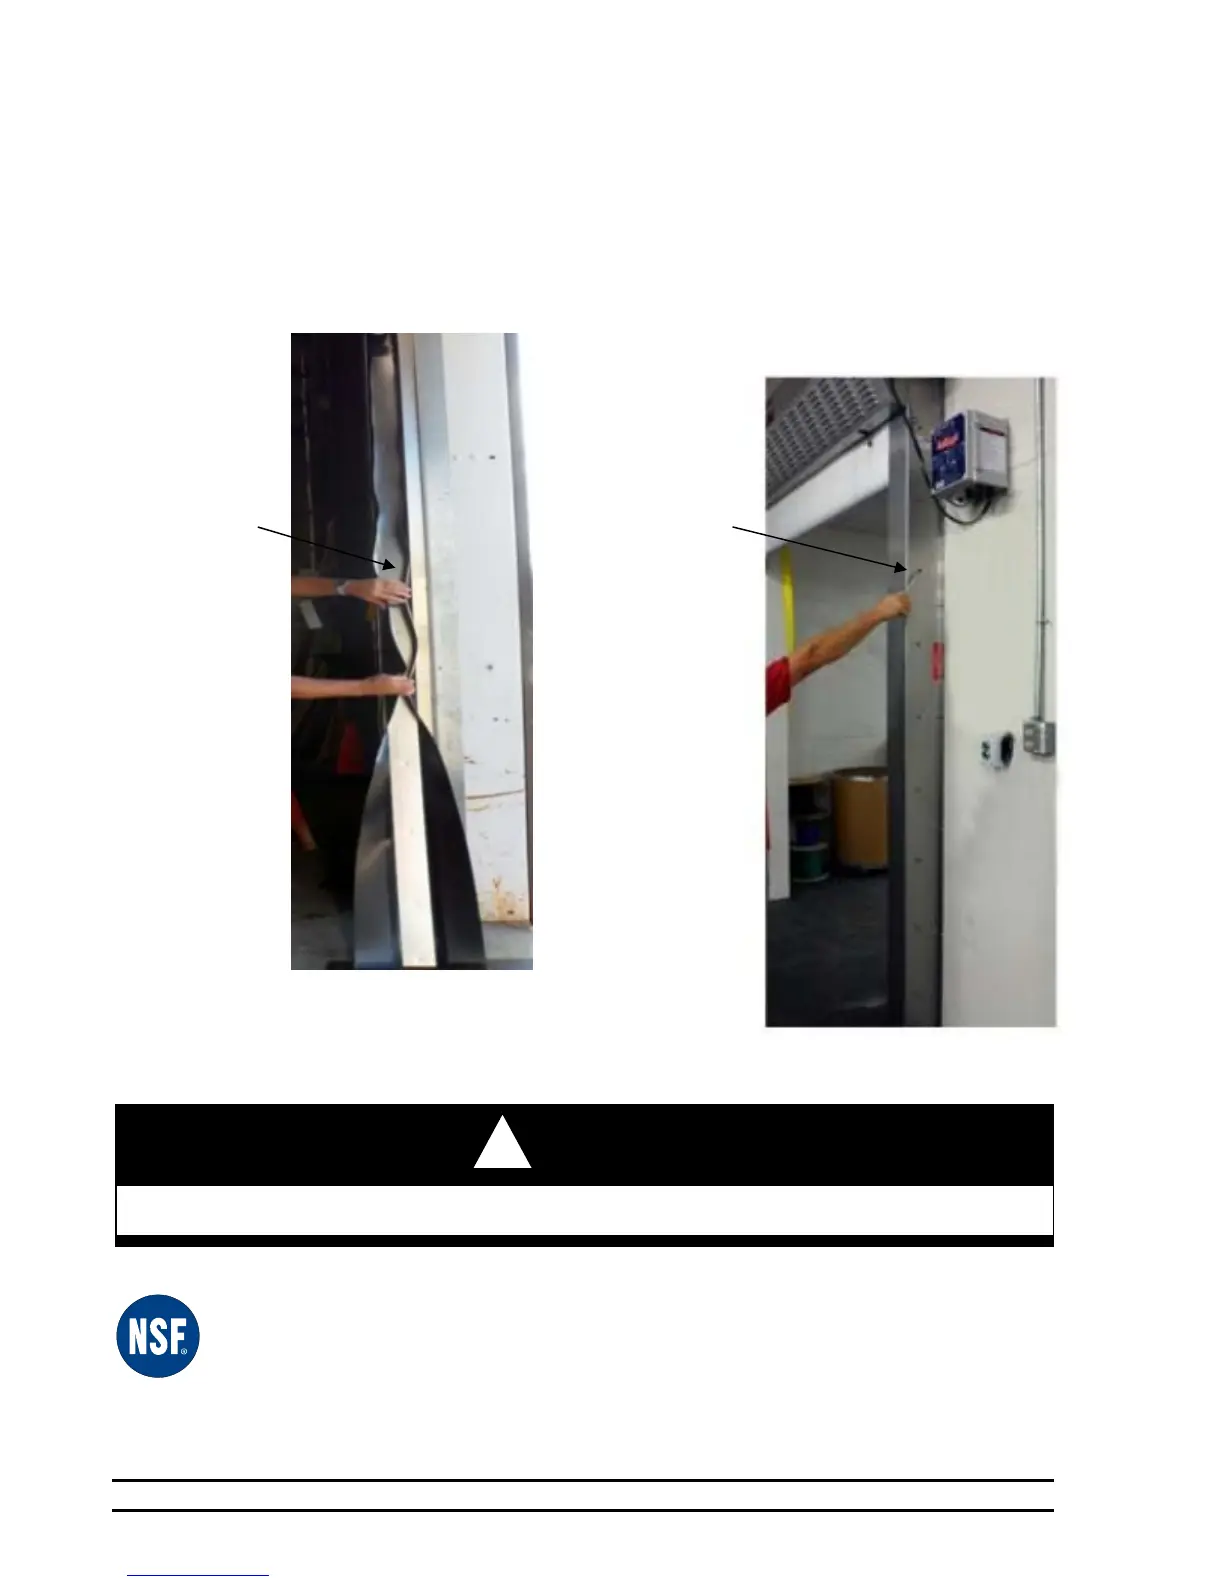
4. Grab and hold the PIM plate assembly and floating in a manner that will prevent the floating material from
coming off of the PIM bolts. Re-install the PIM plate assembly in the track starting with the top PIM bolt.
Align the PIM bolts with the holes in the track (Diagram 35G). Firmly press the PIM bolts into their associated
holes and attach the PIM nuts to the PIM bolts but do not tighten until all bolts have been installed. After all of
the PIM bolts have been installed, tighten the nuts pulling the PIM plate firmly against the track (Error!
Reference source not found.).
Diagram 35G
Diagram 35H
Warning!
Do not over tighten!
Note: NSF Certified doors are equipped with a black rubber boot that covers the
PIM bolts. Replace the black rubber boots on the PIM bolts that were
removed in Step 4.
Squeeze the
floating around
the PIM Plate
and push the top
in the track
assembly first.
Align all PIM
bolts with holes
in the track
assembly
After all of the
PIM bolts have
been installed,
tighten the nuts
pulling the PIM
plate firmly
against the track
!
 Loading...
