3 x Installation
19
FA ROTEX Solaris - 08/2007
3.3 Installing the connection pipes
3.3.1 Fitting the connection pipe to the solar panel
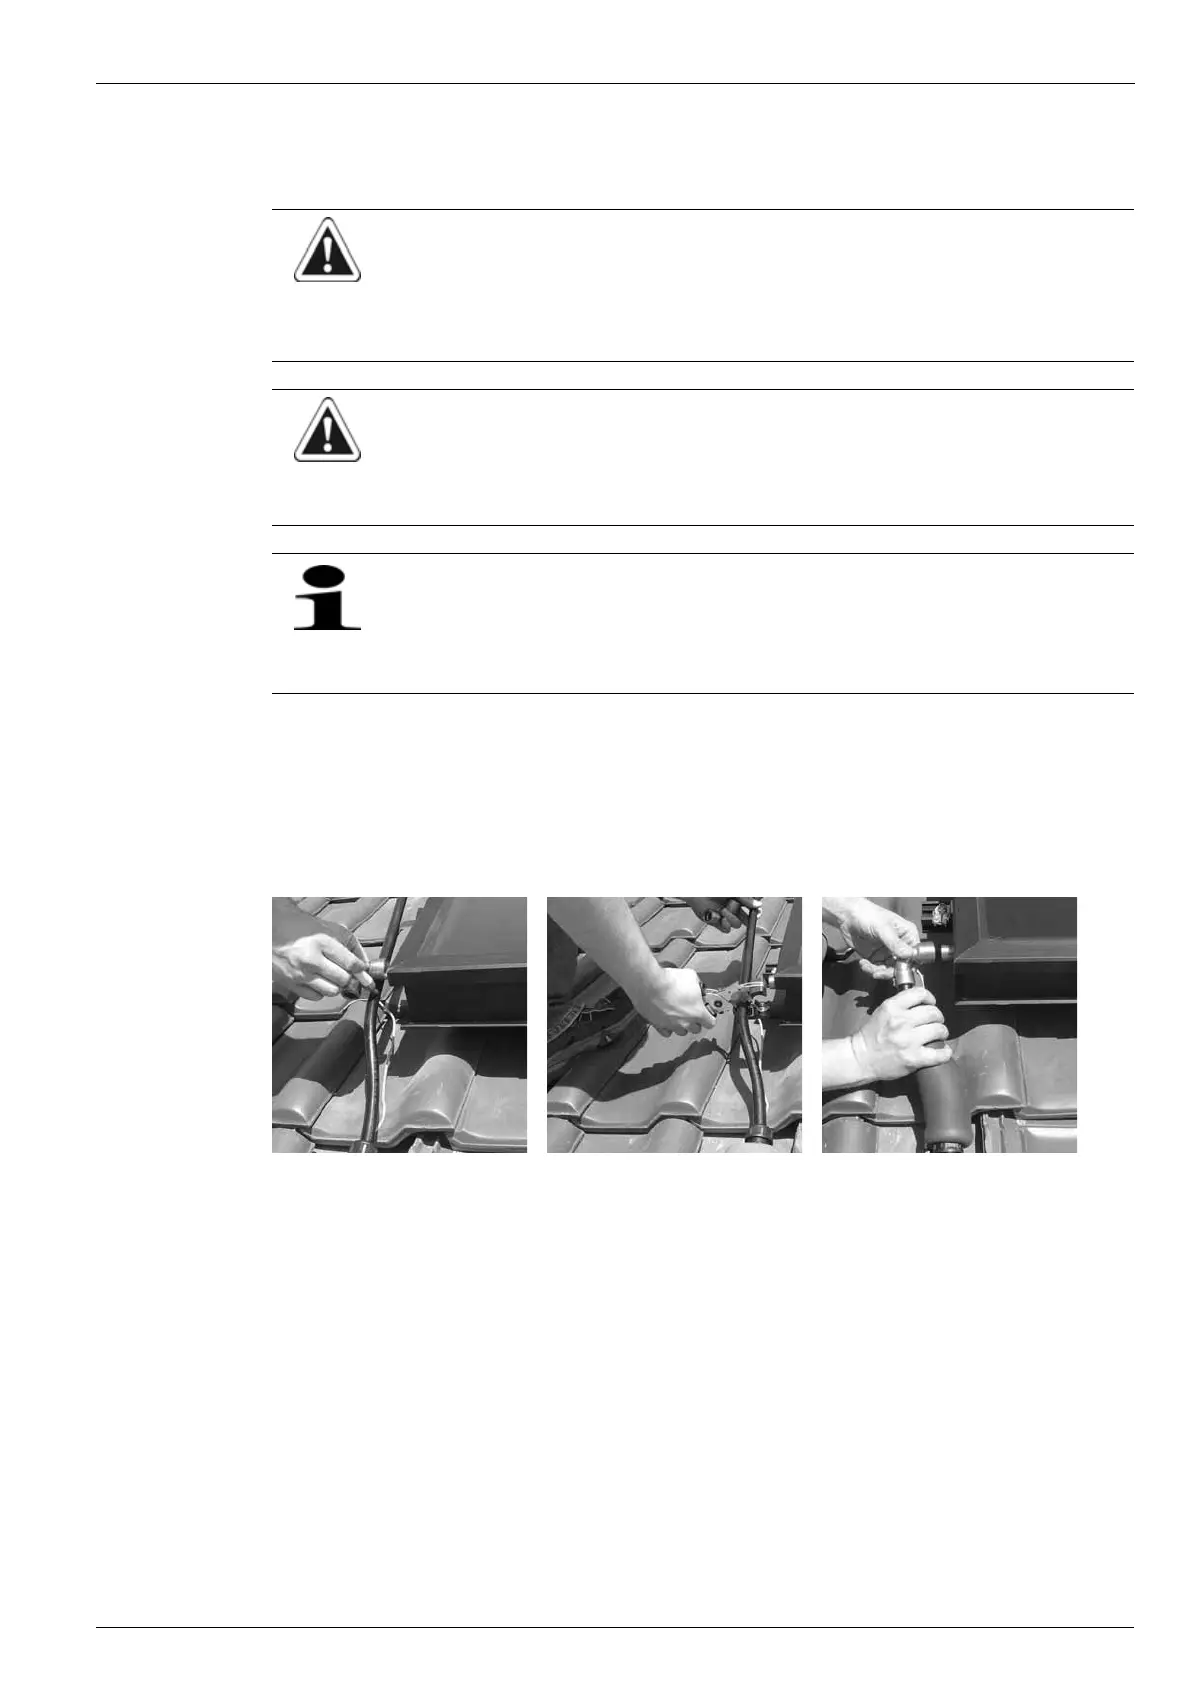
1. Run the connection pipe right up to the solar panel on the roof and attach it with pipe clips at suitable points.
2. Shorten the connection pipe to the required length (Fig. 3-43).
3. Deburr the pipe end (protection for the O-ring in the push-in fitting) and attach the fitting.
4. Connect the feed (at the top of the solar panel/VA15 Solar) or outflow connection pipe (at the bottom of the solar
panel/VA 18 Solar) to the connection pipe (Fig. 3-44).
CAUTION!
In longer pipe runs with minimum gradient, water pockets can form due to thermal expansion of the plastic
pipes between the mounting points:
• Either attach the pipe to a rigid supporting structure (e.g. mounting rail, pipe, etc.).
• Or run the pipe through a drain pipe with gradient (e.g. HT pipe).
CAUTION!
Siphon action must never be allowed to occur anywhere in the pipe run between storage tank and solar panel.
This could lead to functional faults and even material damage.
• Always make sure that pipe runs have a continuous gradient of at least 2%.
The differences between the connection points and dimensions of the feed connection pipe (at the top of the
solar panel/VA 15Solar) and the return flow connection pipe (at the bottom of the solar panel/VA 18 Solar)
make it impossible to mistake one pipe for the other.
• However, you must ensure that the feed and return flow pipes on the solar panel are labelled as heat
generators.
Fig. 3-42 Mark the connection pipe Fig. 3-43 Shorten it to length Fig. 3-44 Push the fitting onto the
coupling