3 x Installation
34
FA ROTEX Solaris - 08/2007
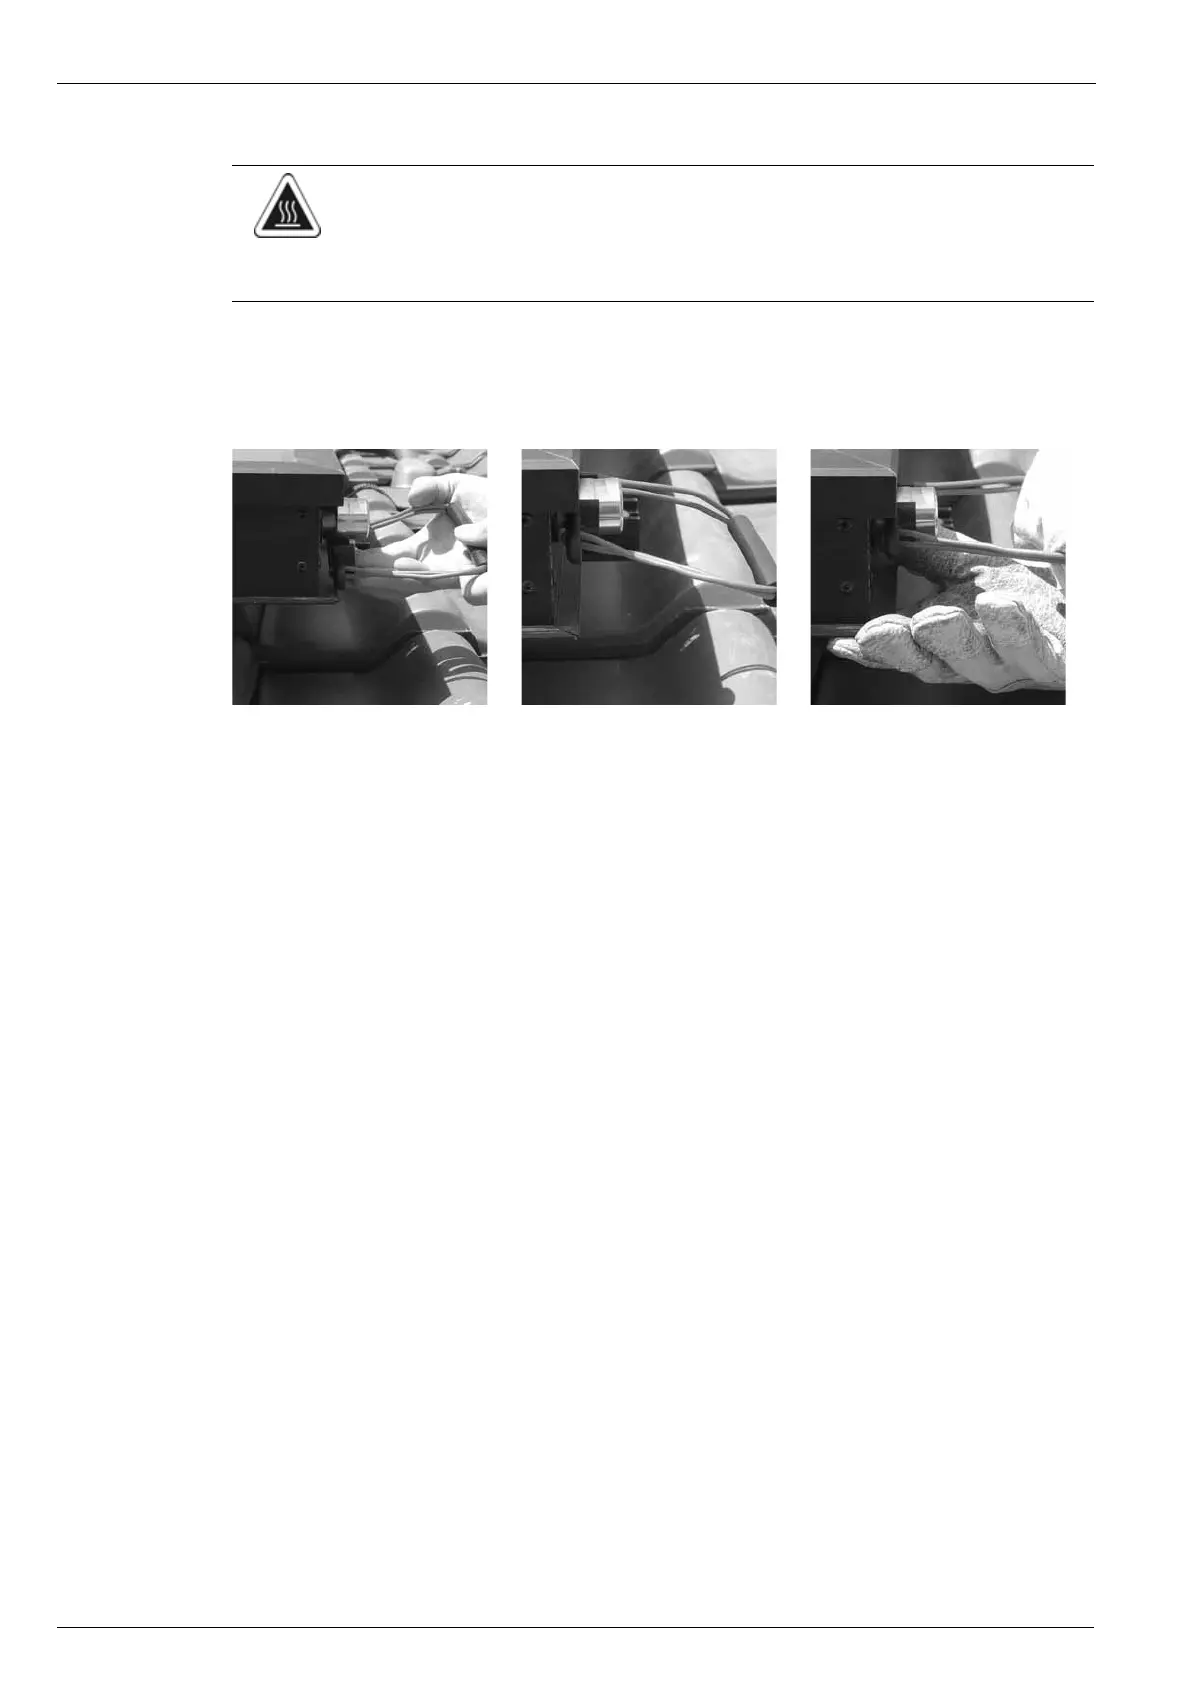
3.4.9 Uninstalling the solar panels
If the solar panels are to be separated, the fittings or the end cap must be removed as follows:
1. Snap into place the loosening tool behind the fitting (Fig. 3-84 and Fig.3-85).
2. Remove the fitting (Fig. 3-86).
3.4.10 Additional notes about connection pipes
If onsite conditions make it impossible or very difficult to install the connection pipes in the manner described above, slight
deviations from the specified installation are permitted. Hereby, the feed pipe may not be larger than 18 x 1 mm.
1. If vertical copper pipes are already installed in the house, they can be used if a continuous connection pipe gradient can be
guaranteed.
2. In the case of a two-way solar panel connection, if a continuous gradient from the second roof duct to all the pipe sections
cannot be achieved, this duct can be raised in relation to that of the feed pipe (e.g. by using a ventilating tile). This is possible
if:
– the highest point if the feed pipe is not more than 12 m above the storage tank mounting floor level,
– the internal diameter of the feed pipe is not more than 13 mm, and
– a continuous rise of the feed pipe to the highest point, as well as a continuous gradient to the storage tank is ensured.
3. If the required pipe length exceeds the maximum length calculated in Table 3-2, a copper connection pipe with larger pipe
dimensions may be installed.
4. For pipe runs in which only a limited gradient can be achieved, copper pipe may be used on site. This avoids the need for
a rigid supporting structure and prevents the formation of water pockets due to expansion of the plastic pipes.
CAUTION!
Danger of burns from hot solar panel couplings and hot solar panel frame.
• Do not touch hot parts.
• Wear protective gloves.
Fig. 3-84 Step 1 Fig. 3-85 Step 1 Fig. 3-86 Step 2