3 x Installation
28
FA ROTEX Solaris - 08/2007
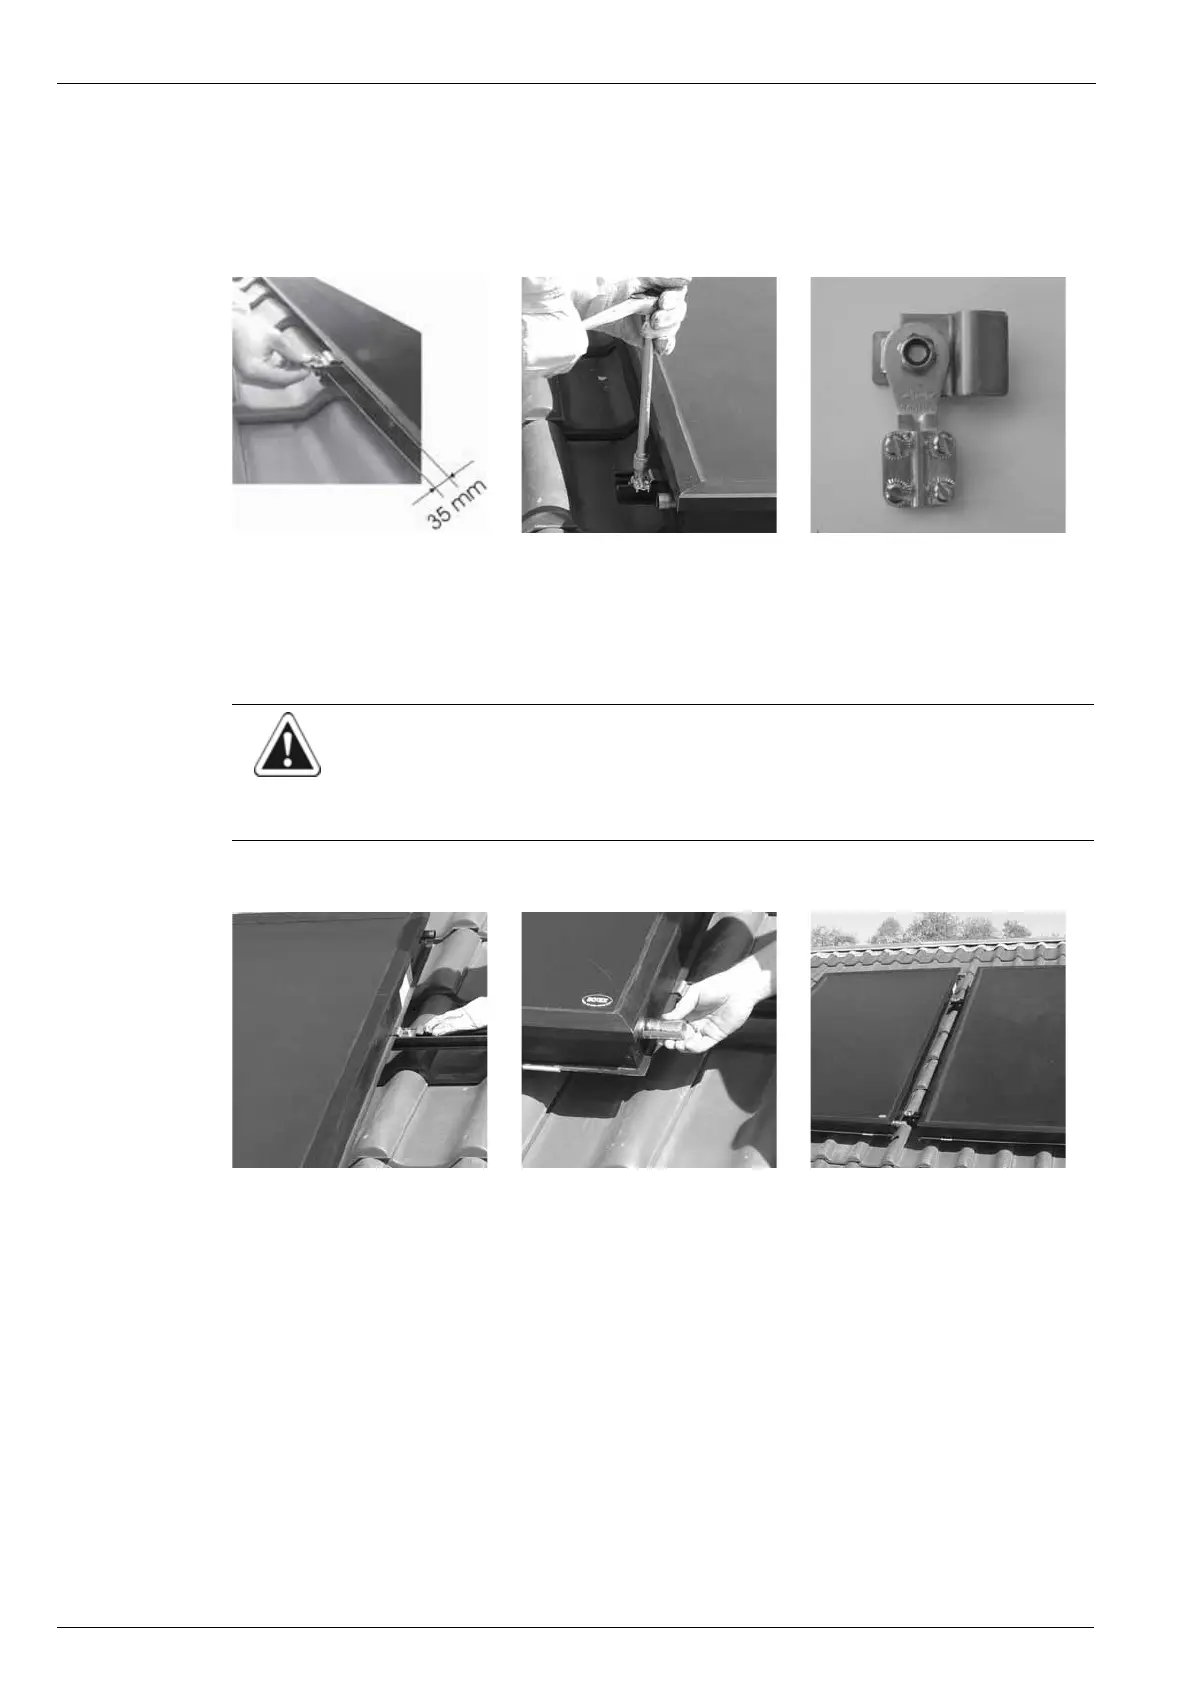
5. By moving it sideways, align the solar panel against the left ends of the two mounting rails until the distance of the solar
panel profile to the mounting rail outer edge is 35 mm (Fig. 3-61).
6. Now push the single clip with the equipotential bonding terminal into the mounting rail close to the return flow coupling and
secure it with self-locking nuts (Fig. 3-62).
7. Then attach the single clip to the upper mounting rail with the self-locking nuts.
3.4.5 Installing the other solar panels
1. Insert dual clips into the upper and lower mounting rails and push them up to the previously installed solar panel (Fig. 3-64).
2. Mount the fitting (Fig. 3-65).
3. Lift the next solar panel onto the mounting rails (see Section 3.4.4, step 2) and lower into the securing clips at a distance
from the fittings (Fig. 3-66).
Fig. 3-61 Correct mounting position Fig. 3-62 Securing the equipotential
bonding terminal
Fig. 3-63 Clip with equipotential bonding
connection
CAUTION!
Careless handling can damage the components, resulting in difficulties during installation.
• Never crush or compress solar panel connection pipes.
• Check for burrs on connection pipe, deburr if required.
Fig. 3-64 Insert the dual mounting clip Fig. 3-65 Push the fitting onto the coupling Fig. 3-66 Positioning the next solar panel