O&M Manual –90E1720004
Table of Contents Page 5 of 52
List of Figures
Figure 1: Lifting with an Overhead Crane and Eyebolts........................................................................................... 10
Figure 2: Lifting with an Overhead Crane, Integral Lifting Angles and Cables or Chains....................................... 11
Figure 3: Lifting with Sling Rigging......................................................................................................................... 11
Figure 4: Forklift Safety Strap................................................................................................................................... 12
Figure 5: Anchoring the Switch. ...............................................................................................................................15
Figure 6: Bypass-Isolation Power Connections (400A 4P shown)............................................................................ 16
Figure 7: Wrapping the Cables.................................................................................................................................. 17
Figure 8: Wrapping the Space between Cables......................................................................................................... 18
Figure 9: Finish Wrapping the Space between Cables.............................................................................................. 18
Figure 10: Continue Wrapping the Cables ................................................................................................................ 18
Figure 11: Securing Cables to Supports (optional).................................................................................................... 19
Figure 12: Tying the Rope Ends Together ................................................................................................................ 19
Figure 13: Locate the TB5 Terminal Block............................................................................................................... 20
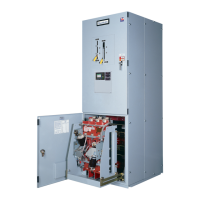
Figure 14: Bypass Switch and Accessory Panel........................................................................................................27
Figure 15: Transfer Switch Cradle ............................................................................................................................ 28
Figure 16: Sliding out the cradle rails. ..................................................................................................................... 31
Figure 17: Withdrawing the Transfer Switch Cradle 100-800A .............................................................................. 31
Figure 18: Rollout Stop for 1000-4000A Bypass-Isolation Switches ....................................................................... 32
Figure 19: Withdrawing the Transfer Switch Rollout 1000-4000A......................................................................... 32
Figure 20: Transfer Switch Position Indicators........................................................................................................ 34
Figure 21: Internal Manual Operators...................................................................................................................... 34
Figure 22: External Manual Operator (EMO) Handle............................................................................................... 35
Figure 23: External Manual Operator (EMO) Operation .......................................................................................... 35
Figure 24: Graphical Control Panel Overview.......................................................................................................... 36
Figure 25: Summary of Function Key Operations .................................................................................................... 37
Figure 26: Summary of LED Indicators.................................................................................................................... 38
Figure 27: Summary of Control Pushbuttons............................................................................................................ 38
Figure 28: Summary of the Graphical Display.......................................................................................................... 39
 Loading...