ENGLISH
14
a. With [--:] highlighted, choose the hour. Press the
confi rm button.
b. With [:--] highlighted, choose the minute. Press
the confi rm button.
10. Press the confi rm button.
11. On the [Setup] screen, press the confi rm button.
12. Choose a prefered cut height. Press the confi rm
button.
13. Press the confi rm button.
14. To set up the docking direction, select one of the
following:
● [CW]: The mower will go back to the charging
station in a clockwise direction.
● [CCW]: The mower will go back to the charging
station in a counterclockwise direction.
15.
Press the confi rm button.
16. To set up the mowing schedule, select one of the
following:
● [YES]: Set up the mowing schedule. For
instructions, refer to the “Setting a schedule”
section.
● [NO]: Set up the mowing schedule at a later
time.
If [NO] is chosen on the [Schedule Setup] screen,
perform a perimeter test run.
17.
On the [Perimeter Test Run] screen, read through
the information and select one of the following:
● [Start test]: Start the perimeter test run.
● [Do it later]: Perform the perimeter test run at
a later time.
18.
Read the warning text, then press the confi rm
button to continue.
19. Read and follow the instructions on the display
screen. Press the confi rm button to continue.
20. A [Perimeter Test Run] screen appears. Close the
control panel cover to start testing.
NOTE: To stop the perimeter testing, press the stop
button. Follow the instructions on the control panel
screen of the product to either continue test run or
cancel test run.
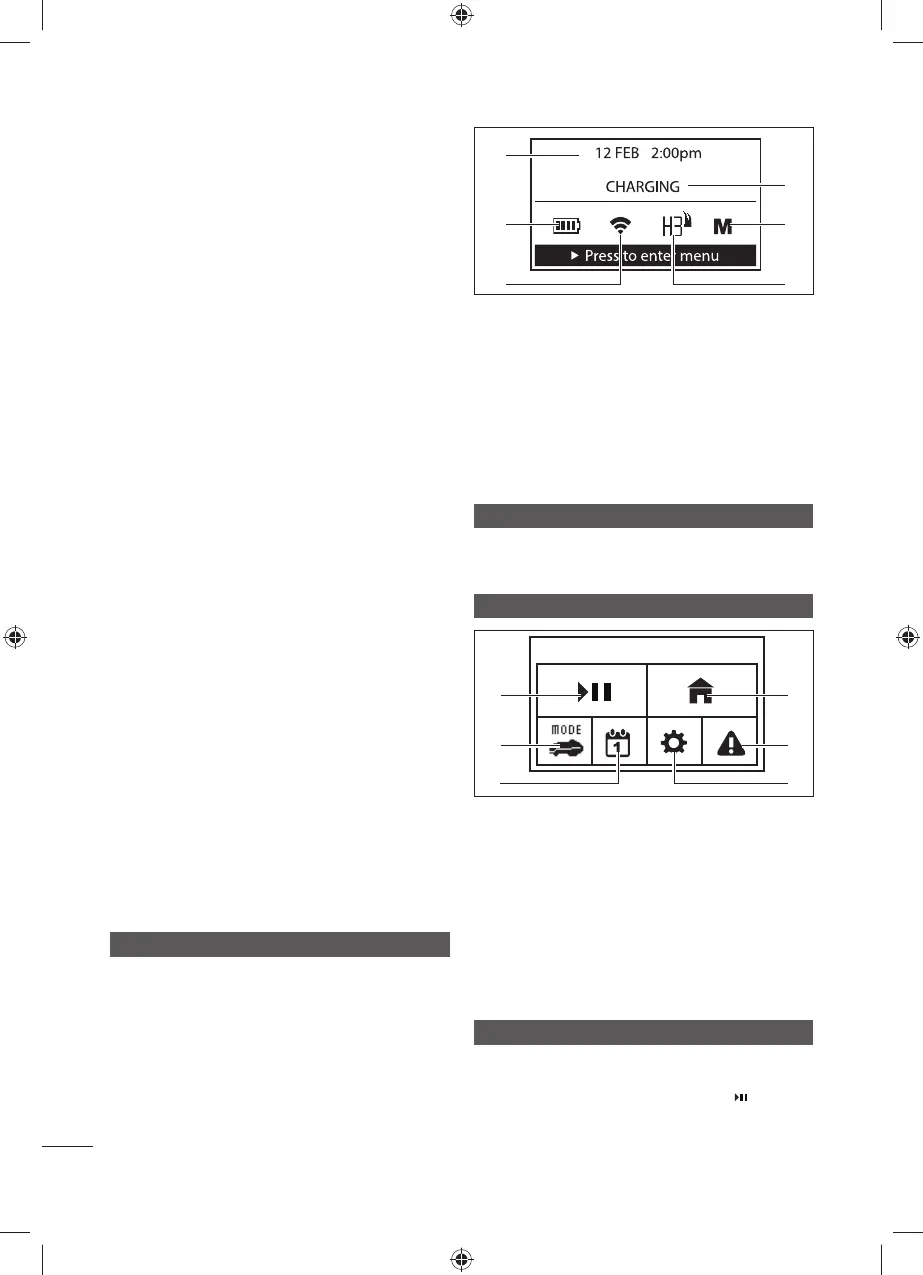
LCD SCREEN OVERVIEW
DASHBOARD
1
2
34
5
6
The dashboard provides information of the product
status and current settings.
1. Displays the current status of the product.
2. Specifi es the cutting operation of the product.
3. Displays the cut height.
4. Indicates the Wi-Fi connection strength.
5. Displays the current battery charge.
6. Displays the date and time.
ENTERING SECURITY PIN
1. Enter your security PIN.
2. With
[Confi rm] highlighted, press the confi rm button.
MENU
Start
1
2
34
6
5
Access the menu to perform the following tasks:
1. Direct the product to return to the charging station.
2. Check active alerts and historical alerts.
3. Confi gure the mower parameters, advanced
settings, and perimeter test run.
4. View, add, edit, or delete schedules for cutting.
5. Select the mow to schedule, manual, or perimeter
trim modes.
6. Start or resume the product cutting operation.
STOPPING/RESUMING THE PRODUCT
● To stop the product, press the stop button. The
control panel cover opens
● To resume the product, choose [
] from the
menu, then close the control panel cover.

 Loading...