EasyManuals Logo

SAJ CHS2 Series User Manual

SAJ CHS2 Series
38 pages
To Next Page IconTo Next Page
To Previous Page IconTo Previous Page
Page #21 background imageLoading...
Page #21 background image
CHS2 Series
34
EMS
1
NC
2
NC
3
NC
4
NC
5
NC
6
NC
7
RS485-A
8
RS485-B
RS485_PAR1/RS485_PAR2
1
NC
2
NC
3
NC
4
NC
5
NC
6
NC
7
RS485-A
8
RS485-B
METER
1
RS485-B
2
RS485-A
3
NC
4
RS485-B
5
RS485-A
6
NC
7
RS485-A
8
RS485-B
BMS_1/ BMS_2/ BMS_3
1
Shut downBMS
2
GND_S
3
NC
4
CANH
5
CANL
6
NC
7
NC
8
NC
Parelle1/ Parelle2
1
SYN B
2
SYN A
3
SYN B
4
SYN A
5
SYN B
6
SYN A
7
CANL
8
CANH
LAN
1
TX_D1+
2
TX_D1-
3
RX_D2+
4
BI_D3+
5
BI_D3-
6
RX_D2-
7
BI_D4+
8
BI_D4-
5.4 Connecting the AC Cable
Type
Cable cross-sectional areamm²)
Conductor material
Range
Recommend
CHS2-29.9~63K-T4/T5/T6-X
35~70
50
Copper
Grounding cable cross-sectional area (mm²): 25
Table 5.1
Recommended specifications of GRID cables
Note: If the grid-connection distance is too far, please select an AC cable with larger diameter as per the actual
condition.
Type
Cable cross-sectional areamm²)
Conductor material
Range
Recommend
CHS2-29.9~63K-T4/T5/T6-X
16~25
25
Copper
Grounding cable cross-sectional area (mm²): 25
Table 5.2
Recommended specifications of GEN and Back-up cables
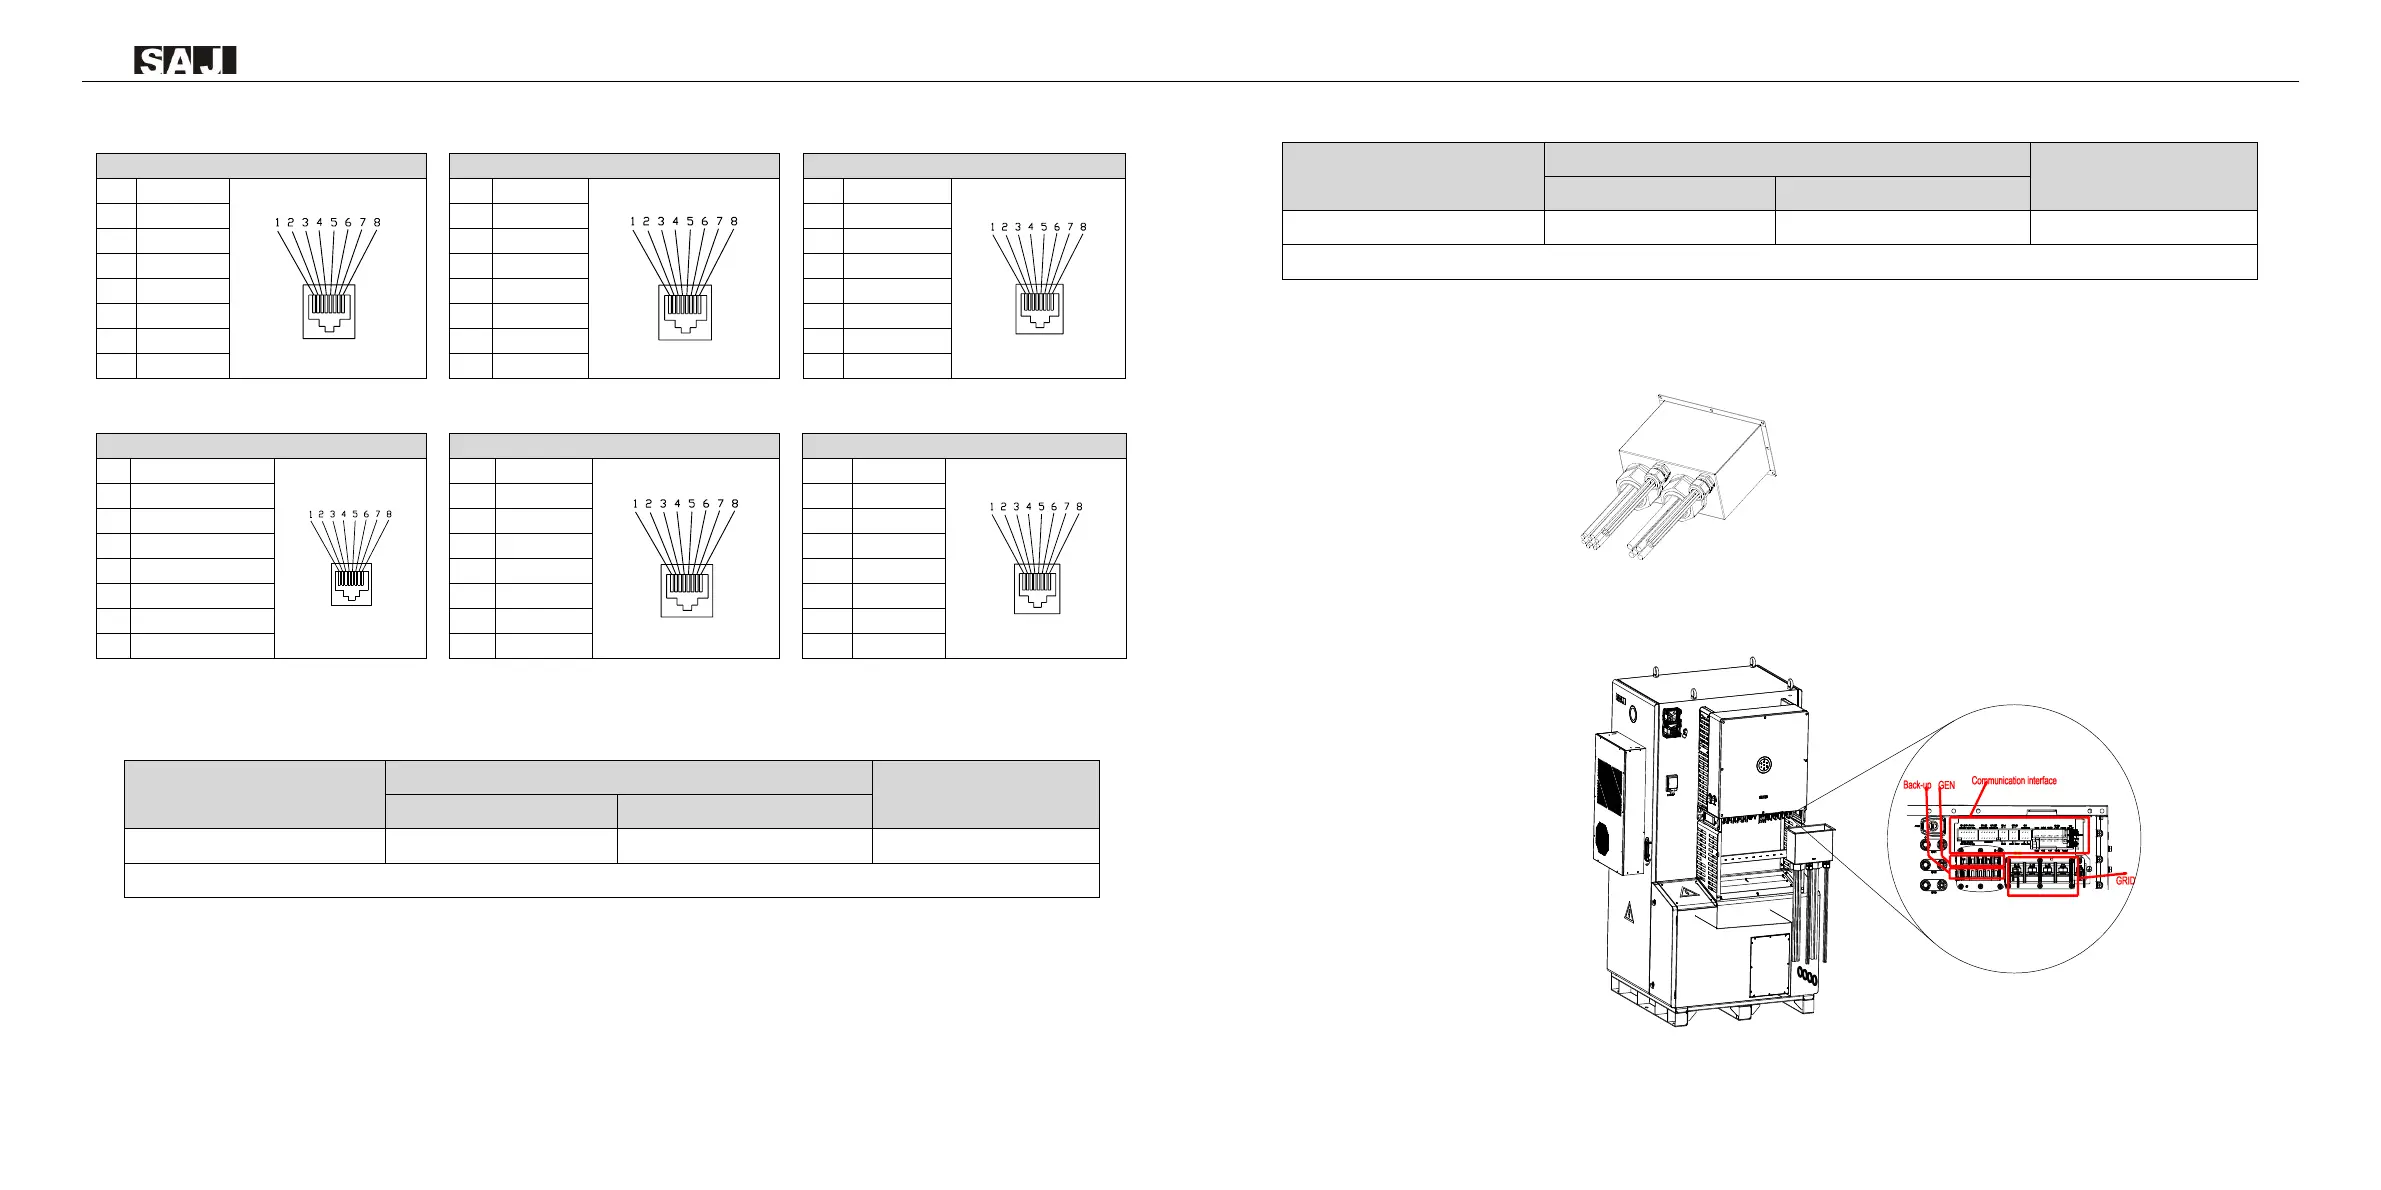
Procedure:
Step 1: Pass the cables to be connected through the corresponding waterproof holes.
Figure 5.13
Thread the cables
Step 2: Connect the communication cable to the corresponding port. GRID,GEN and Back-up Fix the cables
according to conductor marks of L1,L2,L3,N and PE.
Figure 5.14
Connect the Cables

Questions and Answers:

Question and Answer IconNeed help?

Do you have a question about the SAJ CHS2 Series and is the answer not in the manual?

SAJ CHS2 Series Specifications

General IconGeneral
BrandSAJ
ModelCHS2 Series
CategoryStorage
LanguageEnglish

Related product manuals