Do you have a question about the Sam4s ellix 30 and is the answer not in the manual?
Details FCC and Canadian regulations for the device, including interference limits and user responsibilities.
Provides information on FCC RF radiation exposure limits and safe operating distances.
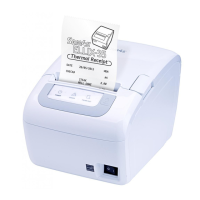
Lists the main features of the ELLIX 30/40 receipt printer, including speed, noise, interfaces, and printing capabilities.
Warns about static electricity damaging semiconductor devices and advises precautions.
Notes that the power outlet should be near the equipment and easily accessible.
Explains the WEEE directive for electronic equipment disposal and the meaning of the crossed-out dustbin symbol.
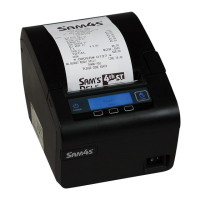
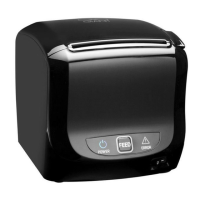
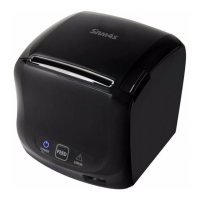
Illustrates the ELLIX 30 model and its LED-type control panel components.
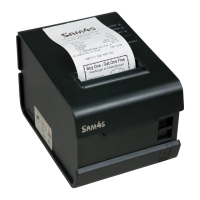
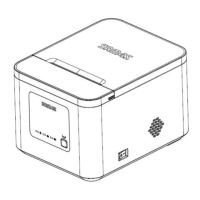
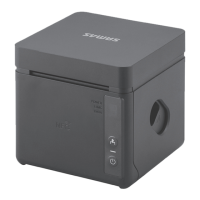
Illustrates the ELLIX 40 model with its LED and LCD type control panels.
Lists the items included in the printer box and advises to contact the dealer if any are missing or damaged.
Explains how to connect interface, USB, drawer kick-out, and power supply cables to the printer's rear panel.
Details the steps for connecting the printer to a computer using an interface cable.
Provides instructions and warnings for connecting a cash drawer to the printer's dedicated port.
Guides on connecting the power supply, including warnings about using the correct adapter and voltage.
Explains how to install or replace the paper roll, with a caution about the sharp edge of the tear bar.
Describes how to install a paper partition for 58mm paper printing, noting it's a dealer option.
Details the process for wall mounting the printer, including drilling, screws, and hooks, noting bracket is an option.
Provides step-by-step instructions and notes for loading a new paper roll into the printer.
Introduces printer settings and adjustments, mentioning DIP switches for ELLIX 30 and near-end sensor for ELLIX 40.
Details the functions and settings of DIP switches for serial interface communication, including baud rate and print density.
Explains the DIP switch settings for parallel interface communication, covering busy control, mode selection, and print density.
Covers basic printer operations and monitoring using the control panel buttons and indicator lights.
Identifies the LED indicators on the printer's control panel: POWER, ERROR, PAPER OUT, FEED.
Explains how to use the FEED button for advancing paper and its disable function.
Describes the meaning of different LED colors (Blue for Power, Red for Error/No Paper) and their states.
Shows the LCD control panel layout for the ELLIX 40 model.
Explains the FEED button functionality for the LCD model, similar to the LED version.
Describes the Function button's role in setting up the LCD screen.
Details the status indications on the LCD screen, including Power, Error states, and Sleep Mode.
Guides on entering and navigating the LCD setup mode to customize interface, printing, and default settings.
Provides a comprehensive list of configurable settings within the printer's setup mode, categorized by main menu and submenus.
Explains how to adjust the sensitivity of the paper near-end sensor for accurate low-paper detection.
Provides instructions for cleaning the printer's thermal head to maintain print quality, with safety precautions.
Lists common printer error statuses, including Cutter Jam, and provides steps for resolving them.
Lists general technical specifications such as printing method, dot density, width, speed, supply voltage, and lifespan.
Outlines the required paper types, form, width, and roll size compatibility for the printer.
| Print Method | Thermal Line Printing |
|---|---|
| Print Width | 72 mm |
| Print Speed | 220 mm/sec |
| Resolution | 180 dpi |
| Connectivity | USB, Serial, Ethernet |
| Auto Cutter | Yes |
| Paper Roll Diameter | 83 mm |