Do you have a question about the Sam4s ELLIX50 and is the answer not in the manual?
Details the items included in the printer box and instructions for checking for damage or missing parts.
Explains how to connect interface cables to the printer's rear connector panel.
Provides steps for securely connecting the interface cable to the printer and host device.
Guides on connecting a cash drawer to the printer's kick-out connector, with important warnings.
Instructions for safely connecting the printer's power supply, including voltage checks and cautions.
Covers installation of optional parts and the procedure for replacing the paper roll.
Instructions for installing a partition to enable 58mm paper printing on the printer.
Step-by-step guide for mounting the printer on a wall using the provided template and hardware.
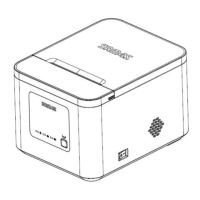
Procedure for installing the splash cover onto the printer for protection.
Detailed steps for opening the cover, removing old cores, and inserting new paper rolls correctly.
Explains how to configure printer settings using DIP switches for communication and printing density.
Details functions and settings for DIP switches related to the RS-232C serial interface.
Describes DIP switch settings specific to the WLAN interface for configuration.
Outlines DIP switch configurations for printers with Serial and Ethernet interfaces.
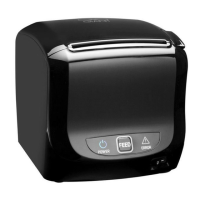
Information on operating the printer, including the control panel, buttons, and indicator lights.
Description of the printer's control panel, including the POWER and ERROR LEDs.
Explains how to use the FEED button to advance paper manually or continuously.
Details the function and meaning of the POWER and ERROR indicator lights on the panel.
Guides on adjusting the paper near-end sensor sensitivity for accurate paper-out detection.
Instructions on how to clean the printer's thermal head to maintain print quality.
Provides information on printer error indicators, causes, and solutions for common errors.
Presents detailed technical specifications for the printer and its paper.
Lists the general technical specifications of the ELLIX50 receipt printer.
Details the recommended paper types, forms, and dimensions for the printer.
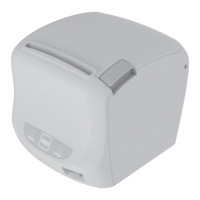
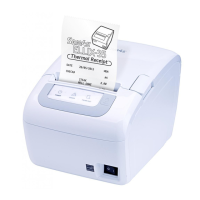
The ELLIX50 Receipt Printer is a thermal line printer designed for use with various electronic instruments such as ECR systems, POS terminals, banking equipment, and computer peripheral equipment. It is designed to be a reliable and efficient solution for printing receipts in commercial environments.
The primary function of the ELLIX50 is high-speed thermal receipt printing. It utilizes thermal printing technology, which means it does not require ink or toner, simplifying maintenance and reducing operational costs. The printer is capable of printing at a high speed, ensuring quick transaction processing. It supports various interfaces, including USB (default), USB+RS-232 (Serial), USB+WLAN, and USB+ETHERNET+RS-232 (Serial), offering flexibility in connectivity with different host devices.
The ELLIX50 also includes advanced features such as a data buffer, allowing it to receive print data even while actively printing, which enhances efficiency. It supports bar code printing using specific commands and offers different print densities that can be selected via DIP switches. The printer can drive peripheral units, enabling control of external devices like cash drawers. Additionally, it supports 2-dimensional bar codes (PDF-417) and two-color printing, expanding its utility for various receipt formats and branding needs.
Setting up the ELLIX50 involves a few straightforward steps. Upon unpacking, users should ensure all components, including the printer unit, interface cable (optional), power cord, roll paper, wall mount (optional), AC adapter, and operator's manual (optional), are present and undamaged.
Connecting the printer involves attaching the power supply, the host device, and optionally a cash drawer. For the host device, the appropriate interface cable should be securely plugged into the printer's interface connector, with screws tightened, and the other end connected to the host device. When connecting a cash drawer, it is crucial to use a drawer that matches the printer's specifications to avoid damage. The drawer cable plugs into the drawer kick-out connector on the back of the printer.
Connecting the power supply requires ensuring the printer is turned off before plugging the DC cord connector into the power jack. If other connections like the interface or drawer are needed, they should be plugged in, and cables organized. It is important to use only the power supply provided with the printer or an equivalent to prevent damage.
The ELLIX50 offers several installation options. For 58mm paper printing, a partition can be installed by opening the cover, removing the existing partition (if any), and inserting the new one into the designated slot. For wall mounting, a template is used to mark drill holes, wall plugs are inserted, screws are placed, and the wall mount bracket is assembled on the printer's bottom. The printer then slides onto the wall screws. A splash cover can also be installed by inserting its bosses into the lower case.
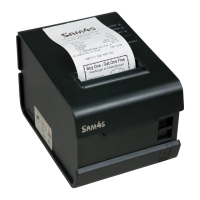
Paper roll installation is simple: open the paper roll cover, remove any used core, insert the new paper roll as shown in the manual, pull out a small amount of paper, and then close the cover and tear off the excess. It is important to use paper rolls that meet specifications and do not have the paper end glued to the core. The printer cover should not be opened during printing to avoid damage.
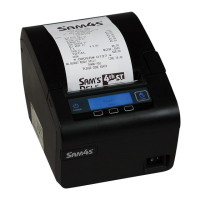
The printer's control panel includes LED indicators for power and error status, along with a FEED button. The POWER LED illuminates when the printer is on. The ERROR LED indicates an error, and users should refer to the error status and resolution section for troubleshooting. The FEED button, when pressed once, advances paper one line, and holding it down feeds paper continuously. This button can be disabled via an ESC c 5 command.
The ELLIX50 also features a near-end sensor for paper, which provides a warning when the paper supply is low. This sensor has five sensitivity settings that can be adjusted to suit different paper core diameters and thicknesses. The factory default setting is position #3, which is appropriate for the recommended paper thickness. This function is not supported when the printer is used in wall-mount configuration.
Regular maintenance, particularly cleaning the printer head, is essential to maintain print quality. Paper dust on the heating elements can degrade printing quality. To clean the printer head, first, power off the printer. Then, open the printer cover and use a cotton swab moistened with an alcohol solvent (ethanol, methanol, or IPA) to clean the thermal elements of the printer head. After cleaning, insert a paper roll and close the printer cover. It is crucial to ensure the power is off before cleaning any internal parts of the printer or the head.
The manual also provides detailed information on error status and resolution. The printer uses a buzzer and the ERROR LED to indicate various error conditions. For example, a "Cutter Jam" error, indicated by specific beeps and blinking, can be resolved by opening the printer cover while the power is on, which automatically resets the cutter. A "Cutter Not Home" error, with similar indications, is resolved in the same manner. A "Paper Out Error" is indicated by beeps and blinking; opening the cover stops the buzzer, allowing the user to replace the paper roll and resume printing. These clear error indicators and resolutions help users quickly address common issues, minimizing downtime and ensuring continuous operation.
| Print Method | Direct Thermal |
|---|---|
| Print Width | 72mm |
| Resolution | 180 dpi |
| Auto Cutter | Yes |
| Paper Type | Thermal Paper |
| Dimensions | 145(W) x 198(D) x 142(H) mm |
| Weight | 1.7 kg |
| Printer Type | Thermal Printer |
| Paper Roll Diameter | 83 mm |
| Interface | USB + Serial + Ethernet |