This document is a service manual for the SAM4S HCUBE-102D Desktop POS Printer.
Function Description
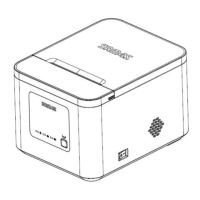
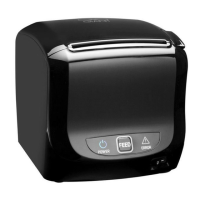
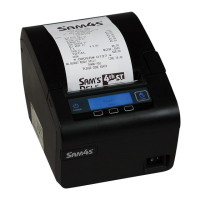
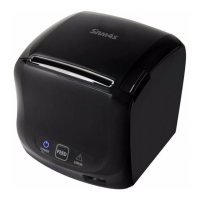
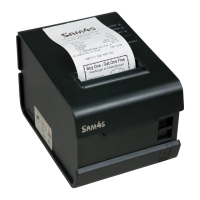
The SAM4S HCUBE-102D is a thermal receipt printer designed for commercial POS systems, catering industries, and other applications requiring real-time field receipt printing. It features an auto-cutter for efficient operation. The printer can connect to other equipment via serial, USB, and Ethernet interfaces, and also includes a cash drawer interface. Drivers are available for Windows Vista, 7, 8, 10, and 11 operating systems.
Important Technical Specifications
The manual does not explicitly list detailed technical specifications such as print resolution, print speed in mm/s, or specific dimensions. However, it highlights several key features:
- Printing Technology: Thermal receipt printing.
- Cutting Mechanism: Auto-cutter.
- Connectivity: Serial, USB, Ethernet, and cash drawer interfaces.
- Operating System Compatibility: Windows Vista/7/8/10/11.
Usage Features
The HCUBE-102D is designed with several user-friendly features:
- Low Noise: Ensures a quieter operating environment.
- High Printing Speed: Contributes to efficient transaction processing.
- Easy Paper Loading: Simplifies the process of replacing paper rolls.
- Cash Drawer Interface: Allows for integrated cash drawer control.
Maintenance Features
The service manual provides detailed instructions for disassembling and assembling the printer, which are crucial for maintenance and troubleshooting. Key maintenance aspects include:
General Cautions:
- Do not disassemble components or loosen screws while the printer is working.
- Carefully check connectors for damage during disassembly.
- Prevent static electricity when handling the print head or other electronic components.
- Ensure a minimum 20-second interval between powering off and on the printer.
- Avoid printing without paper to prevent damage to the platen and print head.
- To extend print head life, set a low printing concentration if the print effect meets requirements.
Disassembly and Assembly:
The manual provides step-by-step instructions for disassembling major components:
- Lower Shell Unit: Involves removing four screws from the bottom and disconnecting cables from two interfaces.
- Cutter Cover, Top Cover & Main Holder: Requires removing cover shafts and torsion springs in the open cover state.
- Main Board: Involves unplugging all cables and removing four screws.
- Gear & Motor: Requires removing screws from the gear cover plate and the motor.
- TPH (Thermal Print Head): Involves removing two nuts from the TPH shaft to separate the shaft, button bar, and pick, then removing the TPH upward.
- Cover Opening Button, Springs & Head-up Sensor Switch: Involves pressing the cover opening button to separate it and the spring from the main holder, and removing the screw of the head-up sensor switch.
Assembly is performed in the reverse order of disassembly. Specific notes for assembly include:
- Aligning the paper container unit with the corresponding slot of the lower cover (taking photos as reference is recommended).
- Ensuring the top cover open angle is less than the maximum during paper container assembly.
- Verifying normal opening and closing of the top cover after assembly.
Troubleshooting:
The manual offers solutions for common printer issues:
- Printer Not Working (LED off): Check power supply connection, replace AC/DC adapter, turn on the printer, or contact the dealer if the circuit board is damaged.
- LED Indicator and Beeper Alarm:
- Error LED and paper LED always on with beeper alarms: Close printer cover (if open), reload roll paper (if paper end), or turn off and resume printer when print head cools (if overheated).
- Error LED blinks with beeper alarms: Print with specified voltage (for over-voltage/low-voltage) or restart printer (for cutter jam).
- Troubles During Printing:
- Blurred printing or spot: Check paper loading, use recommended paper, clean print head/roller, or increase print density.
- Paper not feeding normally: Open cover, check paper path, remove jammed paper.
- Vertical print words missing: Clean print head/roller, or contact dealer if print head is damaged.
- Problems During Paper Cutting:
- Cutter abrasion/insufficient cutting: Replace the cutter.
- Cutter jam (movable cutter stuck): Replace worm gear/wheel (if abrasion), replace motor (if burnt), or clean paper scraps on transmission system.
- Thermal printer head overheated: Reduce printing density.
- Driving too fast: Reduce printer speed.
- Wrong paper feeding position: Put paper parallel with mount and insert correctly between platen roller and print head.
Cutter Jam Troubleshooting:
Specific steps are provided for cutter jams:
- Do not press the cover open button to avoid blade damage.
- Fix the printer with one hand and press the convex bars on either side with the other hand to push up and open the front cover.
- Rotate the gear until the blade returns to its normal position.
Auxiliary Materials and Tools:
- Maintenance Tools: Cross screwdriver, normal screwdriver, cutting pliers.
- Auxiliary Materials: Lubricating grease, alcohol, rayon balls.
The manual also includes an exploded drawing and a comprehensive list of printer components with their descriptions, quantities, and remarks for easy identification during maintenance.