Do you have a question about the Sam4s Gcube-102 and is the answer not in the manual?
Details the items included in the printer box and what to do if any are damaged or missing.
Explains how to connect up to three cables to the printer's connector panel on the back.
Provides step-by-step instructions for connecting the printer to a host device using an interface cable.
Details how to connect a cash drawer to the printer's drawer kick-out connector, including important warnings.
Guides users on safely connecting the power supply to the printer, including voltage checks and cautions.
Covers installation of optional features like wall mounting and the procedure for replacing the paper roll.
Provides step-by-step instructions and diagrams for mounting the printer on a wall using the provided bracket.
Explains how to properly install a new paper roll into the printer, including notes on paper specifications.
Explains how to change printer settings using the NFC APP, including installation and device configuration steps.
Guides users on installing the Gcube APP on a smartphone for printer settings adjustment via NFC.
Details the process of changing printer settings using the Gcube APP and NFC communication with the printer.
Covers the printer's control panel, buttons, and indicator lights for basic operation and status monitoring.
Details the printer's control panel, including its buttons (POWER, FEED) and status indicators (ERROR FND).
Explains how to adjust the sensitivity of the paper near-end sensor for accurate paper detection.
Provides step-by-step instructions for cleaning the printer head to maintain print quality, with safety notes.
Explains how to interpret error indicators on the FND and lists common error conditions like Cutter Jam and Cutter Not Home.
Lists general technical specifications for the Gcube Series printer, including printing method, resolution, and speed.
Lists the specifications for paper types, forms, width, and spool size compatible with the printer.
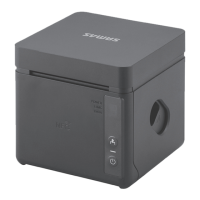
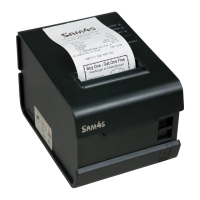
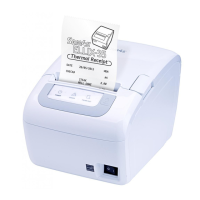
The Gcube Series Receipt Printer is a versatile and high-performance thermal printer designed for various electronic instruments, including ECR, POS systems, banking equipment, and computer peripheral devices. This user guide provides comprehensive instructions for setting up, operating, and maintaining the printer, ensuring optimal performance and longevity.
The Gcube Series Receipt Printer is primarily designed for high-speed, low-noise thermal printing of receipts and other transactional documents. It supports various interfaces, making it adaptable to different system environments. The printer is capable of handling both standard text and advanced printing features, such as bar codes and two-dimensional bar codes (QR code, PDF-417), and two-color printing. Its robust design includes a jam-free mechanism with automatic return for cutter jams, enhancing reliability in busy operational settings. The printer also features a data buffer, allowing it to receive print data even while actively printing, which contributes to efficient workflow management.
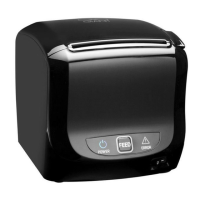
Connectivity and Setup: The printer offers flexible connectivity options, including USB, RS-232 (Serial), WLAN, Ethernet, and Bluetooth, catering to diverse operational needs. Connecting the printer to a host device involves securely plugging in the appropriate interface cable and tightening the screws to ensure a stable connection. For cash drawer integration, the printer provides a dedicated kick-out connector, emphasizing the importance of using a compatible drawer to prevent damage. Power supply connection is straightforward, requiring users to ensure the printer is off before plugging in the DC cord connector and to use the provided or an equivalent power supply. Proper cable management is also highlighted to maintain a tidy and safe setup.
Paper Roll Installation: Installing a paper roll is a simple process. Users need to open the paper roll cover by pressing the cover-open button, remove any used paper roll core, insert the new paper roll as shown in the illustrations, pull out a small amount of paper, and then close the cover. It is crucial to use paper rolls that meet the specified dimensions and to avoid rolls with the paper end glued to the core to prevent operational issues. The guide also advises against opening the printer cover during printing to prevent damage.
Control Panel and Operation: The printer's control panel includes a POWER button, a FEED button, and an FND (Front Numeric Display) for status indication. Pressing the POWER button turns the printer on, displaying a "-" on the FND. The FEED button allows users to advance paper one line with a single press or continuously by holding it down. This button's function can be disabled via an ESC c 5 command. The FND serves as an error indicator, displaying specific characters to denote different error statuses, such as "Power on" error, paper out, or almost used up paper.
Device Settings and Adjustments: Printer settings can be conveniently changed using an NFC (Near Field Communication) application. Users can install the Gcube APP by configuring their smartphone's NFC function to Read/Write, P2P Mode, and then tagging the phone horizontally on the printer's NFC logo. If NFC is recognized, the app installation screen from Google Play Store will automatically appear. Alternatively, the app can be manually installed from the Google Play Store by searching for "Gcube NFC." Once installed, users can access the Device Settings Menu within the app to configure various parameters. After making changes, tagging the smartphone on the printer will write the new settings, and the printer will print a Self-Test Page after resetting, confirming the successful update.
Paper Near-End Sensor Adjustment: The paper near-end sensor has five sensitivity settings, allowing users to adjust when the sensor triggers based on the amount of remaining paper. If too much paper remains when the sensor triggers, users can set it to position #4 or #5. Conversely, if the paper runs out before the sensor triggers, the setting should be decreased. The factory default setting is at position #3, which is suitable for the recommended paper thickness. The accuracy of this sensor can vary depending on the paper roll's winding core diameter.
Printer Head Cleaning: Maintaining print quality is essential, and paper dust on the heating elements can degrade it. To clean the printer head, users must first power off the printer and open the cover. The thermal elements of the printer head should then be cleaned using a cotton swab moistened with an alcohol solvent such as ethanol, methanol, or IPA. After cleaning, a paper roll should be inserted, and the printer cover closed. It is crucial to ensure the power is off before cleaning any internal parts of the printer or the head to prevent damage or injury.
Error Status and Resolution: The printer's FND provides clear indications of error statuses using specific alphabet characters. This feature aids in quick troubleshooting and resolution.
These maintenance features and error resolution guidelines are designed to help users keep the Gcube Series Receipt Printer in optimal working condition, minimizing downtime and ensuring consistent performance.
| Print Method | Direct Thermal |
|---|---|
| Print Speed | 250 mm/sec |
| Print Resolution | 203 dpi |
| Paper Type | Thermal Paper |
| Interface | USB, Serial, Ethernet |
| Auto Cutter | Yes |
| Paper Width | 80 mm |
| Power Supply | 24V DC Adapter |