24 S&C Instruction Sheet 461-502
Operation
WARNING
Careless manipulation of the Loadbuster tool can
decrease the open gap to the point where a flashover
will occur. This can result in arcing, electrical shock,
serious injury, or death.
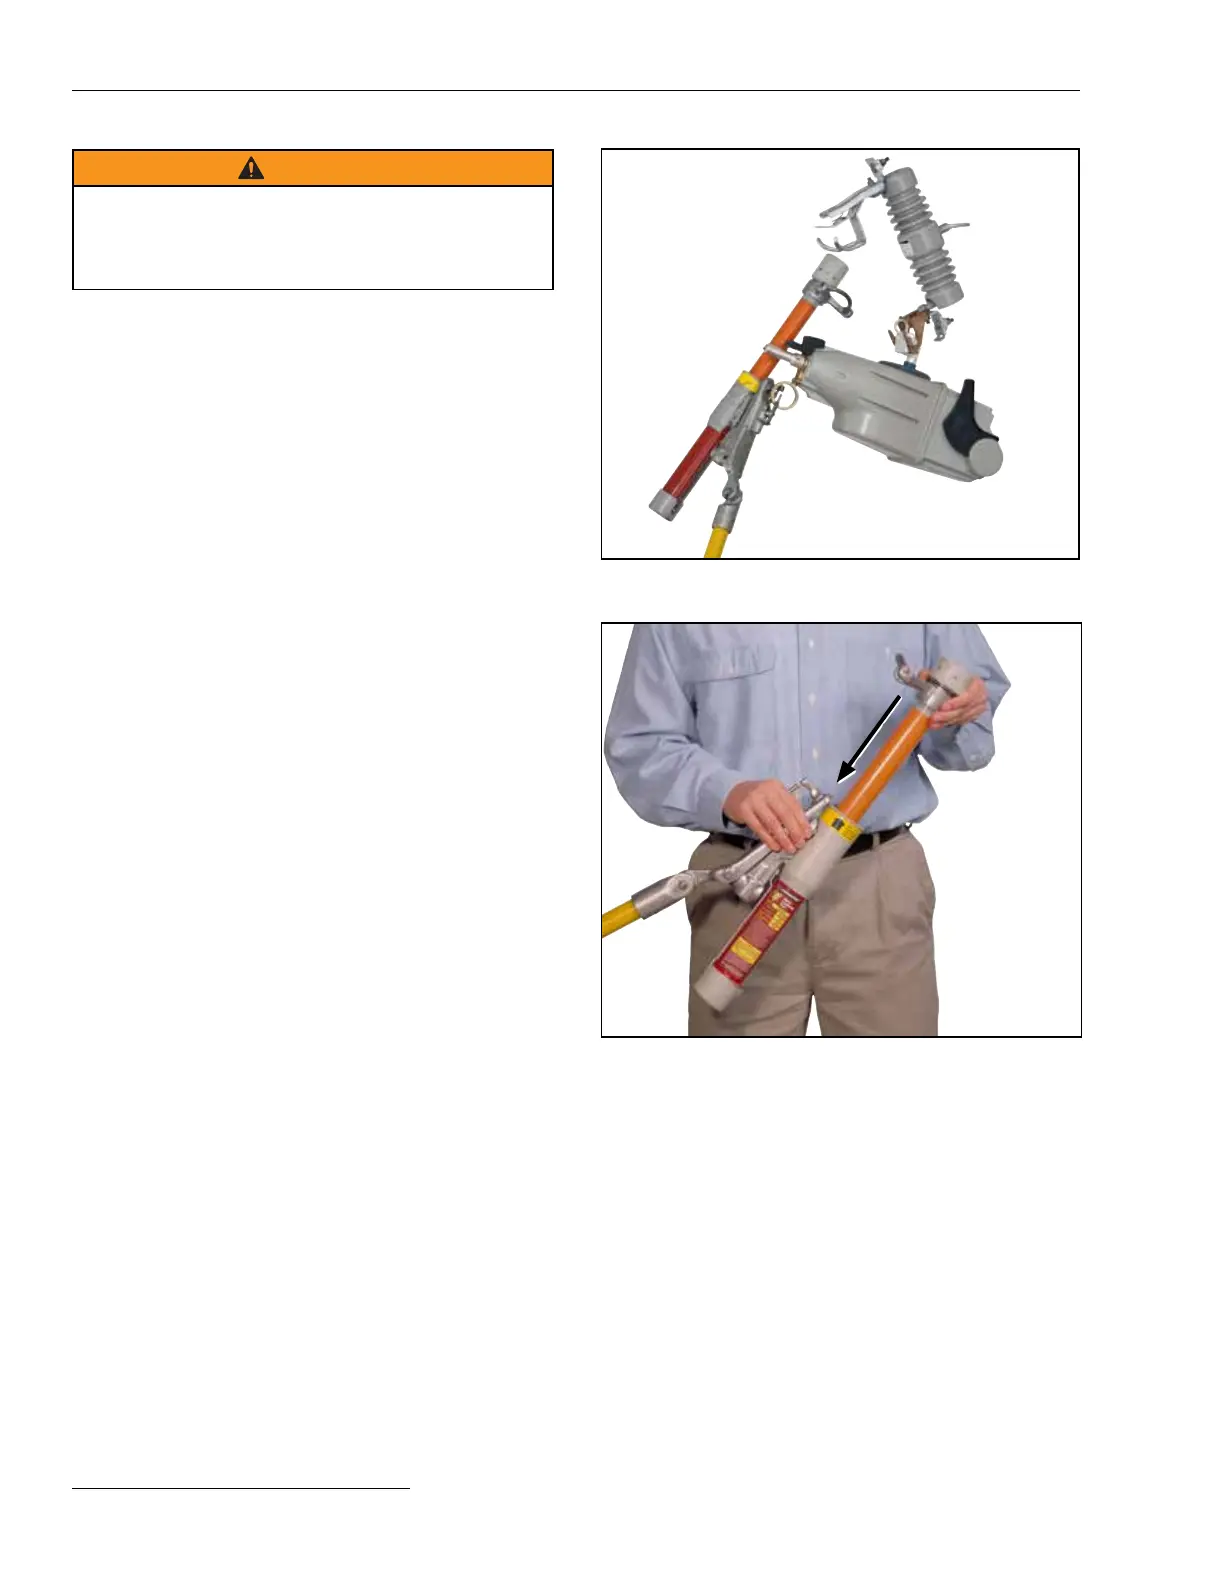
Next, bring the TripSaver II recloser toward its fully
Open position, as shown in Figure 33. Then, remove the
Loadbuster tool from the pull-ring by rotating the pole. This
will deflect the pull-ring latch to release the pull-ring.
Because the TripSaverII recloser will drop fully open by
gravity, it may be preferable to remove the Loadbuster tool
by “rolling” it off both the attachment hook and pull-ring at
the same time by twisting the pole after the Loadbuster
tool has been tripped and fully extended. To perform
this operation easily and smoothly, always roll the
Loadbuster tool so that it rotates in an upward direction.
STEP 5. To reset the Loadbuster tool for the next
operation, hold it as shown in Figure 34. Extend
the tool slightly and lift the resetting latch with
your thumb. With the latch up, telescope the tool
completely so the trigger can reset itself.
Depress the telescoping tube until the orange
paint on the inner tube assembly is no longer
visible. Check for proper resetting by extending
the tool about 3 inches (76 mm). Throughout this
travel, an increasing spring resistance should be
felt.
When the TripSaverII recloser is opened with
a Loadbuster tool, the vacuum interrupter in the
TripSaverII recloser will not be triggered open
and will remain closed. The drop-open mecha-
nism will not operate.
Figure 33. Detaching a Loadbuster tool from a TripSaver II
recloser.
Resetting latch
Figure 34. Resetting a Loadbuster tool.
 Loading...