S&C Instruction Sheet 461-502 13
Installation
Note: To power a TripSaver II recloser from its sleep
state, there must be enough load current available (1 A
for 40-A continuous reclosers, 4 A for 100-A continuous
reclosers, and 8 A for 200-A continuous reclosers). When
powered, the control can stay on when the power does
not fall below the “stay on” threshold (0.5 A for 40-A con-
tinuous reclosers, 1.5 A for 100-A continuous reclosers,
and 3 A for 200-A continuous reclosers). For customers
with lower than the “power on” load current, the Trip-
Saver II recloser will still respond properly should a fault
occur, however, it will take a small but finite amount of
time for the control to power up and issue a trip signal.
This power up time only affects TCC curves selected to
respond quickly at high levels of current.
When the MODE-SELECTOR lever is in the Auto
position, the TripSaver II recloser supports up to three
reclosing operations (four tripping operations in total)
before it drops open. The open interval between trip-
ping operations is user configurable in the range of
one-half second to 5 seconds (or 30 seconds for the
Extended Open Interval option “-O”). The factory default
is 5 seconds. The vacuum interrupter resets 2 seconds after
the TripSaverII recloser drops open.
If a temporary fault is cleared before the TripSaver II
recloser reaches the end of its operating sequence, the
TripSaver II recloser will revert to its setting defined in
the initial trip operation (first TCC curve) after the user-
configurable sequence reset time has elapsed following
the last reclosing operation. The factory default is 15
seconds.
Removing a TripSaver II Recloser from
Its Mounting
When the TripSaverII recloser is in the Dropped-Open
position, follow these steps to remove it from the mounting.
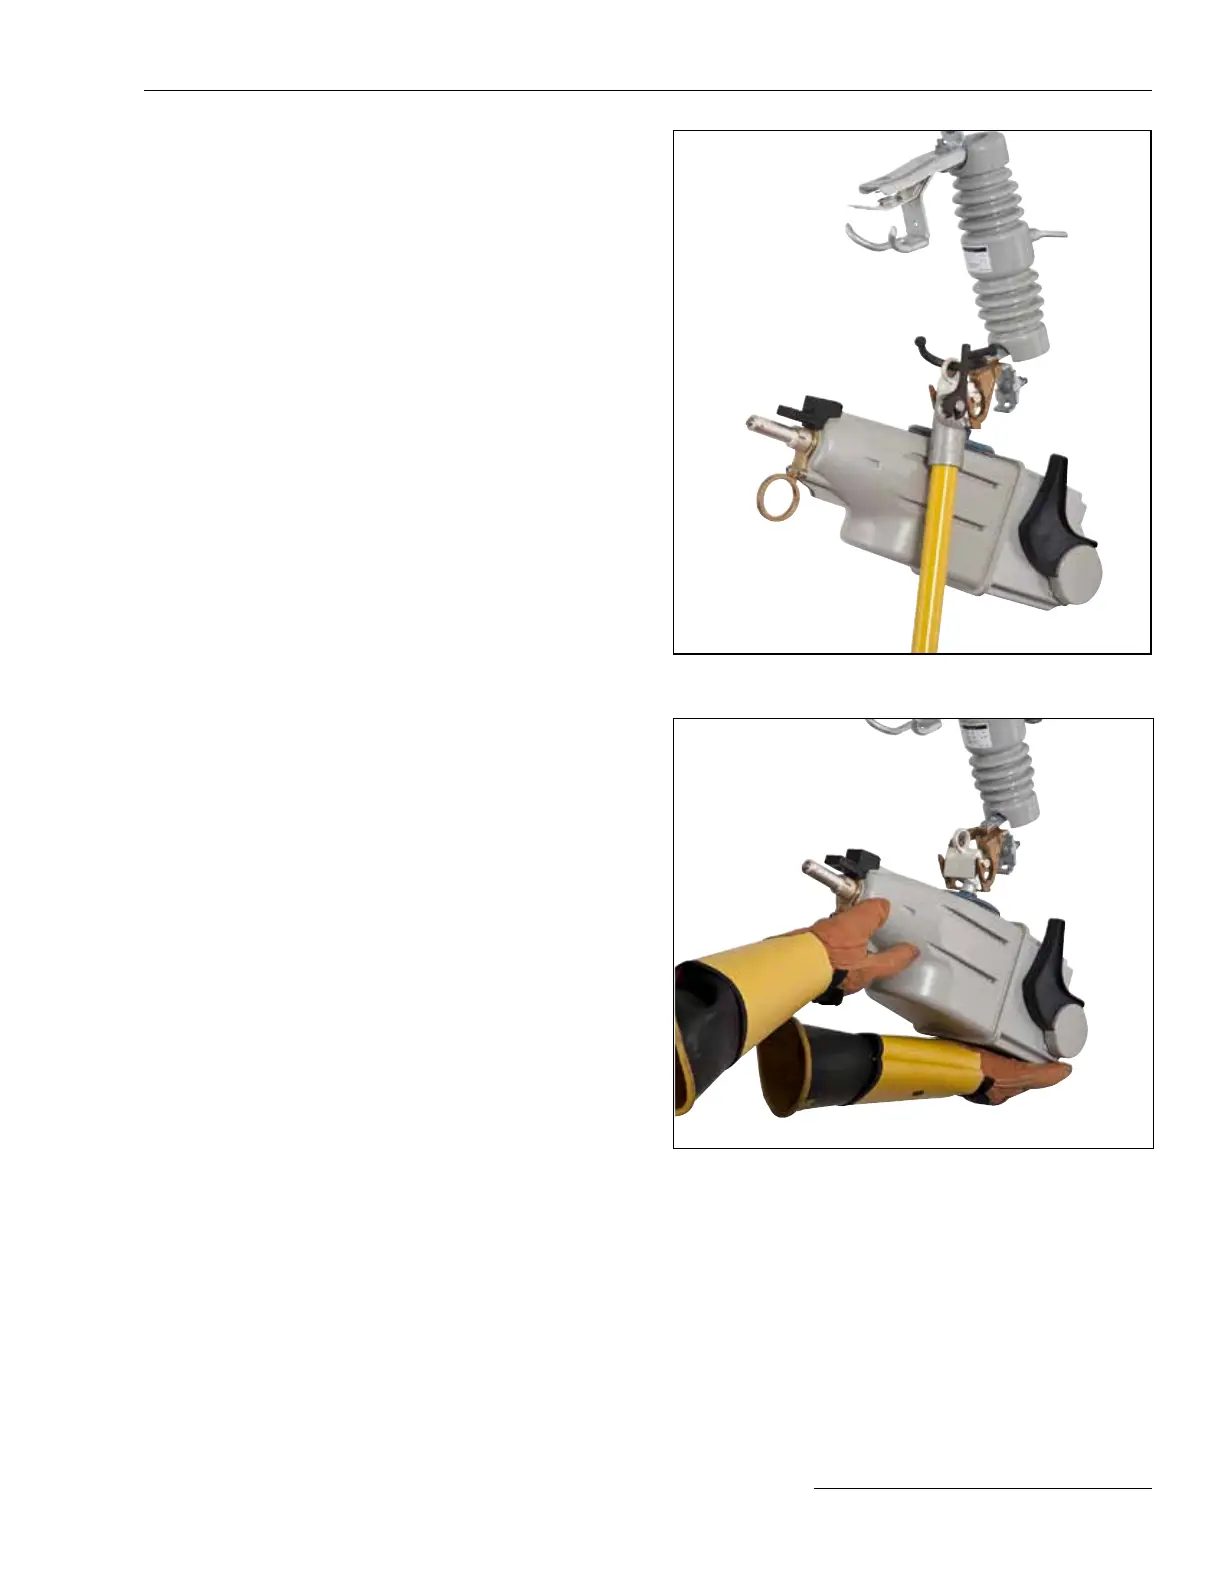
Using a Hotstick
Attach a Talon Handling Tool or a distribution prong to a
short hotstick. Insert the curled prong of the Talon tool or
the distribution prong into the lifting eye of the trunnion.
The hotstick should be positioned vertically as close to
the body of the TripSaver II recloser as possible. Exert
an upward force to lift the TripSaver II recloser out of the
mounting. See Figure 13.
Using gloved hands
Alternately, in the Dropped-Open position, lift the
TripSaver II recloser out of the mounting with gloved
hands. See Figure 14.
Figure 14. Lifting the TripSaver II recloser out of the mounting
using gloved hands.
Figure 13. Lifting the TripSaver II recloser out of the mounting
using a hotstick.
 Loading...