6 7
8 9
20
The Sapling Company, Inc.
1633 Republic Road
Huntingdon Valley, PA 19006
USA
P. (+1) 215.322.6063
F. (+1) 215.322.8498
www.sapling-inc.com
Wall Mount Installation
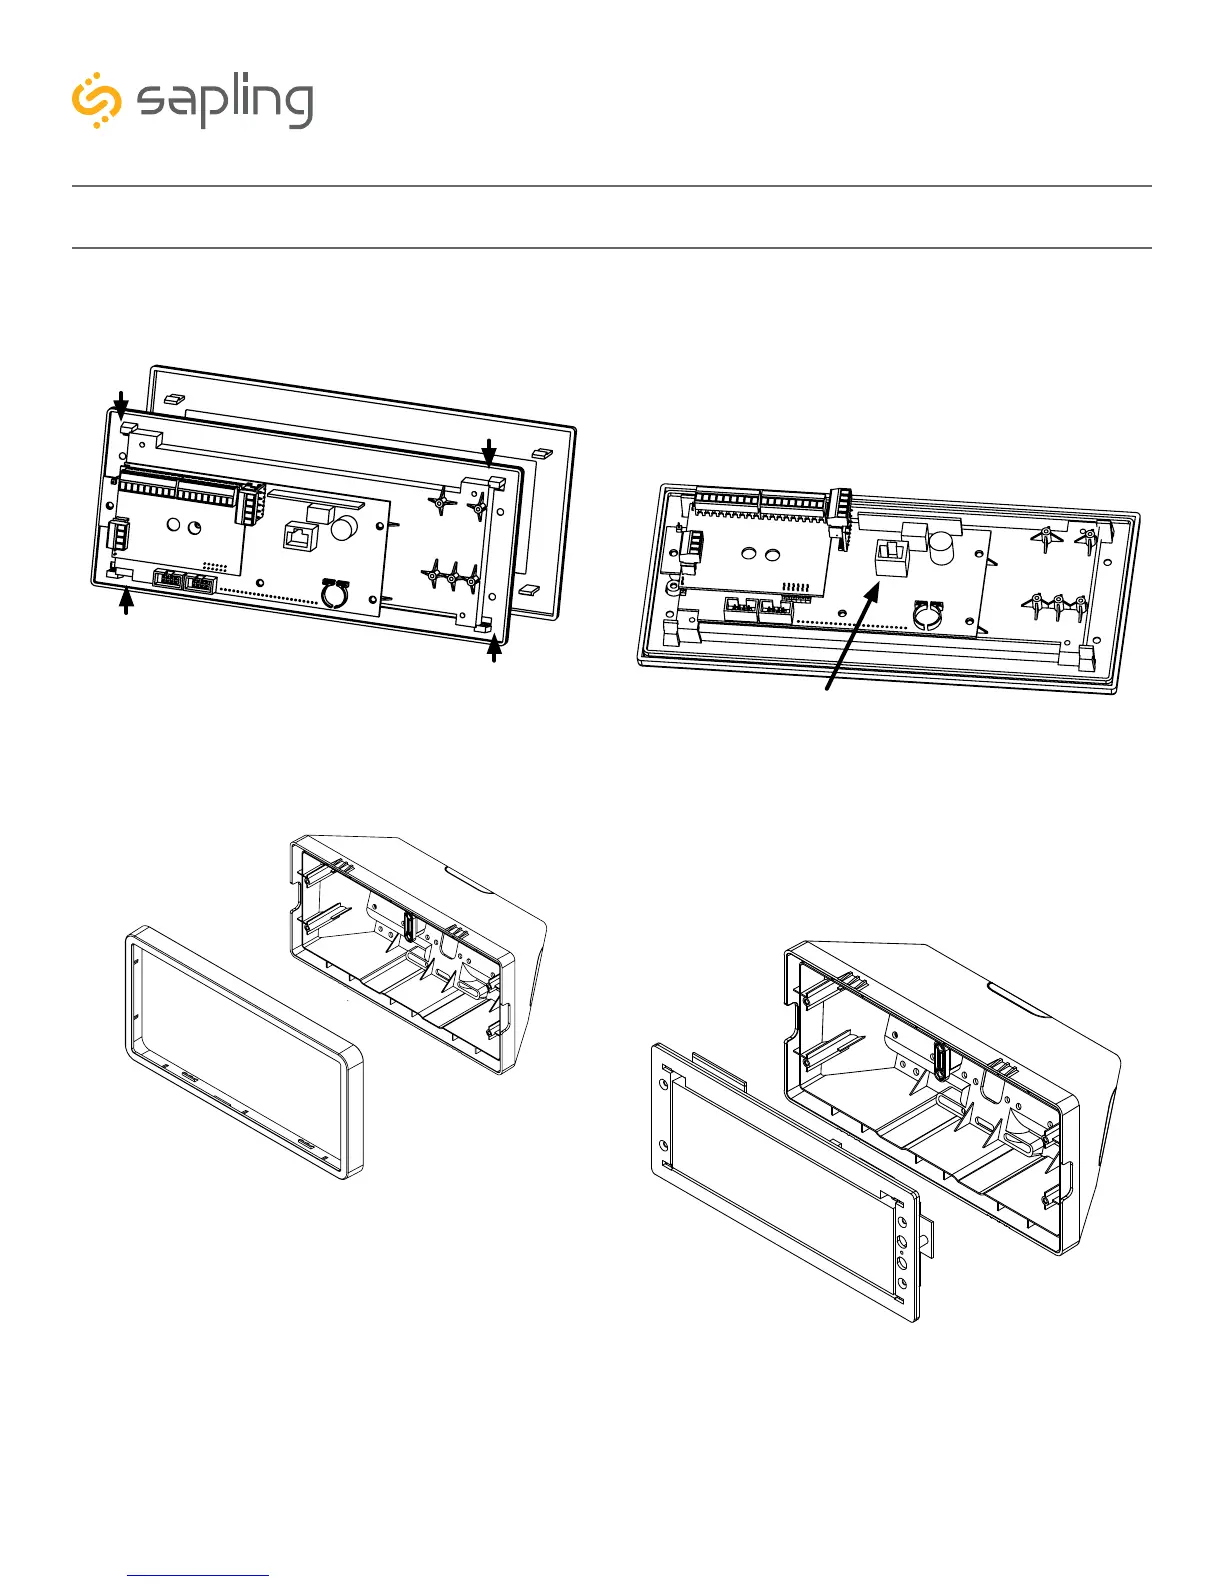
6) Detach the filter from the clock display board by
pressing inward on the red tabs.
7) Attach a data cable to the port on the right side
of the circuit board. If the clock is able to access the
Internet, it will begin to correct itself. Make a note
of the clock’s Serial Number, which should be on a
white sticker above the port. Add this information
to your tracking chart.
8) Detach the frame from the front of the clock
housing by pulling the bottom and top edges away
from the housing.
9) Use the 6-19x1/2 screws to attach the display
board to the housing.
NOTE: For 2.5” Digit clocks, the holes for the
screws will be on the left and right inner surfaces of
the housing. For 4.0” Digit Clocks, the holes will be
on the top and bottom surfaces.