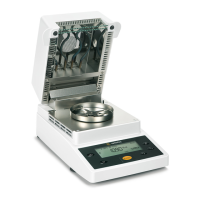
! Following moisture analysis, remove the sample with a forceps.
Caution: the sample is still hot immediately following analysis.
When analyzing samples that can be deemed hazardous,
protective goggles, clothing and gloves must be worn when
opening the analyzer cover after analysis. Some samples may
form bubbles on the surface which can pop and splatter hot
sample material when the sample is removed from the analyzer.
In such cases, we recommend placing a second glass fiber pad on
top of the sample before analysis. Exercise caution in selecting
and preparing the sample in order to prevent operator injury
or damage to the moisture analyzer.
Note:
Some sample materials, such as onion, may spontaneously
ignite if the drying procedure continues after the sample has
been completely dried. Make sure the equipment operator knows
where the fire extinguisher is located.
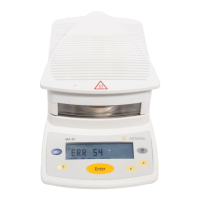
Moisture analysis can be stopped at any time by pressing the
Cancel key (Back). The display then shows “Run canceled;
remove sample”.
! The safety lock and EMI-protective seal on the analyzer cover
must not be manipulated or changed in such a way as to impair
proper functioning. Do not wedge any object between the ana-
lyzer cover and the sample chamber, as the cover provides an
EMI-protective seal.
Do not place any objects or materials besides
– Glass fiber pad
– Sample retainer
– Sample
inside the sample chamber.
Do not use a sample container that prevents the cover from
closing completely.
! The moisture analyzer must not be operated if the sample cham-
ber is not completely closed and sealed by the analyzer cover.
Safety Precautions
! Make sure the vents for the cooling fan and the analyzer cover
are not blocked or covered, as this would distort the results of
analysis.
! Make sure to avoid contamination of the sample chamber.
The sealing surfaces where the cover meets the sample chamber,
as well as the EMI-protective seal, must not be contaminated
by sample material residues or other deposits. Keep the sam-
ple chamber clean at all times and remove any dirt or deposits
immediately. Insert the protective plug (see “Getting Started”)
before cleaning. Do not use aggressive cleaning agents nor
objects with sharp edges or points to clean the moisture analyzer.
Follow the instructions under “Care and Maintenance” to clean
your moisture analyzer.
! Make sure that no liquid enters the analyzer housing.
4
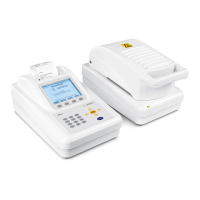
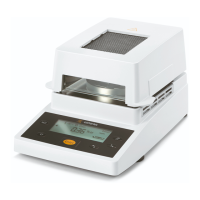
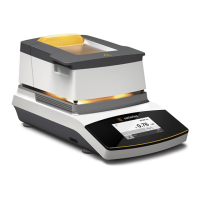
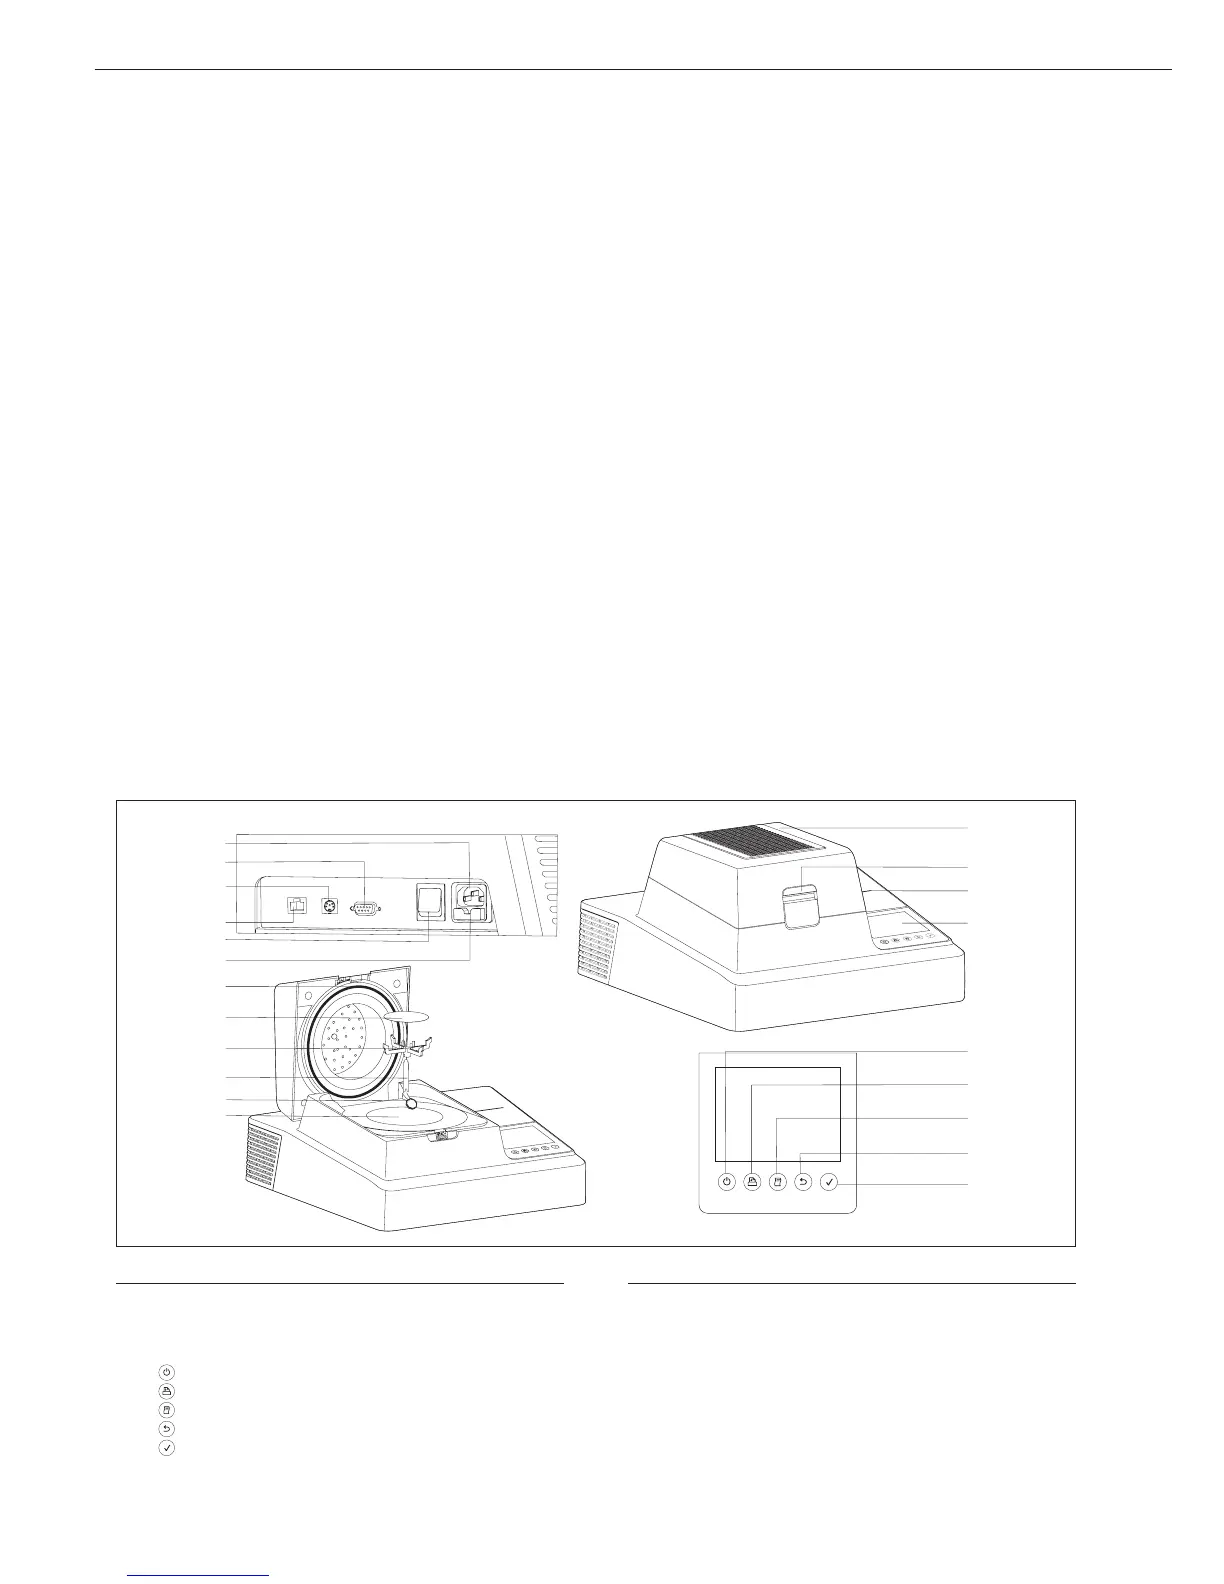
General View of the Moisture Analyzer
Pos. Designation
1 LMA200PM
2 Safety lock
3 Printer/printer compartment
4 Touchscreen: 1/4 VGA display; 5.7” operating panel
5
On/off (standby) key
6
Form feed key
7
Print key
8
Cancel key (Back)
9
Enter key
10 Sample chamber
Pos. Designation
11 Protective plug/transport locking device
12 Adapter
13 Sample retainer
14 Glass fiber pad
15 Analyzer cover with EMI-protective seal
16 Fuse (115V/230V)
17 Power switch (on/off)
18 Ethernet interface
19 PS/2 socket
20 RS-232 interface
21 AC jack
1
2
3
4
5
6
7
8
9
10
11
12
14
15
16
17
18
19
20
21
13