14
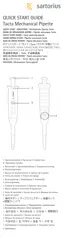
c. With a 10 ml pipette hold the tip cone cylinder firmly and turn the locking ring (2) clockwise with your fingers (see image
below). Do not turn the tip cone (3) as this will break the pipette.
4. Clean the tip ejector collar (1), the tip cone holder, the tip cone cylinder, and the piston (4) with a disinfectant liquid or
mild detergent and a soft, lint-free cloth.
5. Clean the interior of the tip ejector collar (1) and the tip cone cylinder with a cotton swab. Be careful with 3, 10, 20, and 100 μl
pipettes to ensure the seal inside the tip cone is not damaged.
6. Rinse the parts with distilled water if necessary and allow them to dry.
7. Depending on the pipette volume:
a. With a 3, 10, 20, or 100 μl pipette, apply a thin layer of grease on the piston (4).
OR
b. With a 200 or 1000 μl pipette, apply a thin layer of grease around the seal (5).
OR
c. With a 5000 μl or10 ml pipette, apply a thin layer of grease on the interior of the tip cone cylinder and around the seal (5).
NOTE: Avoid excess grease. Only use the grease provided with the pipette.
NOTE: Before reassembling, check that there is no lint or particles on the surface of the piston.
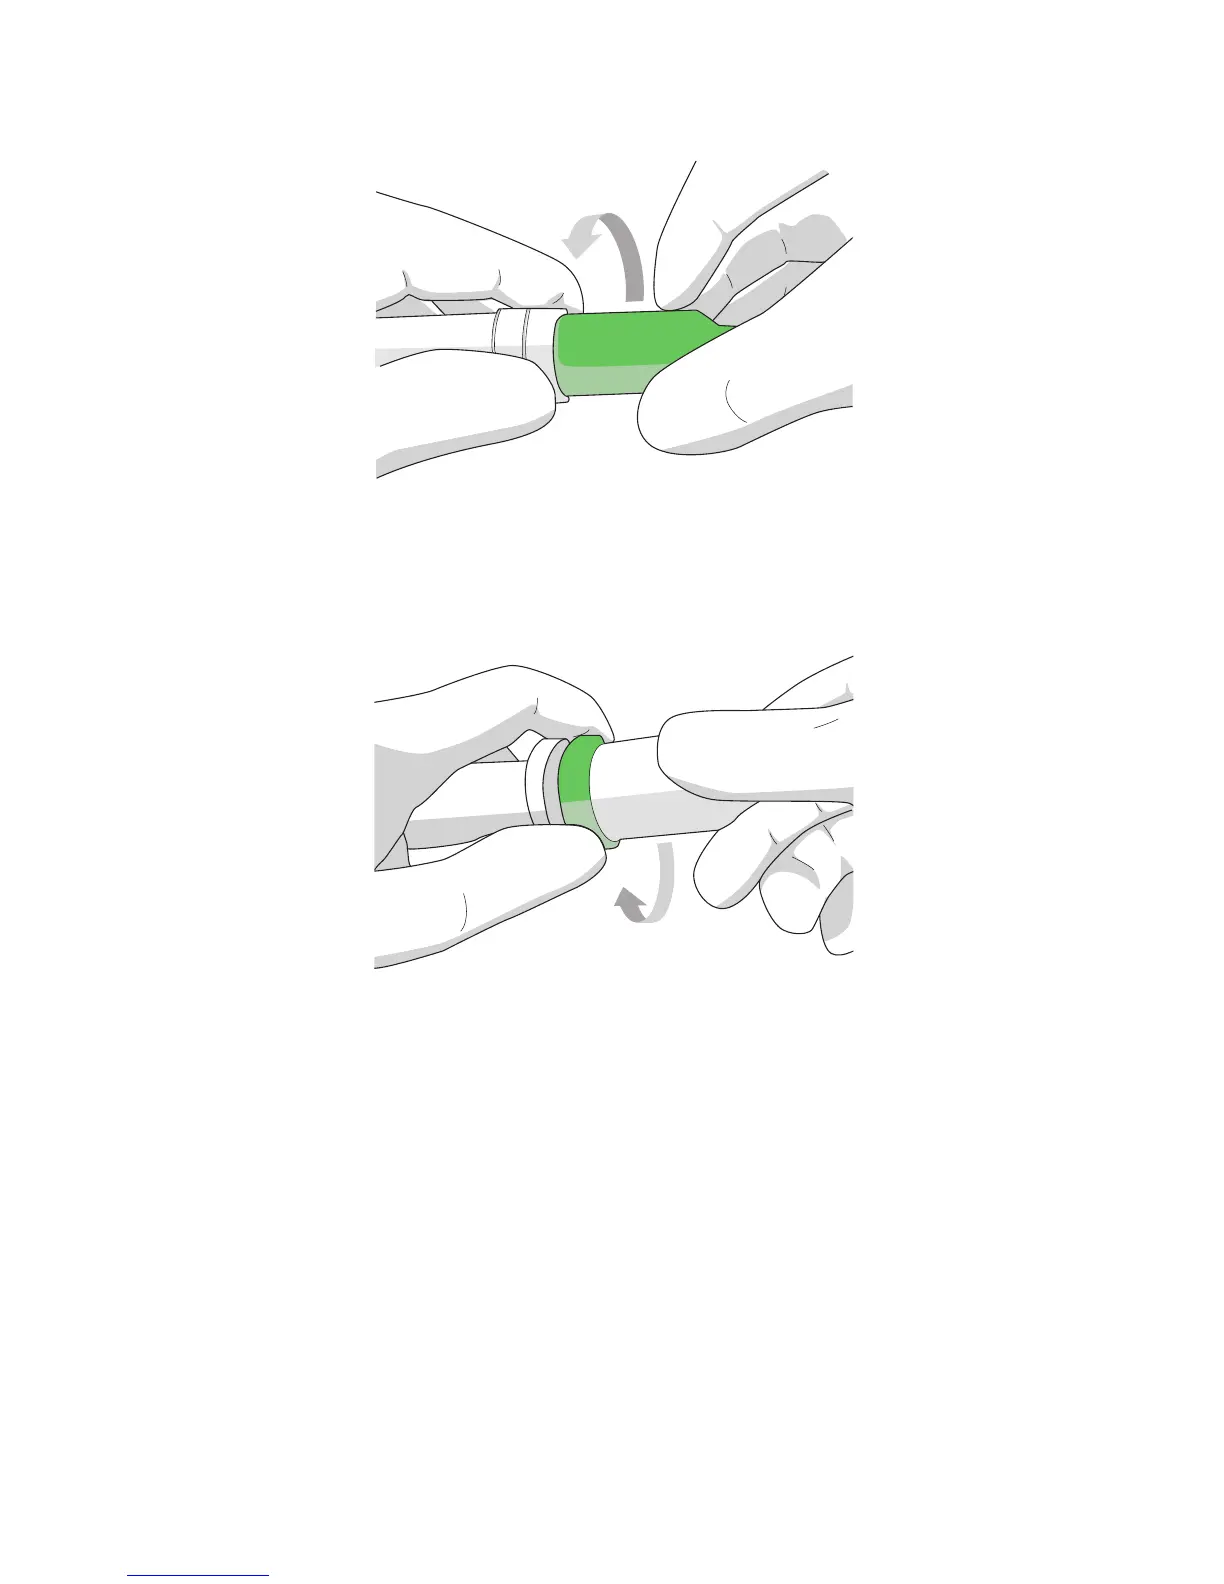
b. With a 5000 μl pipette, hold the locking ring (2) firmly with your fingers and turn the tip cone cylinder counterclockwise with
the other hand (see image below). Do not turn the locking ring as you turn the tip cone (3) as this will break the pipette.
OR