2. Cut the replacement service part at the
marked line.
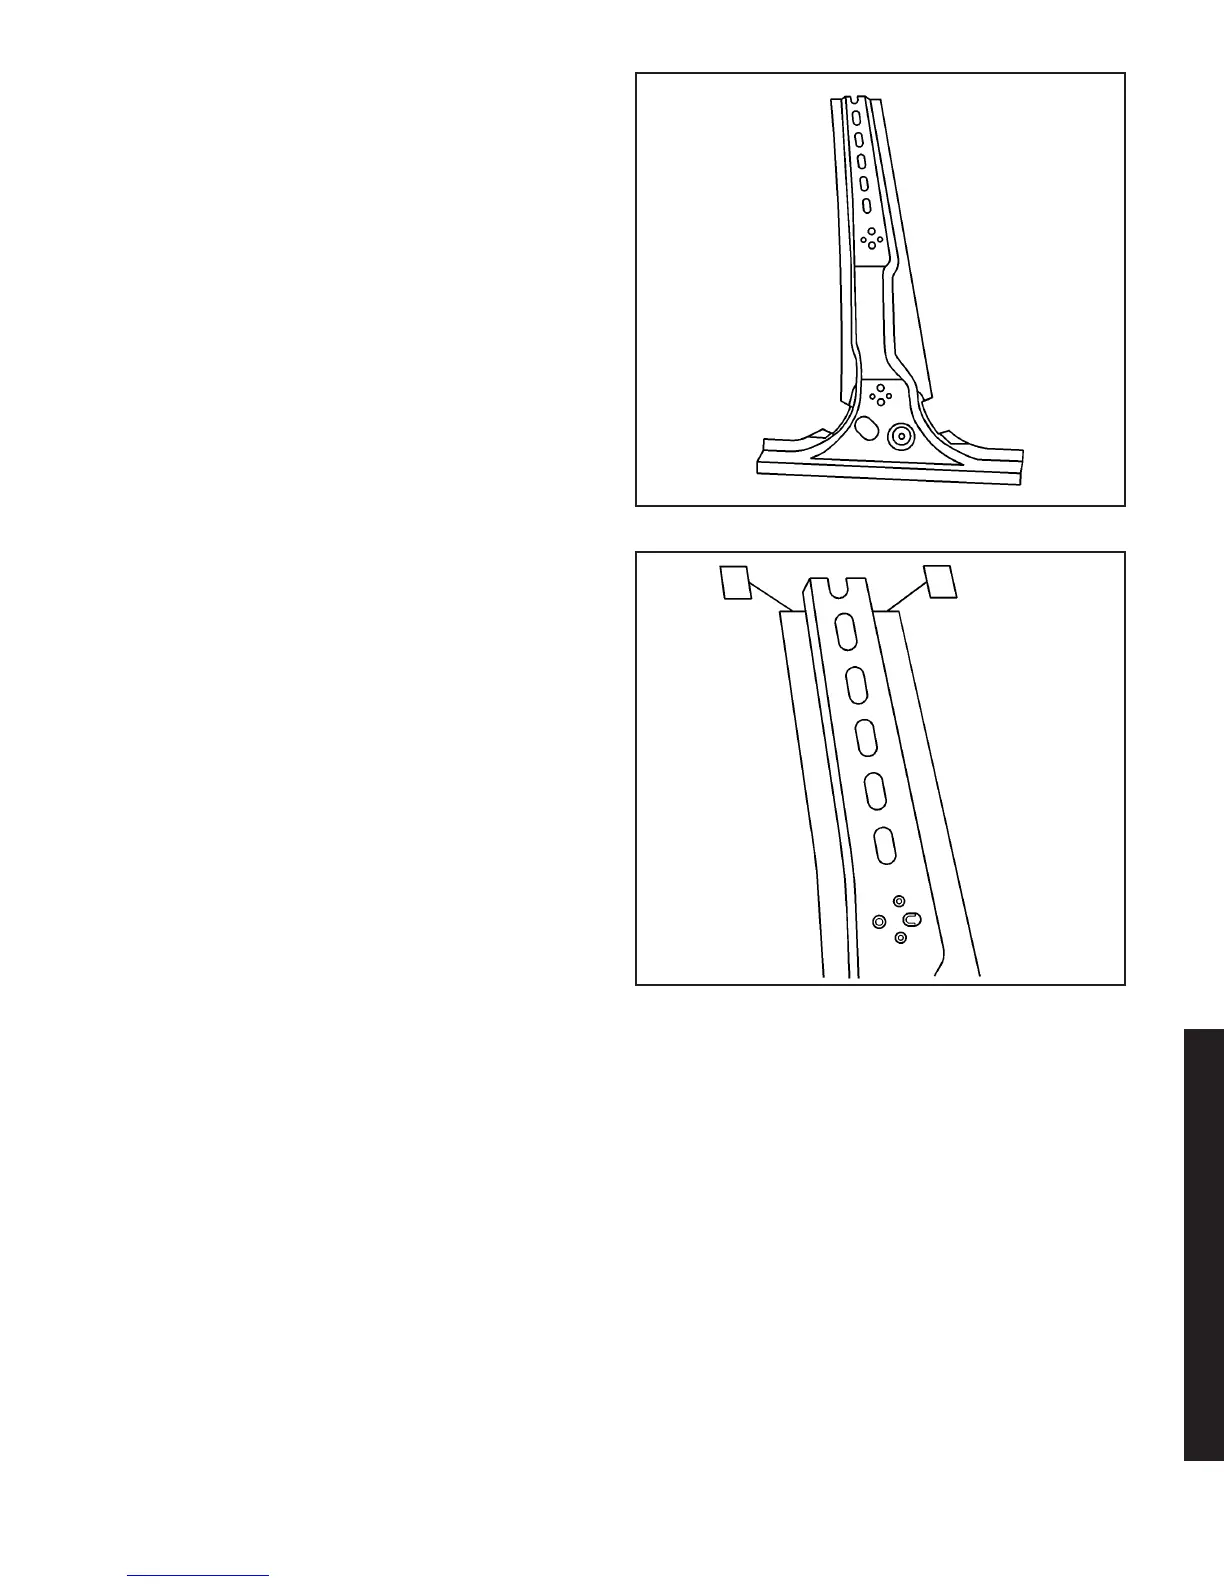
3. At the cut area of the service part, notch the weld
flange areas down to the top of the fifth hole from
the bottom.
4. Drill 8 mm (5/16 in) plug weld holes, 2 holes on
each side, along the sectioning cut on the
original reinforcement. Locate these holes 10 mm
(
1
⁄
2
in) from the edge.
5. Drill 8 mm (5/16 in) plug weld holes in the service
part as necessary in the corresponding locations
noted on the original panel.
6. Prepare all mating surfaces for welding as
necessary.
7. Apply 3M Weld-Thru Coating P/N 05916 or
equivalent to all mating surfaces.
8. Slide the top sectioning joint together by sliding
the service part under the original part at the
sectioning area.
9. Position the service part on the vehicle using
3-dimensional measuring equipment. Clamp
the part in place.
10. Plug weld accordingly.
11. To create a solid weld with minimum heat
distortion, make 25 mm (1 in) stitch welds
along the sectioning joint seam with gaps of
25 mm (1 in). Go back and complete the
stitch weld.
12. Clean and prepare all of the welded surfaces.
13. Apply the sealers and anti-corrosion materials to
the repair area, as necessary.
14. Paint the repaired area.
15. Install all of the related panels and components.
16. Connect the negative battery cable.
17. Enable the SIR system.
870949
872393
2003 Saturn Ion
3-111
2003 Saturn Ion

 Loading...