Caution: Before servicing any electrical
component, the ignition key must be in the OFF or
LOCK position and all electrical loads must be
OFF, unless instructed otherwise in these
procedures. If a tool or equipment could easily
come in contact with a live exposed electrical
terminal, also disconnect the negative battery
cable. Failure to follow these precautions
may cause personal injury and/or damage to the
vehicle or its components.
2. Disconnect the negative battery cable.
3. Remove all related panels and components.
4. Repair as much of the damaged area as possible.
Refer to
Dimensions - Body on page 3-7
.
5. Remove the sealers and anti-corrosion materials
from the repair area, as necessary.
Important: Note the number and location of the
factory welds for installation of the center floor panel.
Important: Do NOT damage or drill through
adjacent panels.
6. Locate and drill out the #2 and #3 bar attachments
to the inner rocker panel.
7. Bend the upper weld flange up and away from the
inner rocker panel.
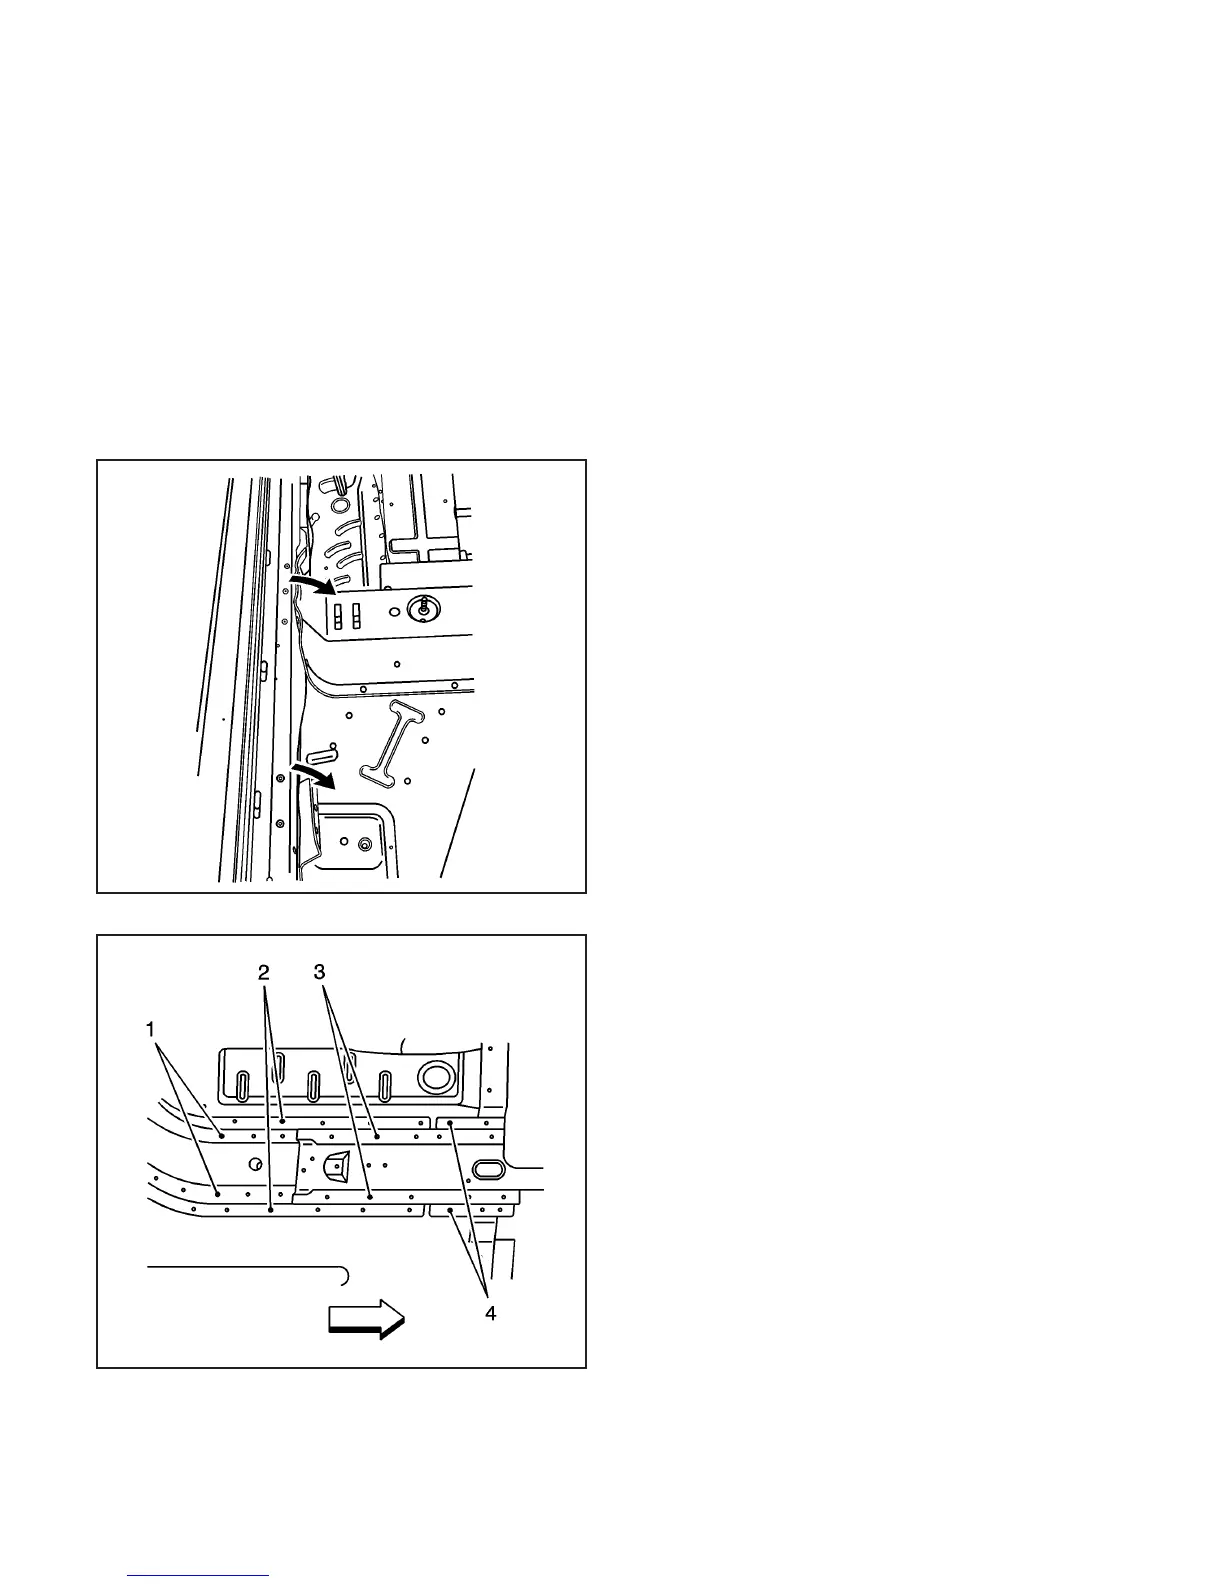
Important: The rear portion of the front compartment
lower rail is a multi-layered assembly.
8. Note the layering (1,2,3,4) of the weld flanges.
• The rear portion of the front rail to rail
assembly
• The rear upper reinforcement of the front rail
to floor pan
• The intermediate portion of the front rail to rear
upper reinforcement of the front rail
• The intermediate reinforcement to the floor pan
870890
870892
3-90 2003 Saturn Ion

 Loading...