Appendix D – Use and Maintenance of the Cooling Booster
Page 73
D. Appendix D - Use and Maintenance of the Cooling Booster
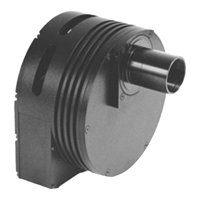
The cooling booster was an option or included accessory for the parallel versions of the
ST-7E, ST-8E, ST-9E, ST-10E and ST-10XME. When a parallel camera with this accessory is
upgraded to the USB version, the cooling booster is left in place instead of changing to the new
cooling design. The cooling booster is a second TE cooling module that goes inside the back
compartment of the camera. It requires a second power supply. This memo is a step-by-step
guide to using the booster for those upgraded cameras that kept the earlier design.
CAUTION! Please be sure that whenever the cooling booster is on (i.e., plugged into
12VDC), the camera is also powered up so that the fan is running. The fan is needed to
dissipate the heat generated by the cooling booster. If you power up the booster by plugging it
into 12VDC without the camera fan running it can overheat and damage the cooling booster
system. This won't happen immediately if you happen to accidentally power up the booster
before turning on the camera, but running it more than few minutes without the fan could
damage the unit.
For users with fixed sites, or small observatories, water circulation and the attendant
tubes and pump are easier to manage. For field use, however, you may wish to forgo water
circulation and use the cooling booster with 12VDC only to simplify the setup. When using
water circulation, the major problem one must deal with is routing the rather heavy water tubes
off the mount to minimize perturbations to the mount during tracking. In general, try to route
tubes (and wires) over the mount, rather than just let the tubes dangle from the end of a long
tube. Water cooling is probably not necessary for most users when the air temperature is below
10 degrees C (50 degrees F), since the dark current is fairly low already. Think of it as a
summertime accessory! We do not recommend use of water cooling below freezing
temperatures, where antifreeze must be added to the water. It is simply not necessary then.
There is no problem with using the cooling booster with only air cooling in the winter, though.
With the cooling booster installed on your camera, you have a choice of three levels of
cooling. First, you can ignore the booster and operate the camera with single stage cooling only
by simply not connecting 12VDC to the booster's power plug. Second, with the camera power
on and fan funning, you can also power up the cooling booster by plugging in 12VDC to
increase the cooling capability of the camera without using any water circulation. Third, you
can power up the cooling booster with 12VDC and use water circulation to further increase the
cooling capability of the camera.
Without flowing water the cooling improvement is about 6 degrees C. With it the
cooling improvement is about 15 degrees C. If you plan to use it without the water then you
should disconnect the hoses from the camera and shake out the water trapped in the heat sink.
Disconnecting the hoses will reduce the potential perturbation to your telescope mount.
To operate the cooling booster without water cooling, mount the camera to the telescope
as before and simply plug the auxiliary 12 volt supply jack into the connection on the camera
back plate. Turn on the TE cooling to 100% by giving it a target temperature of –50 degrees.
After 10 minutes examine the camera temperature, and reset the set point to 3 degrees C above